I had salad for lunch today. I had two salads for dinner last night. All I want to eat is salad, and it's not even that hot out. But salad!
I went to the store and got butter lettuce and tomatoes and carrots and mushrooms and avocados and cucumber and some fairly extravagant organic mesclun mix that was on sale for $2.50/lb. Then I made salads.
Avocado and tomato salad
avocado
tomato
a little salt
Peel and chop the avocado. Don't peel but also chop the tomato. Put it in a bowl with a sprinkle of salt, and maybe a little lemon juice if you're not going to eat everything instantly. Stir it up and eat it instantly. Instantly!!
I was excited about this one because of the heirloom tomatoes. The yellow one was a plum variety with nearly solid flesh inside. The red one, though, could almost have been a bell pepper when you looked at structure. The seeds nearly fell out of the tomato when I cut it up. It would have been great for stuffing with something like cold rice and spinach salad, or something like cottage cheese and mint.
Greens and feta salad
mesclun mix/other lettuce
mild feta
vinaigrette, homemade or not
Wash and tear up some greens; put a handful of them in your bowl. Add as many feta crumbles as you like. I'm pretty sensitive to any feta but the absolute mildest, so I used only a tiny bit. Add vinaigrette, stir it up, and eat it also instantly.
This is a pretty classic, ordinary salad, but it was really good. I had another white peach with it.
Afterward we sat around eating raspberries and more salad leaves out of the bag. Tonight I plan to eat even more salad. Salad.
30 July 2008
28 July 2008
Is it soup? Is it sauce?
Today on Eileen Chef, we'll show you how to whip up a tasty tomato soup with pureed garlic and mushrooms. I mean, we'll show you how to concoct a hearty, flavorful sauce filled with roasted vegetables. I mean, it'll be awesome.
Tomato soup with roasted business
I mean, actually it's
Gemelli with hearty tomato sauce
head of garlic
half an onion
tomatoes/tomato puree
mushrooms
red pepper
olive oil
salt, pepper, basil, oregano, paprika
parmesan/other hard grating cheese
for pasta: gemelli/other pasta
for soup: lots of croutons
Basic plan: roast vegetables while cooking tomatoes on the stovetop. Puree it all together. Serve with pasta or croutons. Come to think of it, why not serve with pasta and croutons? Texturally, that would probably be pretty awesome. Then you could also have a gigantic salad.
Ok! For the roast, get a handful of mushrooms and pull out their stems. I used six. Stuff each mushroom cap with a wedge of peeled, smashed garlic. Put all the mushrooms, their stems, and a bunch of diced red pepper in a reasonable roasting dish with a couple slugs of olive oil. I used a pyrex bread pan. Add some more smashed garlic for good measure; use about half the head. Put your vegetables in to roast slowly, at about 325F.
Next, peel and smash whatever's left of your head of garlic. Throw it in a big, deep saute pan or soup pot over medium heat. Dice up some onion and add it too. Spice with your basil, oregano, and paprika. Add some olive oil, stir it up, and let it all cook slowly until the onion and garlic is soft and golden.
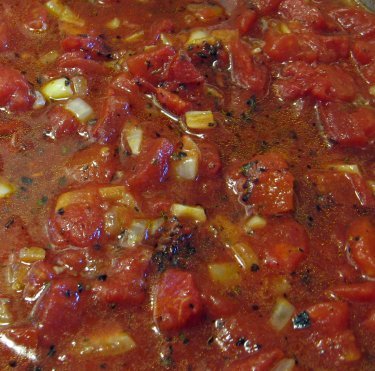
Add a bunch of tomatoes. You can use canned or fresh, whatever you have around, as long as it's good quality. I used a 24-oz can of Glen Muir fire roasted tomatoes, which I'd gotten on sale due to various foodblog hype. Let me just say this was a bad idea. The smell and taste of these strongly suggest chemical additives instead of actual roasting, and neither went away over the course of cooking. The end result was not terrible, but it wasn't anywhere near as good as it would have been with real tomato-flavored tomatoes. Use good tomatoes!
So add tomatoes, stir, and reduce everything together.
Check on the roast and stir it up every once in a while.
Hang around in the kitchen having a glass of wine and inhaling all the deliciousness. It'll be nice.
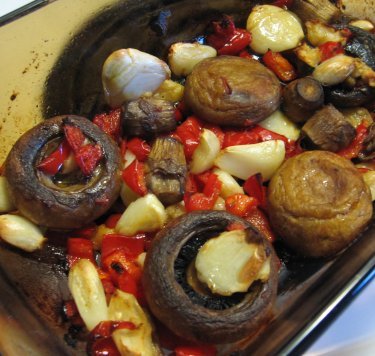
The roast should be roasty and the tomatoes at least partly reduced somewhere near the same time. When both these conditions are true, take the roast out of the oven and scrape its contents into the tomatoes. Add some water stir, and bring the business to a simmer. Cook for a few minutes to let the flavors combine.
If you want a chunky sauce, you can stop here and serve over pasta. If you want a smooth sauce or soup, take the pan off the heat and let it cool for a minute or two. Then, if you have one, break out your immersion blender and blend everything until it's sufficiently pureed. You may need to add more water to let this work smoothly, but that's ok: you can just cook it off in a minute.
You can also use an actual blender, but in that case I'd let things cool off more before blending, and also work in batches. The immersion blender is the best idea ever.
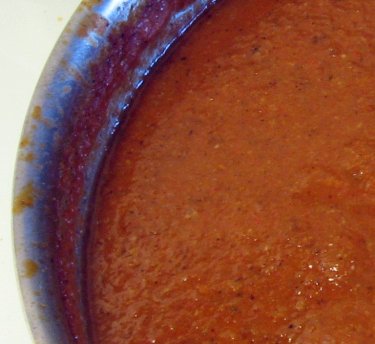
Put the pureed sauce back on the heat, cook down to your desired thickness, and serve.
Soup: put it in a bowl, add a lot of garlic croutons (or parsley, or whatever sounds good) and eat.
Pasta: serve over pasta, with grated cheese if you like, and eat. I used a lot of cheese because I was trying to cover up the fake fire-roasted taste.
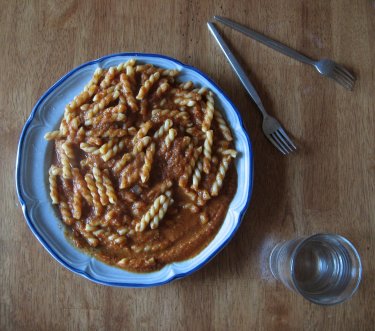
Eat a salad. Have the rest of the bottle of wine. Go to sleep sated and happy.
25 July 2008
Eat a sandwich.
I do not get the issues some meat-eating people have with liverwurst. Foie gras is ok, right? It's not just ok, it's super-fancy! Pâté is considered super-fancy as well. And yet liverwurst, which is also a paste made of liver, and much better than any store-bought pâté I've ever had, somehow is considered gross. I bet it's because it has the word "wurst" in it.
Anyway. I grew up with liverwurst, and while I don't eat it very much now, I do want it occasionally. So when I saw a tiny $1.95 tube of herbed liverwurst at the store, I went ahead and got it.
The best liverwurst sandwiches have to have tomato. It's also pretty classic to have cream cheese. I didn't have any tomato or cream cheese this time, but I did have a plethora of other fine business. The most important part is making sure there's enough crispy, juicy vegetable to balance out the heavy, rich liverwurst. Taste your liverwurst and decide which of your vegetables would be good.
One liverwurst sandwich
bread (baguette segment)
liverwurst or braunschweiger (same difference)
crumbled mild feta
romaine
fresh basil leaves
red pepper
salt and pepper
Cut the baguette in half. Spread each half with liverwurst. Sometimes you'll get a liverwurst hard enough to slice, so in that case you can just slice it. Mine was nice and spreadable, so I spread it.
Cut up the rest of the business and layer it over the liverwurst. The hardest part for me was keeping the feta crumbles from rolling everywhere. To solve this, I pressed them into the liverwurst, where they stuck. It's definitely handy to have a sticky base in this situation.
Put the halves of the sandwich together and eat it.
Liverwurst is deep and rich, so if you want wine, have red.
What, you're not having wine because sandwiches are for lunch? Why not? This is the perfect picnic food, and you know how well wine goes with picnics. I would go so far as to make an entire baguette into awesome sandwich, wrap it up, cut it in sections, and have a plethora of sandwiches, all with red wine. Then you can hike up the street, spread out your blanket, and eat it all, lounging in the grass at a safe distance from the yelling kids on the soccer field.
23 July 2008
Kiwi strawberry peach kiwi
Apparently all I want to eat this summer is exotic and fragile fruit. Gold kiwi!
These were exciting, especially since they're much smoother and less skin-issue-provoking than normal fuzzy green kiwi. I peeled them without my hands starting to itch! I ate them with no reaction whatever from my lips! Usually I don't eat kiwi because I have sensitive skin and it's just too much work to avoid the pain. With these, though, everything was fine. I'm going to eat them until they're gone.
The gold kiwi was a little sweeter than the usual sharp green kiwi, and a little more smoothly textured. It went really well cut up with a bowl of strawberries. We ate the entire gold kiwi supply in one go.
Of course we eat green kiwi too. I can take it! RARGH!
This time I cut it up with a white peach. I cut off the kiwi skin, ran the fruit and knife in cold water to get off any last vestiges of irritant, then cut the kiwi into pieces. The white peaches have some fuzz too, but I don't feel any need to peel them, since it's minimal and doesn't provoke any allergic reactions. In contrast, I don't eat yellow fuzzy peaches without painfully peeling each slice. This means there are generally a lot of nectarines at our house.
Man, I did not mean for this to turn into an entry about skin irritants. It is about fruit! The summer fruit is dripping and delicious; eat it!
21 July 2008
Tahini-miso tofu salad
Playing around with food is great.
I'd been thinking about using the Vcon tahini-miso salad dressing as a marinade for a few days. Since I was making it a marinade instead of a creamy dressing, I used enough water to keep things good and liquid. I also used red miso instead of the requested white, because that's what we had. So I marinated the tofu, seared it, steamed some vegetables with it, and poured the whole business on top of a plate of greens. It was one of the best salads I've ever eaten.
Also, since the dressing as marinade gets soaked up by the tofu, you can make the salad itself with no dressing. MIND-BOGGLING.
Dressingless dressed tofu salad
firm nigari tofu
red miso
tahini
water
carrot, mushroom, red pepper, summer squash, etc.
romaine or other lettuce
Mix equal parts tahini and miso together with a fork. I didn't really measure, just used huge heaping spoonfuls for each. The two should mix easily into a smooth paste. Add at least double their volume in water and whisk until the paste is dissolved.
Cut your tofu into cubes, or whatever small salady shape you like. You could also use tempeh or chicken or fish or whatever sounds good with tahini-miso business. I plan on doing some eggplant experiments in the very near future.
Throw the cubes into the miso-tahini business and let them soak. I ended up letting mine soak overnight, which worked fine. An hour will work well too.
Heat a wide frying pan with a lid, throw in the tofu, and sear on all sides. I kept tossing mine around every few minutes, instead of trying to turn each individual piece to get the whitest side down. It should take somewhere between five and ten minutes (depending on how good your stove is) to get things nice and brown.
While the tofu is cooking, prep the other salad vegetables. For my main salad, I peeled and chopped half a carrot, diced half a red pepper, and chunked a handful of mushrooms. On the second batch, for John, I chopped up a small globe summer squash instead of the mushrooms. You can use any other vegetable that will steam to doneness easily: green beans definitely sound like a good idea. Use as many vegetables as you want.
For the base, I just washed and chopped a lot of romaine and threw it on a plate. You can use any leaves you want, but a crisper lettuce will stand up best to the heat of the cooked salad.
When the tofu is seared, scrape all your steaming vegetables into the pan, add a quarter cup or so of water, and clap the lid over everything. Let it cook for about five minutes, shaking or stirring occasionally. Then take the lid off the pan and let it sit for a minute, so any extra moisture evaporates. Take the pan off the heat and let it cool a little, so you don't wilt all the lettuce instantly. Then pour the pan contents over your plate of lettuce.
Eat. Oh man, isn't it great?
A salad this great demands wine. I had been pretty excited about even finding this business: Frey organic no-sulfide-added sauvignon blanc. However, it was not an especially good wine. The actual mouth taste was ok, but the aftertaste was pretty bad. We drank it anyway, as it wasn't That bad, but it definitely wasn't as good as I would've liked it to be.
Some better sauvignon blancs to try:
- Zolo, Argentina: sharp and crisp. We drink this all summer.
- Veramonte, Chile: sharp and thin, a little harsh.
- Page Mill, CA: sweeter and more rounded.
- Cartlidge & Browne, CA: this one's actually organic too, and good.
And that's the limit of my wine knowledge.
18 July 2008
The salad was delicious.
Well, I continue to espouse Veganomicon, and in a full-blown "she admitted it! She's gonna marry a carrot!" kind of way. This time I wanted salad, particularly salad involving two heads of endive I'd bought because they were too awesome not to take home. I'd initially been thinking of braising them, but we turned out not to have any red wine. Boo! So I looked through all the books until I found "Pear and Endive Salad with Maple Candied Pecans". Then I looked through the kitchen for ingredients, and came up with this:
Endive White Peach Salad with Honey-Candied Pecans Instead
per person:
a head of endive
half a peach (or a whole one if they're small)
a handful of candied pecans
Vcon has you candy the pecans in maple syrup, which would clearly have been awesome had I had any maple syrup. I did have honey, though, so that's what I used. Honey definitely works: I'd done it before from Michel Nischan's Homegrown (which is incidentally well worth taking a look at, especially for the $6.50 used), so I knew it'd be good. Actually, that time I spiced the nuts as well: you could experiment with cayenne and etc. for spicy nut extravaganza. Vcon also has you use pears for the fruit content. If I were making this salad in the fall, I would totally use pears. It's July, though, and we had a bowlful of softball-sized white peaches that were essentially juice held together with skin. We've been eating them plain for dessert every night.
Candied pecans
pecans
honey
tasteless oil
salt
First, prep a rack for the finished nuts. I used a cookie rack over a paper towel. I would put the rack over an actual cookie sheet in future, though, so I can pry up and eat all the hardened drips of honey afterward. Yes. This really seems like a recipe for dishwashing disaster, but it isn't: honey melts under hot water.
Take half a cup of pecan halves (or walnuts or cashews or whatever you think will be tasty) and toast them in a low frying pan for five minutes. Watch them carefully and stir so they don't burn! Add a couple teaspoons of tasteless oil (I used safflower) and a pinch of salt. Stir it up and add honey (or maple syrup). I didn't measure the honey at all, just poured it out of the jar, but the official measurement was 1/4 cup. Stir everything up as the honey melts and bubbles and bubbles some more. Give it a couple minutes, then pour the nuts onto your prepared rack. Try to keep the extra honey liquid back in the pan as much as possible, but of course drips are going to get everywhere. It'll be ok. Spread the nuts into one layer to cool. If you have a bunch of liquid left, you might want to do what I did and drop driblets of it directly onto the nuts. This will make them extra honey-sticky later.
Cool the nuts on their rack in the refrigerator. You'll have enough for two or three salads.
Salad: chop out the endive's core and cut the rest into bite-size pieces. Cut the peach into slices, then cut each slice into a reasonable chunk. Distribute roughly equal amounts of endive, peach, and pecan into bowls.
At this point you can make and add vinaigrette if you want it. I made one, but decided I didn't want it, which was fine.
Eat it. You can eat it by itself, or do what I did and sear some red snapper in butter to go with it.
Red snapper in butter
Heat up a frying pan big enough to hold your filet of snapper. Put it over medium-high. When it's good and hot, throw in a chunk of butter. Tilt the pan around to get the butter everywhere as it melts and foams. When the butter is melted, throw in the fish. Salt and pepper the top. Let it cook for about five minute, or until the edges are opaque and starting to look golden. Then flip the filet, salt and pepper the other side, and let cook another five minutes, or until totally opaque and easily flakeable. Flip it onto a plate, arrange it next to your salad, and eat everything right away.
This combination was really great: everything was tasty and different, but no element clashed or overwhelmed the others. It was food I could actually serve my parents, which is pretty remarkable, since our cooking/eating styles are polar opposites. It also left me satisfied but not stuffed to the point of pain.
The salad was delicious.
16 July 2008
Chickpea tomato curry business
Monday was humphy day. Humph! Here is what you make a person when the person is all humphy and does not want anything they can think of but still wants to eat and needs food badly in order to get out of their humphy mood and into a good mood.
This situation generally calls for curry at our house: lazy curry of the "throw everything in the pot with spices and make it be delicious right now for eatings" variety. I made one and it was delicious.
Lazy chickpea tomato curry
garlic
half an onion
olive oil
ginger
coriander
cumin
cayenne
cooked chickpeas
tomato puree
grain for serving
Start cooking your grain first, so it'll be ready later.
Smash and peel six or so cloves of garlic; peel half an onion. Chop them up and soften in olive oil. If you have fresh ginger, peel and finely mince a knob of it and toss it in as well. Otherwise, add several shakes of powdered ginger, plus coriander, cumin, and a little cayenne. If you can find your turmeric, you can add some of that too, but my turmeric had fled to the very farthest corners of the spice cabinet, and so I had none. Boo!
When the garlic and onion are soft and golden, add about two cups of cooked chickpeas. Mine were frozen into a big block, which was fine. I just broke everything up with a spoon as it softened. If things are starting to stick, add a few splashes of water as well. Then add in half a can of tomato puree, or any equivalent amount of any textured tomatoes. If you use fresh chopped tomatoes, you may need to cook a while longer to break them down; in that case, I'd do the tomato before the chickpeas. Stir everything together, add a pinch of salt and a little pepper, and cook another five or ten minutes, until everything is warm and done.
Eat with whatever grain you have in the cabinet. I made millet and quinoa mix, since the millet and quinoa are still mixed up in the same jar. It was fine and fine: this way the millet is fluffy and the quinoa is a little crunchy and everything sets into a big tasty mass. Also this way you don't have to rinse the quinoa, or at least I don't think you do, since I can't taste any of the advertised bitterness.
I'm going to have to make a pan of plain unrinsed quinoa sometime soon, to test and see if I can tell the difference from rinsed. If only I had two rice cookers: we could make it ridiculous quinoa cookoff extravaganza! Then I could invite everyone I know over with food that would be good served over quinoa. Actually, this sounds like a really good idea now that I'm thinking of it. Grain-oriented potluck!
14 July 2008
I like two breakfasts
Here's the kind of thing I generally make myself for breakfast: fruit cut up in a bowl. Maybe I won't even cut up the fruit if I got up late. Maybe I'll have fruit and a piece of toast. The fruit can be anything ripe: this time it was an apricot and a handful of strawberries. I almost always have tea. Tea is great even if it barely cools down enough for me to drink a quarter cup before I leave. If I got up late enough not to boil a kettle, I might have iced tea, but it's clearly not what I actually want in the morning. I never make coffee except on the weekends.
Here's the kind of thing John makes for me if he can't sleep anymore and gets up early to exercise and shower and have a plate full of delicious breakfast ready for me by the time I get downstairs. Obviously this doesn't happen all the time, but it's really nice when it does. This time he made me an omelet full of lots of red pepper and onion plus a cup of tea. Tea tea. I even had time to drink it.
I like eating in the mornings.
11 July 2008
Plum bloodbath
So you know how I'm constantly fuming about the amount of food waste in California? There are these dozen plum trees in my apartment complex, and they were all dropping ripe plums into the parking lot to rot. I went outside to take out the trash and ended up standing underneath the trees picking a shirtfront full of plums. Then I came inside and proceeded to turn about half of them into freezer-bound plum pulp, to be used in eventual smoothies or ice cream or maybe even homemade plum sauce.
This is not necessarily a project you want to undertake at eight on a thursday night just because you think it sounds like fun. Wait until saturday morning.
Things to get BEFORE you start, as opposed to during the process:
- an apron. I never use an apron, but it's not called "plum bloodbath" for nothing.
- a non-staining cutting board. Ha ha! Ok, just use one that's old and junky.
- a food mill, if you can possibly swing it.
- a sharp serrated knife.
Plum pulp
You can use this same basic process for any stone fruit you might want to freeze. Different fruits will require different amounts of processing into pulp, though.
We're essentially going to skin and deseed as much fruit as possible.
First, acquire fruit. Get about double the amount of whole fruit as you want pulp. I used maybe a quart or a quart and a half of plums, which produced one 3x2x8 inch brick of pulp. Places to get large volumes of fruit: roadside farmstands, the farmer's market, or any fruit trees you might know of.
Get a large pot, maybe twice the depth of your fruit, and fill it halfway with water. Put it over high heat and bring it to a boil.
Wash all the fruit in a colander under the tap, working in batches if you need to. Take your serrated knife and cut a little cross in the skin of each plum, preferably opposite the stem end. This was hard to see on my plums, since they were only about an inch in diameter and had a stem scar to match. For most fruit, it won't be an issue. Don't worry about cutting the actual flesh of the fruit, just part the skin.
When all the fruit is cut, and the water is boiling, turn the heat down and bring the pot to a simmer. Then throw all your fruit into the pot. Leave them for thirty seconds to a minute, then drain them immediately in your colander. I have a steamer insert that I use as a colander. This was helpful since I could put it on top of the pot I'd used for boiling, and catch any dripping juice. A regular colander in the sink (or over the pot) is fine too. When you look at the fruit, you'll see that the skins have now all split and are starting to peel off of their own volition. Yay!
Let the fruit cool for a minute. Get ready for the real bloodbath: set out your cutting board, knife, food mill, and a bowl or other container for finished fruit. Put on your apron if you haven't already. Get any decent shoes off your feet too.
Pick up a plum. Hold it over your cutting board or container while you strip off the skin. It will come right off. Repeat for all plums. Try not to burn your fingers; the plums may still be hot.
Now it's time to pit the fruit. There are a couple different ways to do this. First, try picking up a plum and cutting the fruit off the pit. This step will be challenging in proportion to the slipperiness and mushiness of the fruit at this time. I swiftly discovered that it would be easier to just pull the plum apart with my bare hands, putting the pits in one pile and the squishy remains of the fruit in my container. Larger, more solid fruit will require the knife. I might even cut and pit larger fruit before the whole blanching and skinning process, depending on softness and maneuverability. Pit all the fruit.
At this stage all my plums had achieved a proper stage of pulp. I poured their juice out of the pan and over the pile of pulp, then threw the entire thing in the freezer.
If your fruit behaves better than mine, and remains in actual slices or halves after the whole process, put it through a food mill to achieve pulp. If I'd had a food mill, I would've put the whole plums in with pits and seen if it would adequately strip the flesh off the pit for me. If I were an especially gadgety person, I might even have used a cherry pitter. My plums were small! It would've worked!
Put your finished product into the freezer: that way, in the future it can't spill.
Now clean your kitchen.
09 July 2008
It's hot! Let's have more soup!
Being sick means never having to say it's too hot out to have soup. Er, yes. I needed to shovel nutrients into my system without killing my throat, though, so I made this tomato rice business. It turned out rich and serious, yet homey and vegetabley, for an efficient nutrient shovel.
It's really hard to just call this "tomato rice soup" because I've had so many bad or boring tomato rice soups. This soup was emphatically neither bad nor boring. It was the antithesis of boring. So instead it can be
Fascinating tomato rice soup
half a yellow onion
six or eight cloves of garlic
an inch-thick chunk of butter (or olive oil)
crushed tomatoes with basil
also diced tomatoes in juice
water or broth
long grain brown rice
a couple splashes of bourbon
salt, pepper
Melt the butter in a heavy, deep pan over low heat. I assume olive oil will work fine, but I didn't try it, and so I cannot guarantee that it will provide the same degree of awesomeness in the results. Sometime I will do an experiment.
Dice the onion; smash the garlic with the flat of a knife and peel off the skin. Throw the chopped onion and whole garlic cloves into the melted butter/warmed oil. Put the lid on the pan and cook slowly for about twenty minutes. You are braising them in butter. This process is clearly key to the awesomeness of said soup.
When onions and garlic are soft and nice, break out the tomatoes. You can probably use whatever form of tomato is hanging around, as long as it comes to about a cup and a half total. I had the end of one can, plus the beginning of a second can. Use good tomatoes, you guys. Mine were organic, which was clearly a plus: they tasted sweet, as tomatoes generally do when real. Skinned, chopped summer tomatoes (and their juice!) would be ideal.
Throw your tomatoes into the pot. Add a couple big splashes of bourbon (maybe half a shot) and a cup or so of water, then bring everything to a boil. Brandy would also be really good here: brandy, butter and tomato clearly win. Cover and simmer for another ten minutes, or until the tomatoes break down.
If you want a smooth soup, now is the time to take the pot off the heat and break out the immersion blender. Puree until the soup is your preferred texture.
You could stop at this point, salt and pepper, and proceed to eat some excellent tomato soup. I wanted rice in mine, so I added another cup of water and half a cup of rice, then covered the pot and put it back to simmer for another half hour. This definitely seems like it's going to take forever, and why bother when you could just add leftover rice, but it's really important to cook the rice in the soup! That way it soaks up all the deliciousness in the soup instead of just soaking up plain water in the rice cooker. The rice will be 100 times better if you cook it in the actual soup. You CAN use leftover rice, but it just won't be as good.
Simmer until rice is done. You're done. Put it in a bowl and throw some fresh parsley or basil on it. Drink it all with a grilled cheese sandwich, or at least some toast.
07 July 2008
Hot food for feeling better
Of course now I'm sick too. Good. Great. I spent the weekend curled up on our (very uncomfortable) couch, drinking pots and pots of tea. Now I am home from work, and still curled up drinking pots of tea.
FOOD FOR FEELING BETTER WHILE SICK BY EILEEN
1. Hot as blazes soup
broth in the 2-3 cups area
a hunk of fresh ginger
a hot pepper
spinach/other greens
soba noodles
lemon juice if you have any
We still had some of the chicken broth from ages ago, frozen into a big rectangle, so I used that. Other kinds of broth would work fine. I threw my brick of stock into a pot with a little water to melt and heat up. When it was all liquidized and bubbling, I threw in three thick slices of unpeeled ginger and a chopped jalapeño pepper. Asian red peppers would be more in line here, but the green worked ok too. I let everything simmer while I washed and destemmed the remains of a wilting bunch of spinach from the other day. All the leaves went into my soup bowl, uncooked. For tougher greens, I'd probably throw them into the soup for a few minutes right at the end of cooking. Anyway. Then I got out a handful of thin soba and stuck it directly into the soup pot. I let things simmer until the soba was cooked, then poured all my broth and noodles over the spinach, keeping the ginger and as much jalapeño as possible back in the soup pot. Then I squeezed a quarter of lemon over the bowl before I ate it. Er, drank it.
This soup was very, very hot in all senses. It was definitely one of the foods that make you realize why slurping noodles is good manners: it would burn your lips and tongue horrifically not to do so. As it stood, I ate, drank, gulped and slurped everything as quickly as possible, because this is also a dish that hurts a lot more when you stop eating. Also: if you are a person whose body expresses food heat through the sinus and chest as opposed to the sweat glands, have some tissues on the table. Expectorate!
2. Soothing mashed potatoes and peas
some yukon gold/other boiling potatoes
a handful of garlic cloves
at least a cup of frozen peas
salt, pepper, olive oil
Starch and peas are totally the choice for sickness.
Make mashed potatoes: peel and chunk potatoes, then dump into boiling, salted water. Cover and simmer for a half hour, or however long it takes to get your potatoes totally soft. I used two gigantic potatoes for two servings plus leftovers.
While the potatoes are boiling, soften some chopped garlic slowly in olive oil. You can use a lot of oil, especially if you aren't going to butter the potatoes later. This means you will have lots of garlicky oil for mashing purposes. You're welcome. When the potatoes are almost done, add a bunch of frozen peas to the garlic and oil. Cook for maybe three or four minutes, until the peas are not just defrosted but actually steaming and warmed through.
When the potatoes are done, drain them and mash them with a big wooden spoon. Dump in the entire contents of the oil and garlic pan, plus a little salt and a bunch of ground pepper. If you want to add anything else to the potatoes, now is the time. I recommend grated cheese, if you like cheese.
Mix it all up until it's a good texture for you, put it in a bowl, and eat it. Then take a long pathetic nap while pretending to watch Pride and Prejudice.
Later, make potato cakes out of the cold leftovers.
Potato cakes
Warm some olive oil or butter in a medium-hot nonstick pan. When things are adequately warm, throw in some slabs of leftover potato. Let them cook without moving on one side for five minutes, or until you can see golden brown bits encroaching around each cake's perimeter. The flip them over and do the same to the other side. When both sides have an adequate crispy brown crust, flip them onto a plate and eat them hot. The insides will squish out and get all mixed up with the crusty bits, and the peas will pop in your mouth. AWESOME.
3. To be continued.....with more soup. Oh yes. There will be more soup.
04 July 2008
Further dispatches from cookie central
Hey, did you hear it's a holiday? And yet I am at work. Hmm. I guess I can live vicariously through fantasizing about the cookies I made a couple days ago. If only they'd been, say, barbecue sauce cookies. Now THAT would be seasonally appropriate.
It has been sugarshock central at our house lately. I don't know what the deal is. I went to the store and emerged with not only cookie ingredients but also a package of more cookies! Help!
I looked in the Joy of Cooking for cookie recipes. I now suspect that their classic chocolate chip cookies are ONE AND THE SAME as Toll House cookies. Of course, I used ridiculous on sale Guittard milk chocolate chips, futzed with sugar types, and left out the gross nuts, but somehow I think that is an improvement.
Chocolate chip cookies are delicious!
8 tbsp/1 stick soft unsalted butter
1 cup turbinado sugar
1 egg
1 1/2 tsp vanilla
1 cup + 2 tbsp wheat flour (or a rounded cup)
1/2 teaspoon baking soda
1/4 tsp salt
1 cup chocolate chips
Oven: 375F. Cookie sheets: greased.
Most cookie recipes are basically the same: cream wet ingredients, sift together and add dry ingredients, then add any chunky pieces. So! Put butter and sugar in a deep bowl. Beat (either by hand or with electric mixer) until everything is evenly mixed, soft, and fluffy. Add the egg and vanilla and mix some more.
I don't know about you, but I don't sift. I don't add in batches either. So dump your baking soda, salt, and flour into the wet mix. Stir gently, to mix in the flour without causing a huge cloud. Then, when everything is damp, actually beat the dough together. Or you can actually add your dry ingredients in batches! Who can say what is best in this new day and age?
Add the chocolate chips and stir to mix.
Now you can either drop dough by teaspoonfuls onto the sheets, or use your hands to roll said dough into balls. I like making a mess, so I used my hands. Bake until just golden brown, about eight to ten minutes. Cool on a rack.
Eat them!
Seriously, I ended up having chocolate chip cookies and a banana for lunch the other day. The sugar has to stop.
02 July 2008
Raw fruit for summers
Wow, I'm exhausted.
However, guess what season it is?
FRESH FIG SEASON.
Figs are great. One reason figs are great: they require little to no cooking, and yet are awesome. For instance, today for breakfast I had two figs and two pieces of bread. That was it. For another instance, here is a fruit salad:
A fruit salad
half a cantaloupe
a barely ripe banana
some figs
lemon juice
Seed the cantaloupe and scoop out chunks into two bowls. Slice a banana into chunks and divide the chunks into two bowls. Cut the stems off the figs, chop them up, and divide them into two bowls. Add any juice left over in the cantaloupe shell, plus a little fresh lemon juice. You can do this without lemon juice if you want; I had some lying around. Mix each salad up and eat it.
Clearly you can use whatever fruit you have lying around for this sort of thing. You can also add a honey drizzle or some chopped mint for extra deliciousness.
These are great for 1. when you are sick and have no energy for cooking, 2. when you are just tired and have no energy for cooking, or 3. when it is too hot outside for cooking.
I may end up making another one for dinner. I'm really tired.