Showing posts with label preserves. Show all posts

09 July 2015

Refrigerator zucchini pickles

Refrigerator zucchini pickles

Yay! It's summer squash season! Yes, that magical time of year in which suddenly everyone you know is trying to foist bagfuls of zucchini, pattypans, and yellow squash onto their friends and neighbors at the slightest provocation. If you're growing your own, the situation is even worse. Suddenly, YOU are the one wandering into the backyard to find that an apparently bare plant has somehow sprouted six fully grown squash -- and you have four more plants to check -- and there were already several zucchini in your crisper.

Now is the time to use up that squash any way you can. I like to slice up a few squash for a simple saute with garlic and olive oil, or to cube them and scramble them with eggs and a big handful of herbs. But when those strategies fail, it's time to go a step further and think about preserves.

The classic method of summer squash preservation is a simple shred and freeze. This works out very well if you are the kind of person who will eat zucchini bread for months on end. But I decided it was time to try something different, and that thing was pickled zucchini.

This is a very simple and delightful refrigerator pickle. There is a surprising hint of mustard taste in the finished product, which means that these go very well on sandwiches of all kinds. A jar of these is definitely a great way to get through some of a massive summer zucchini harvest -- or, in my case, the seven or eight zucchini at a time that have been arriving at frequent intervals via CSA box.

Refrigerator zucchini pickles

1 pint mason jar, washed and dried
4 medium zucchini or summer squash (~2 cups sliced)
1 halved garlic clove
1/2 tsp dried dill
3/4 cup white vinegar
3/4 cup water
1/4 tsp peppercorns
1 tbsp pickling salt or kosher salt
optional canning funnel

Wash your zucchini and slice them into rounds or spears. I chose rounds for easy sandwich application. Leave them raw.

Put your garlic clove and dill into your jar. Add your zucchini. You may have to shift the pieces around a bit to fit them all in there.

In a small saucepan, heat your vinegar, water, peppercorns, and salt. Put on the lid and simmer for about five minutes, or until the salt has completely dissolved.

Pour your hot brine into your jar, leaving 1/4 inch of headspace at the top. Use a chopstick or spatula to release any air bubbles, and top up with more brine as needed. Make sure you get all the peppercorns into the jar, even if you have extra liquid left over.

Lid your jar and put it into the refrigerator. Let your pickles cure for at least 24 hours before eating them.

Now it's time for voluminous sandwiches of all kinds. Pickles for every lunch! Hooray!

How do you use up the yearly summertime zucchini glut?

20 September 2014

Tomato sauce showdown: Victorio strainer vs. immersion blender

Tomato sauce showdown: Victorio strainer vs. immersion blender

When I've canned tomato sauce in the past, I've always gone through the arduous slog of coring and skinning all the tomatoes before cooking them down. This, as you might notice from my tone, is a huge pain in the ass. It takes forever and makes a mess -- and then I end up cooking the tomatoes down into slurry anyway. It's not like I need whole, intact skinned tomatoes! So this time I decided it was time to try a couple different methods.

1. The Victorio strainer.
2. The immersion blender.

The Victorio strainer is essentially a giant food mill. You feed tomatoes into the top while turning a handle. The strainer smashes the tomatoes and separates the skin and seeds from the usable tomato flesh. Then you cook down the tomato to the sauce consistency of your choosing and preserve it as you see fit. I did a basic water-bath canned tomato sauce, but you can always go for the pressure canner or freezer as you see fit. Be careful with food preservation! The USDA guide to home canning is a good resource here.

Anyway. I've had my mom's old strainer in the office closet for a few years, but I hadn't actually broken it out and used it before now. So this was a learning experience.

Tomato sauce showdown: Victorio strainer vs. immersion blender

I got to learn how to put everything together. I got to learn that the clamp that holds the strainer upright was too wide for our dining table but too narrow for our kitchen counters. Eventually I found that it would fit the coffee table, which we then had to move into the kitchen to avoid getting tomato splashes all over the couch.

When we were ready to puree, I fed in the tomatoes and John worked the handle. Then we got to learn that trying to use a strainer set up on a knee-high table is a terrible idea if you have more than a small batch of tomatoes to process. There's nothing like hunching over for a full hour as you shovel chopped tomatoes.

We also got to learn that if you pad out the clamp with a towel, so as not to completely kill your table, the strainer is likely to come off square and start getting loose. We learned that some tomatoes were going to explode and rain juice all over the kitchen, no matter what we did. It was super exciting.

And afterward we got to learn how delightful it was to try to take apart and clean a strainer we'd had to wedge closed as tightly as possible -- while it was covered with all kinds of slippery tomato detritus.

On the other hand, the strainer certainly did make very short work of producing approximately 7.5 quarts of tomato puree -- less than half the time it would have taken to core and skin all the tomatoes. It required only the most minimal of prep work -- we only needed to remove the stems and quarter the larger tomatoes before pureeing.

We could use our grape tomatoes as well as the standard large tomatoes. We could feed the skins and seeds back through the strainer to squeeze out every last bit of tomato flesh. I got to rescue all the waste to make a huge batch of tomato broth, which turned out to be lovely and flavorful and full-bodied due to the pectin in the skins.

Overall, it was a reasonable trade.

Tomato sauce showdown: Victorio strainer vs. immersion blender

The next weekend, I was not really up to mopping the kitchen again. Besides, I was thinking about that tomato broth and the pectin in the tomato skins. And then I remembered that Erica at Northwest Edible Life had written a post on actually making sauce from tomato skins instead of throwing them away. Erica was using the skins from her whole home-canned tomatoes; I was planning to sauce all of mine. Why even bother skinning the tomatoes in the first place, then? Why not just puree everything together at once?

So that's what I did. I washed my batch of tomatoes, chopped them roughly, removed any really seriously woody core pieces, and went at the remaining tomatoes with the immersion blender. Then I cooked the resulting slurry into delicious tomato sauce, ladled it into jars with the requisite lemon juice, and canned it all.

It worked very well indeed.

Since I already know how to puree things with the immersion blender, there wasn't very much to learn here per se. I just made sure to keep the head of the blender submerged, so I didn't accidentally splort random tomato bits all over the kitchen.

I also had to work in batches, so as not to overheat the blender. This is for sure the only time I've ever had to even think about that consideration when using our very nice and heavy-duty immersion blender! If I'd cooked the sauce down for a while and then pureed it, I think the overheating issue would have been less of a problem. But even so, the results were excellent.

This sauce cooked down a whole lot faster than the previous skinless batch. That is a real benefit when it's a minimum of 85F in your kitchen and you want to get past the heat portion of the day as swiftly as possible. You have to love fiber and pectin at work.

Even though this method defaulted to include skin and seeds, I was really happy with the finished sauce.

Tomato sauce showdown results

Victorio strainer:
- no seeds or skins in the sauce
- minimal prep required
- fast pureeing time
- long cooking time: 4-5 hrs
- technically fiddly, with lots of required setup
- equipment will not overheat
- can use grape and cherry tomatoes along with standard
- medium to high cleanup
- bulky equipment
- single-use, at least for the time being (maybe I will make applesauce sometime?)
- peels and seeds provide ingredients for convenient side-effect broth

Immersion blender:
- tiny seed and skin bits in the sauce
- slightly more than minimal prep required, but still not very much
- fast pureeing time
- faster (but still fairly long) cooking time: 2+ hrs
- not fiddly; no setup
- equipment can overheat; breaks are required
- can use grape and cherry tomatoes along with standard
- low cleanup
- more compact equipment
- definitely multi-use
- no secondary products produced

As long as no one cares about teeny tiny seed and skin bits -- and so far, I don't -- the winner is the immersion blender. Of course, if you cared very much about such a thing, it would be possible to strain your sauce after cooking it -- but I am just not going to go to that kind of effort unless I see a real need.

The other real issue is overheating your equipment. No one wants to blow out a blender just to get tomatoes processed into sauce. So if you're making a really huge batch, or don't have the time to take breaks between pureeing batches of tomatoes, the manual strainer is probably the best bet.

The end product is great either way, so choose what works for you.

How do you process your tomatoes before canning? What favorite tools do you use?

07 August 2014

Red cabbage curtido de repollo

Red cabbage curtido de repollo

If you want to make the pinkest pickle imaginable, I have just the recipe for you!

I've been making gigantic batches of curtido de repollo -- essentially, spicy pickled cabbage slaw -- ever since I first tasted it at our local Salvadorean restaurant. There, you stuff platefuls of pupusas with as much curtido as you so desire. The contrast between soft, chewy masa, creamy beans, and crunchy, tangy curtido is pretty spectacular.

At home, I've never yet attempted a batch of pupusas. Note to self: this really needs to happen as soon as possible. However, the curtido has been flowing freely. We eat it in tacos, in burritos, on top of big bowls of chili, and occasionally all by itself. SO good.

Normally, I use standard green cabbage and yellow onion to make curtido. This time, I had a lot of red cabbage and red onion from our CSA. Pink curtido it is!

Red cabbage curtido de repollo

1 small or 1/2 large red cabbage
a carrot
half a small red onion
1 1/2 cups white vinegar
1 cup water
2 serrano peppers, or whatever works for your spice tolerance
1 tbsp salt

Start by coring and shredding your cabbage and dicing your carrot and red onion. Put them in a large non-metal mixing bowl (mine is 4 quarts) and toss to mix.

Put your vinegar, water, peppers (chopped roughly), and salt in a blender. Liquefy. Be sure to keep your hand and maybe a towel over the top of the blender, so you can combat any liquid leaks. The result will be a light green brine with a layer of foam on top.

Red cabbage curtido de repollo

Pour your completed brine over your bowl of vegetables. Stir, getting all the vegetables wet.

The brine will not come up to the top of the bowl; this is fine. As the cabbage pickles, it will wilt and exude liquid, so the amount of brine will increase to cover all the veg within a few hours.

It will also turn pink from the red onion and cabbage. Hooray! Pink pickles!

Red cabbage curtido de repollo

Cover the bowl, put it in the refrigerator, and let it sit for at least three to four hours. Mix every so often, so the surface cabbage gets submerged in the brine. When the liquid level comes up to the top of the vegetables, you can stop mixing.

Congratulations! You are the proud owner of a big batch of curtido -- about 8 to 10 cups, depending on the size of your cabbage. It will keep well in the refrigerator for a good two weeks, getting gradually more and more pickley as it ages.

Eat your curtido with pupusas or arepas, on tacos, in burritos, on top of servings of chili, or alongside big bowls of tortilla soup. So crispy and tangy and delicious!

What's your favorite bright pink food?

28 July 2014

How to dry fresh herbs

How to dry fresh herbs
Because you can't just pickle an abundance of fresh dill, but you can dry it out, crumble it up, and use it to pickle other things!

Drying herbs at home is actually really, really easy. All you need is a place to let your herbs dry undisturbed and a little patience.

If you have lots of fresh herbs -- whether you grow them yourself, get them spontaneously through a CSA, or have good access to cheap farmer's market deals or foraging -- you should absolutely dry your excess so you can use them all winter long. It takes very little work, produces MUCH higher quality dried herbs than you can buy at the supermarket, and takes advantage of the super-cheap summer harvest. Give it a try!

I like to dry my herbs in the laundry room, because that's how I roll. Actually, a lot of blog stuff gets done in the laundry room. It has good light via multiple windows, which means the top of the dryer is very frequently where I set up my photo shoots. Yes! Secrets of foodblogging revealed!

ANYWAY.

So. Drying herbs.

Generally, you want to spread herbs out to dry, so they get good air circulation. You want them to be out of direct sunlight, so the sun doesn't bleach them and their oils don't evaporate. And you want to put them somewhere where they'll be undisturbed for at least a week. You have a choice of several different methods by means of which to do this.

First, the plate method.

This is the simplest possible way to dry herbs. Just spread your clean herbs on a plate and leave them alone for about a week, or until they are entirely crispy and crumble easily between your fingers. No elaborate drying screens necessary!

This method works really well as long as you can ensure your herbs remain undisturbed. If you have an inquisitive cat, for instance, this might not be the best choice for you. But if you can put them in a room (a laundry room, perhaps?) with a door you can keep shut, you're probably good to go.

Second, the hanging method.

Here, you'll separate your clean herbs into a series of small bunches and hang them somewhere to dry. Then just leave them alone for a good week, or until they're completely dry through.

I usually attach all my bunches of herbs to a wire hanger and hook it over a plant hook in the laundry room ceiling. (In case you were wondering, this is sufficiently above the windows to eliminate the direct sunlight issue.)

"Attach" can mean securing the bunch with a twist tie and then wrapping its ends around the hanger wire, or it can mean gently separating each bunch of herbs in half up to the tie and sliding that over the hanger, so the herbs fall to either side and the tie rests on top of the wire. Lots of other methods can work well too. Give it a try and see what's most practical for you.

How to dry fresh herbs

When your herbs are dry (by either method), carefully pick the leaves from the stems, working over a cutting board or plate to catch all the fragments. For some herbs, this takes more effort than others. Greener and more delicate herbs are easier to process; dill, for instance, generally crumbles right off its stem. Woody herbs like sage and thyme can take a bit more care, since you don't want to end up chewing on an inedible stem later. But unless you're harvesting an entire field's worth of dried herbs, you probably won't have too much trouble.

Next, crush, grind, or chop your dried herb leaves to your preferred texture. I usually roughly chop mine with a chef's knife. A mortar and pestle or spice grinder can come in handy if you want a finer texture. Do what works for you.

Finally, funnel your finished dried herbs into jars and store them until needed.

Hooray! You just saved a bunch of herbs from melting into a puddle of swampy goo in the bottom of the crisper! And you'll also be able to keep your money instead of shelling out for yet another jar of dried basil in mid-January.

Are you drying any food this summer? I keep meaning to build a solar dehydrator, but it hasn't happened yet. Any other less usual methods of food preservation in the house?

And hello to all the excellent women I met this past weekend at BlogHer! So nice to meet all of you! I have a stack of business cards and a whole lot of new blogs to visit and twitter feeds to follow...as soon as I take a day or two to nap. :)

08 September 2013

Pickling, saucing, jellying

backyard jalapeno harvest

The scope of my preserving has been broader this year than ever before.

The backyard jalapenos have done amazingly well. Who knew that if they actually got sun they'd be super happy? Everyone? Yeah. So I stripped all the ripe jalapenos off our single plant, sliced them up, and proceeded to pickle them for future consumption.

I used the basic jalapeno pickle recipe from Food in Jars. It's really easy: sterilize jars, make brine, slice jalapenos, pack jars, process. I did not use gloves, but you probably should, since capsaicin burns are no joke.

sliced jalapeno peppers

Look at all those slices! A huge pile of seeds settled to the bottom of the pile as well. I didn't add quite all the seeds to the jars, but there are certainly enough to pack a punch.

We are now the proud owners of 5 half-pints of pickled sliced jalapenos grown in our backyard. These guys are going to be amazing on all the tacos and burritos we eat all winter.

pickled jalapeno peppers

The plant is still producing, too, so we aren't hurting for fresh jalapenos while the pickled ones cure. Hooray!

Then there are our tomatoes.

backyard caspian pink and boxcar willie tomatoes

These guys--caspian pinks and boxcar willies from the backyard--got skinned, cored, and processed into sauce, along with some grocery store romas, using this tomato sauce canning method. Hooray for 5 more quarts of tomato sauce!

Right now I have about this many garden tomatoes ready and waiting for another batch, so that should happen fairly soon.

And then, at the weirdest possible time of year, my next-door neighbor showed up on our doorstep with a gigantic shopping bag of tangerines from her backyard tree. So I juiced about fifty of them, chucked out ten times as many seeds, and made the resulting 4 cups of juice into mimosa jelly from the Food in Jars cookbook.

boiling tangerine mimosa jelly

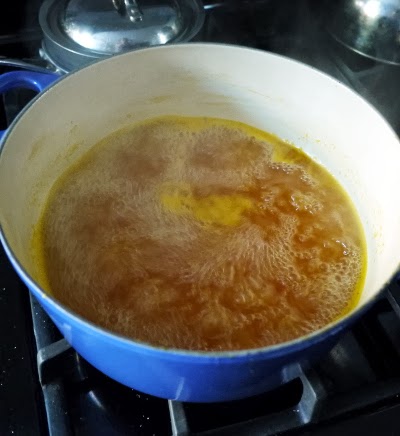
Every single picture I took looks like this: clouds of steam and big bubbles frothing everywhere.

The recipe is pretty similar to this earlier recipe for orange jelly, but with the addition of champagne. I actually went out and bought one of those little cubes of Coppola Sofia champagne, so I wouldn't have to use up an entire bottle of champagne, only to find that the single-serve cans hold only 7/8 of a cup. I guess I could've just used that, but I'd never made jelly before, so I went ahead and opened a second one to make up the full cup. And then I had to drink the remaining champagne. How terrible for me.

I overboiled the batch a little bit, so the resulting jelly is quite firm, but overall: success!

Next on the docket: 4 pounds of nectarines.

What are you guys preserving this week?

19 September 2012

Other people's recipes

Lately, I want to eat practically everything I see.

nectarine muffins

I saw Cupcake Rehab's jammy muffins, followed a link back to the master muffin recipe, determined that we had the necessary ingredients, and was off. I used wheat flour, put rice milk in place of dairy, and stuffed the muffins full of chopped nectarines instead of jam or chocolate chips. Otherwise, they were totally identical! I ended up with eight standard muffins and twelve tiny little dudes, and we slathered them with butter and ate them all over the course of four days.

The butter situation at our house is now pretty dire, incidentally. No butter!

spicy pickled peppers

I saw Emmy Cooks's spicy pickled peppers and I ran off to the farmer's market sort-outs bin, which has been reliably full of zucchini and peppers and eggplant for the past few weeks, and brought a big bag of peppers home with me. I chopped them into rings, packed them into a jar, added dill and garlic, and covered the whole thing with simple brine. Then I stuck the jar into the fridge, where it has been for the past two days. I can finally eat some of them tonight! Patience is the only real problem with pickling things.

baked flounder

I saw Stella Cooks's fish tacos with spicy carrot slaw, so I went to the farmer's market fish guy and walked away with a gigantic piece of flounder. I promptly brought it home, cut it into four pieces (three of which are resting happily in the freezer, waiting for the next fish and/or taco occasion), covered the last piece in spices and lemon, deposited it in a foil packet, and baked it for twenty minutes, or until awesome.

fish tacos with carrot slaw

Then I sauteed up a mess of carrots, red pepper, and sambal oelek, mounted it with butter (item: this was before the butter situation got quite so dire), and whacked everything together into a series of flame-toasted corn tortillas. Then I took pictures for posterity and crammed them all into my mouth as fast as possible. Hooray!

What new recipes have you guys been trying?

10 September 2012

Pickled once, pickled twice

homemade pickled beets

Pickled beets are very nice.

I've been meaning to can some pickled beets for just about the entire summer. The thing is, I've never made pickled beets before, so I needed to find a good recipe. Online research revealed a whole lot of recipes featuring large amounts of sugar. Well and good--except that I historically strongly dislike sweet pickles. So I was pretty relieved when I found the simplest of pickled beet recipes. It not only required no sugar, but was by Marisa "Food in Jars" McClellan. Obviously, this was the perfect candidate.

Right! So I bought two bunches of massive softbally beets at the farmer's market--one red and one golden--and set out for pickletown.

I estimated I'd be able to fill about 5 pints, so I made extra brine. This turned out to be a good plan. Item: it would probably be good to get a kitchen scale if you want to have a really clear idea of how many jars you're going to be able to fill.

Start by washing your beets and trimming off their leaves. Cut the stems about an inch above the body of the beet, and leave the trailing root ends intact. (Keep your beet greens and saute them with garlic for dinner later.) Then put your beets in a pot, cover them with water, and put them on to boil.

boiling beets

Try to boil your beets in a pan bigger than this. I'm just saying.

No disasters actually occurred. However, just imagine the horror that could ensue with that much boiling beet juice. You do NOT want your beets to boil over.

While you're boiling your beets, prep all your canning equipment. Put the water bath on to boil, sterilize jars, warm lids and rings, etc. Check out the National Center for Home Food Preservation's boiling water canning guidelines if you haven't canned before.

boiling beets

My beets were gigantic, so they took about an hour to cook through. Smaller beets will take somewhere in the neighborhood of 20 to 45 minutes.

When your beets are tender to the point of a knife, drain them and let them cool enough to touch. A cold water bath is not a bad idea here.

Peel the cooked beets by rubbing them with your fingers. The skins will come right off. This is also the point at which your beets will suddenly get ultra-messy, so make sure to wear something that can potentially get beet juice all over it, and keep some towels handy for wiping up puddles of red, red juice before they stain your counter.

Slice the peeled beets into whatever size and shape you desire. I made a lot of quarters and smaller chunks. "Smaller" is relative here, of course.

boiled, peeled, and sliced beets, ready for pickling

When your beets are all prepared, make the brine. I used 3 cups of water, 3 cups of apple cider vinegar, and 3 tablespoons of pickling salt. Bring it all to a boil and cook until the salt is completely dissolved. Keep your brine hot.

Now it's time to pack your jars, one at a time. Put a tablespoon of pickling spice in your first jar. Pack the jar with beets. Pour the hot brine over your beets to cover, leaving 1/2 inch of space at the top. Use a chopstick to release as many air bubbles from your jar as possible. Top up the brine if needed before wiping the jar's rim. Top your jar with a hot lid, screw the band to finger tightness, and deposit your jar in your canning rack. Repeat until you're out of beets and brine.

Since I was using both red and golden beets, I ended up with a delightful multicolored variety of pickles. Hooray! I had a few pieces of beet left over, so I poured over the last few bits of brine, added a little bit of pickling spice, and stuck them in the fridge for instant beet pickle.

Process your pickles in a boiling water-bath canner for 10 minutes. Remove to a towel or wire rack on your counter. Let cool for 24 hours. As the cans cool, they'll seal themselves with a loud ping. Hooray! Science!

Test your jar seals before storing your pickled beets. You can do this by trying to lift the jar by the lid (rings removed) or pressing the center of lid to see if it snaps up and down. If any jars didn't seal, just put them in the refrigerator and eat them within a week or two.

homemade pickled beets

What can you do with pickled beets? The classic solution is "put them in salad." If you like beets on burgers, you can put a slice on your burger. If you like the classic ploughman's lunch of bread, cheese, and pickles, beets are an admirable addition. And there's definitely something to be said for a little dish of pickled beets treated as an ordinary vegetable, served alongside whatever main dish you might be having for dinner.

Hooray! Pickled beets! I can't wait to try these.

What are you guys pickling and preserving this fall?

17 August 2012

Tomato sauce!

homemade tomato sauce

Hooray for summer tomatoes!
Hooray for my cabinet of canning jars!
Hooray for the water-bath canner I got for the holidays!
Hooray for a messy stovetop!
Hooray for the huge pile of stock-ready trimmings!
Hooray for the farmer's market $.65/lb sort-outs bin!
Hooray for a serrated tomato knife to split the skins!

skinning a summer heirloom tomato

Hooray for squishing by hand!
Hooray for seeds and juice spraying randomly onto the walls!
Hooray for open windows and a good fan!
Hooray for an arsenal of useful tools!
Hooray for kitchen towels!
Hooray for the end result!

homemade tomato sauce

Needless to say, I've canned a bunch of tomato sauce in the last few weeks. I wrote up the entire tomato sauce canning method in great detail last year. I'm going to make more this weekend, and probably more the weekend after that, and again the weekend after that.

Now let's see how long I can go without buying canned tomato puree, shall we?

03 August 2012

Freezing summer corn for fun & profit

fresh corn on the cob

Corn! You can buy bags of it pre-frozen in the grocery store, of course, but where's the fun in that? And how much better does the farmer's market fresh corn taste? Why not take advantage of the abundant midsummer corn harvest to freeze your own?

So that's exactly what I did last weekend. I grabbed an armful of corn at the farmer's market, dragged it all back home, and proceeded to enhance my freezer stash.

First, I husked ten ears of white corn. Easy but annoying!

Then I cut all the corn kernels off the cobs. Usually I do this by laying the whole cob down on the cutting board, holding my knife at an angle, and using a sawing motion to slice from tip to end. This gets the kernels off the cob with minimal fuss, and without a huge corn mess spraying everywhere. If you want to hold your corn upright while you slice off the kernels, you can put the ear in a big bowl first, but why bother?

blanching fresh corn

I brought a pot of water to a boil, blanched my corn kernels for about a minute, and drained them all. I used a big pasta pot with an insert so I could just lift all the corn out at once. This worked admirably.

After some time to cool, I filled my bags with beautiful fresh corn. Normally I'd spread my corn kernels out on a cookie sheet, freeze them that way (to avoid kernels sticking together), and remove the frozen kernels to a few large containers. However, I've had a box of tiny little snack-size ziplocs hanging around since the holidays, and I wanted to get them out of the way, so I decided to fill them up instead.

fresh corn blanched and ready to freeze

Ten ears' worth of corn kernels filled up nine bags, which I left open on the counter to cool completely. Afterward, I pressed the air out of the bags, sealed them, and put them in the freezer. Bonus: now I know each bag has just over one ear of corn in it. When I want to use the corn, I'll just throw a bag in a bowl of warm water to defrost & separate. Easy!

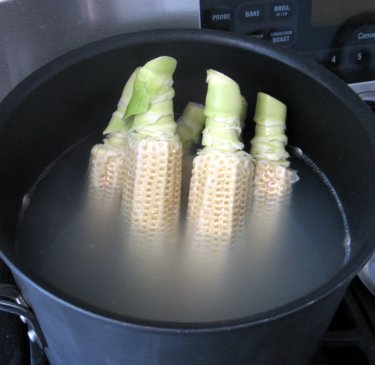
After I was done blanching corn, I had a big pot of freshly boiled corn-scented water. I also had a stack of corncobs. So, guys, are you pondering what I'm pondering?

I put the water back on the heat, dropped in a bunch of the stripped corncobs, and simmered for about 20 more minutes. Voila: a massive pot of fresh corn broth!

corn broth with corncobs

The resulting broth filled eight 2-cup containers, which I left to cool on the countertop. It's important to fully cool broth before you lid and freeze it; otherwise it'll start to ferment. A few hours of waiting took care of that problem. Then they went into the freezer too.

So about one hour of effort gave me a full supply of delicious corn and broth. Hooray!

Then I proceeded to sauce & can 12 pounds of tomatoes, but that's another story.

What vegetables do you guys freeze in summer? Do any of you go the pressure canner route instead?

31 July 2012

Adventures in sauerkrauting

homemade sauerkraut

Why is fermenting food so intimidating?

I've been meaning to ferment something or other for a good three years at least. I love all kinds of fermented foods, from miso to sourdough to kimchi to tempeh, so it's not as though I had no reason to make them myself. But somehow the only fermented or cultured food I'd ever tried to make was yogurt, and that only once, due to lack-of-candy-thermometer fail.

Clearly the lack of an everyday fermentation tradition is the problem. So. Let's fix that by making a start, shall we?

Two weeks ago, I decided to take on a fermentation challenge and make a batch of sauerkraut. I followed the classic sauerkraut recipe from Sandor Ellix Katz's Wild Fermentation.

These instructions sound very easy. You do need appropriate equipment and a place to put everything during the fermentation process--but the process is clearly doable. It goes like this.

1. Shred cabbage.
2. Mix with salt.
3. Pack into crock.
4. Weight down/ensure things are covered with brine.
5. Let sit around for two weeks or until delicious.

That doesn't sound so hard, right? So I acquired a crock and a cabbage and got to work.

green cabbage

I cored and shredded a green cabbage. This particular one was pretty small. I don't have a scale, but I'd estimate it weighed about two pounds.

Shredding a cabbage by hand is not that big a deal, in case you were wondering. It's not a sufficient reason to get a food processor. (Cashew cheese and its ilk might be, however.)

shredded green cabbage for sauerkraut

I mixed the cabbage with salt and packed it into a large glass jar. Since the rim of the jar was a bit narrower than the body, I couldn't fit a plate inside to weigh down the cabbage. So instead I found an empty ziploc bag, washed it, filled it with water, and weighed the whole shebang down with a smaller jar of water. I hear that if you use this weighting method you're supposed to use salt water in your plastic bag, just in case it bursts. I didn't, but then my bag didn't burst, so that turned out okay.

After about 12 hours my cabbage and salt had produced enough brine to cover itself, so I didn't need to add any additional salt water.

sauerkraut crock with shredded cabbage

Then I just left the entire deal on my kitchen counter, out of the sun and covered with a dishcloth, for two weeks. I checked on it every few days, and shifted my weights a bit to let the bubbling gases escape. The gas from the bubbles smelled sort of milky or whey-like. However! The fermenting sauerkraut didn't smell of anything at all at any other time. We'd been worried that fermenting would really stink up the house, but it totally did not do so in any way whatever. Qualms overcome!

After two weeks, the bubbles had largely subsided, and it was time to try out the finished product. The result was a tangy mass of slightly crunchy sauerkraut, with a young but distinctly correct kraut flavor. It's a far cry from the slimy, translucent, and overpowering mass-produced sauerkraut you get at the grocery store. I'm going to let it keep fermenting for another week or so to get a stronger finished flavor before putting it in the fridge. And then! I will eat it over chili, and with seared sausage, and maybe I'll make up a batch of sauerkraut and mushroom pierogies to stick in the freezer for future dinner application.

Hooray for sauerkraut!

Have you guys ever made fermented food? How did it go?

30 March 2012

Salmon with marmalade marinade


It seems like everyone I know is making marmalade. I myself have a treeful of oranges and one of lemons, but I haven't jumped on the marmalade bandwagon quite yet. For one thing, Veronica gave me a full pint of her seville orange marmalade in exchange for a baby spider plant!

I really don't need more marmalade...but who am I kidding? I'll probably end up making at least a small batch in the near future. I think I want to try this lemon marmalade with tea.


In the meantime, I do have an entire pint of marmalade to use for whatever nefarious purpose I choose. So why not mix the marmalade with some soy sauce, ginger, and sesame oil, spread it on a piece of salmon, and bake it?

Baking fish may not be quite as easy as poaching--you can, in fact, burn fish if you bake it, while it's awfully difficult to do so if it's submerged in water--but it's still very easy. I think the only real danger is letting the fish get dry. By using an oily fish like salmon and covering it with marinade, you can take a few steps back from that likelihood.

Baked salmon with marmalade glaze

salmon fillet
marmalade
soy sauce
sesame oil
sambal oelek
olive oil

First, make your marinade. In a small bowl, mix together a spoonful of marmalade, several good shakes apiece of soy sauce and sesame oil, and a small spoonful of sambal oelek or other chili paste. The proportions are really up to your tastes. Obviously, I like spice; if you don't, feel free to reduce the chili amount. You could also add a variety of other things to your marinade--rice wine vinegar, mirin, garlic, salt and pepper, or shredded herbs come to mind. I personally wish I'd thought to add some seriously minced and pulverized fresh ginger.

I considered briefly precooking the marinade so the marmalade would melt, but decided not to. This worked out fine.


Lightly oil the skin side of your salmon, so it won't stick. If your fillet is skinless, or you want to skin it first, that's fine. I did find that after cooking, the skin separated from the fillet of its own volition, so I don't think skinning is necessary. In any case, spread your marinade over the other side of the fillet.

Let your fish marinate for at least a half hour, so the marinade has a chance to soak in. Put it in the refrigerator if you're going to marinate it any longer.

When you're ready to cook, preheat your oven to 425F and take your salmon out to come to room temperature. Put your fish on a piece of parchment paper in a baking dish, so the sugar won't make your pan impossible to clean later. Bake for about ten minutes, or until the fish is cooked through and its flesh flakes easily. You may need a couple more minutes if you have a particularly thick fillet. Mine took about twelve minutes total.


After baking, your salmon will look like this. Hooray! That parchment paper was definitely a good idea, right?

Since salmon and marmalade both have very strong flavors, it's best to keep any additional vegetables simple. It would be great with a green salad, a whack of rice pilaf, or a bed of wilted spinach.

I liked this initial experiment, but I think I could make it even better. I definitely want to try spiking the marinade with ginger, for one thing. I also want to try using sea bass instead of salmon and lemon marmalade instead of orange. Ooh, I know--sea bass with lemon marmalade and fresh rosemary. There's the excuse I need to make lemon marmalade! Food tweaks FTW!

17 January 2012

Brandy butter rice soup redux: using what we canned

using home-canned tomatoesThe other day John and I decided we wanted our awesome tomato rice soup and grilled cheese sandwiches for dinner, so we pulled out the first-ever jar of home-canned tomato sauce.

Using our own canned tomato was a little nerve-racking! I mean, nobody wants botulism in this day and age (or, you know, in any day and age). But all my jars looked good, smelled fine, and presented no issues whatsoever, so I ventured forth and did meet with victory upon the field of battle. It wasn't even St. Crispian's Day or anything!

To open home-canned jars, use the flat side of a standard bottle opener. Hook the broad edge over the top of the lid, and the little punched-out edge under the lip of the jar. Press down on the top of the opener with your thumb as you pull the lever arm upward. The lid will come right off with a nice pop. Voila!

Yeah, you guys probably know this, but it never hurts to have more info, right? Especially considering the lack of general cooking & food preservation knowledge in American culture over the past 40 years.

Anyway. This soup is more than the sum of its parts. I blame the butter and the brandy.

Brandy butter rice soupBrandy butter rice soup

butter
garlic (&/or onion, shallot, etc.)
tomato puree or sauce
vegetable broth
raw long grain rice
brandy
salt, pepper, basil
fresh parsley &/or other garnish of your choice

Melt a large chunk of butter in a reasonable soup pot. You can cut it with olive oil (or replace it entirely) if you so choose.

Smash and peel a good eight or ten cloves of garlic. I like to leave mine in large chunks, but it would also be fine to mince them. When your butter is melted, add the garlic to the pot. Cover, turn the heat to low, and cook slowly for about ten or fifteen minutes. This long slow poach will essentially give you garlic-infused butter, which is of course well worth pursuing.

When your garlic is all tender and lovely, add your tomato to the pot. I used a full jar of our summer tomato sauce; you can use whatever form of tomato is available to you. Season with salt, pepper, and basil. I want to experiment with other herbs in the future.

Turn the heat up to medium and simmer for about five minutes. Now it's time to add your rice. Since the rice needs to cook in the soup, you'll need to add some vegetable broth as well. So. Add about half a cup of rice, plus a cup or more of vegetable broth, according to how thick you like your soup. Add in a good shot of brandy as well. Bring the pot to a boil, turn down the heat, cover, and simmer until the rice is cooked through. The time will vary based on the type of rice you're using. I think mine took about fifteen minutes from zero to tender.

When your rice is cooked, your soup is essentially ready. If the soup is too thin for your liking, take off the lid and boil it down a little longer; if it's too thick, add a little more vegetable broth. Taste and correct any seasonings, and you are done.

Eat your soup with chopped parsley, chervil, or whatever other herb sounds good to you. Some sour cream or plain yogurt would be nice too.

Brandy butter rice soup with grilled cheeseSince this is tomato soup, a grilled cheese sandwich is the obvious companion choice. Toast or biscuits would work too. Otherwise, a white bean vinaigrette could provide a good contrast in texture & acidity.

09 November 2011

Oven-dried sungolds

sungold tomatoesI've been meaning to make these dried sungolds in olive oil for a very long time. This year, with the onslaught of tomatoes bursting out of our backyard, I gave them a try.

First, I went out to the garden and picked all the ripe tomatoes I could find. (I also picked up one big green purple cherokee that I accidentally knocked off its vine. It has since turned mostly red in the sun on the kitchen windowsill.) Yes, the tomatoes are still alive. Yes, they are still slowly ripening, even though it has finally gotten at least a little chilly. No, it was not difficult at all to find this many.

sungold tomatoesIt only took me about ten minutes to wash the sungolds, cut them in half, and arrange them cut side up on a cookie sheet. I had just enough to cover the entire sheet.

Then I turned the oven to 200F, deposited the cookie sheet inside, stuck a wooden spoon in the door to allow for air circulation, and went about my business for several hours.

When the tomatoes were shriveled but still chewy, I took them out of the oven and packed them into a jar with chopped basil and minced garlic. If you don't happen to have any fresh herbs, or you want plain oven-dried tomato goodness, I'm sure you could just put them in the jar alone. I covered the entire shebang with olive oil, let it cool on the counter, and stuck it in the fridge. Voila!

oven-dried sungold tomatoes in olive oilSince I'm keeping my jar in the fridge, the olive oil gradually turned cloudy and coagulated. This is fine. I plan to just leave my jar out on the counter for an hour or so to warm up before using the tomatoes in any sort of uncooked context.

I have not yet actually eaten any of these! Maybe I should bust them out for lunch today, in a sandwich with some cream cheese and spinach. Or maybe I should make some pasta and throw a big spoonful in at the last minute. Or I could drain off the oil, chop the tomatoes, and knead them into pizza dough...HMMM.

18 October 2011

Pineapple guava invasion

Pineapple guavasSo. When we got home from vacation, guess what we found waiting for us?

A backyard full of pineapple guavas, also known as feijoas, that's what.

Pineapple guavasWhen we moved into our house, our landlord told us all about the gigantic tree that shades nearly our entire backyard. Apparently it's the largest pineapple guava tree in the state. You can eat its flowers if you want. When the fruit is ripe, it falls of its own volition. Also, since the tree is getting old, it's getting less productive.

Uh huh. If this is "less productive," I'm a little scared to ask just how many pineapple guavas he and the previous tenants ate.

Pineapple guavasI think I picked up about 50 to 75 pounds of guavas on the first day.

We ate a few out of hand. You eat a pineapple guava by cutting or ripping it in half, then scooping or sucking out the insides.

vsThe inside of the fruit is quite a bit lighter than a regular pink-fleshed guava, but it's very juicy, with a jellylike texture in the middle and a grainy pear texture toward the skin (which is technically edible, but bitter). Pineapple guavas taste vaguely tropical, sort of like a more floral kiwi.

They're also super-fragrant. We literally could not keep this many of them in our house after a few days of increasingly cloying scent. An excellent argument for cleaning out the refrigerator, I guess.

So, what do you do with pineapple guavas? You make jam, for one thing. Well, that's great, but since we've previously established that John and I practically never eat jam, it doesn't seem like the best idea. You can evidently also make guava cheese, a solidified block of guava resembling quince paste, to eat with cheese and crackers or just on its own.

One of my friends suggested drying the guavas, which I will probably do later this week. This is definitely an occasion on which I wish I'd spent some time making an insect-proof outdoor dehydrator, so I could just cut them all up and leave them out in the sun for a few days. But since I don't have one, and the ants and slugs in our yard LOVE the small percentage of cracked or split guavas in the yard, sun-drying sounds like a recipe for infestation. Instead, I'm going to give it a shot in an ordinary (although really low) oven.

Pineapple guava schnappsIn the meantime, I turned to the easiest and quickest way of preserving the pineapple guavas: I made them into schnapps.

I can't say I found any pineapple guava schnapps recipes to follow, shockingly enough, so I just loosely modeled my process on the techniques at danish-schnapps-recipes.com. I washed and halved a bunch of pineapple guavas, filled quart jars to about 2/3 full, and then filled the remaining space in each with vodka. After agitating the jars every day for three days (during which the guavas turned a bizarre pickle color), I strained out the fruit through a regular strainer, then restrained through a fine-mesh nylon sieve to remove leftover particulates.

Pineapple guava schnappsVoila! The resulting schnapps clearly needs some time to age, but that's no surprise.

Now all we have to do is figure out what to do with the remaining 200 to 300 pounds of guavas still on the tree...

Pineapple guava tree