Showing posts with label soporific. Show all posts

02 June 2015

Samosa soup

Samosa soup

We've been eating a lot of pinto beans lately. This is a thing that happens when you buy a 5-lb bag of said pinto beans and cook huge batches of them in your pressure cooker on a regular basis, both of which I absolutely do.

Refried beans are already on the table two or three times a week at our house, whether they're made from pintos or black beans. I also recently made a double batch of Good Good Things' bbq pinto bean burgers (along with a vegetarianized batch of Joy of Cooking bbq sauce to put in them). We now have a lovely stock of 11 burgers stashed away in the freezer for future consumption. But I still had quite a few beans in their broth hanging around waiting to be eaten afterward.

We'd more or less exhausted the classics, so I wanted to make something different. Soup is always good. Why not mix up a basic bean soup with the spices usually used in making samosas?

I looked up a couple of samosa recipes and went to town.

This soup is lovely and warming, with a hint of heat that can be increased as much as you like. The garam masala makes it a bit sweet, especially when eaten plain. Add a handful of crackers (or naan, if you're feeling semi-industrious) and a few salad greens, and you have a complete and very satisfying meal. The leftovers freeze very well.

Serves 4.

Samosa soup

Samosa soup

oil of choice
1 large yellow onion
2 carrots
1-2 stalks celery
1-2 boiling potatoes
1 jalapeno or serrano
2 cups cooked pinto beans (in 2 cups of their broth if homemade, drained if not)
2 cups veg broth (+2 more cups if using canned beans)
1 tsp salt
1 tsp ground coriander seed
1 tsp cumin
1 tsp amchoor powder (or sub lemon juice)
1/2 tsp cayenne pepper or to taste
1 tsp garam masala
immersion blender or other pureeing device
plain yogurt/sub of your choice and cilantro to garnish

Warm a couple slugs of oil over medium heat in a large soup pot while you chop up your onion, carrots, and celery. When the oil is hot, add the chopped vegetables to the pan along with a shake of salt. Cook, stirring occasionally, for about five minutes, or until the onion is beginning to turn translucent.

While you're waiting, chop up your potatoes and chile. Then add them to the pot, stir, and continue to cook for another five minutes.

Next, add your pinto beans and broth to the pot. Add all the spices except garam masala (and lemon juice, if you're using it). Bring the pot to a boil, cover, reduce heat, and simmer for about ten to fifteen minutes, or until your potatoes are entirely cooked through. This may take a bit longer if your potato pieces are on the large side.

Take your pot off the heat and puree your soup using an immersion blender. Taste and correct the seasonings. Then return the soup to the heat and cook it down until it reaches your desired texture.

When you're happy with your soup, turn off the heat and stir in your garam masala (and lemon juice). Serve plain, with chopped cilantro, or top with plain yogurt. Voila!

If you want more vegetables, you can saute some peas in olive oil with a little salt and put a big scoop of them over the top of your bowl of finished soup. Or put a handful of spinach or mesclun leaves in the bottom of each bowl before serving. Or have an actual salad on the side! It's all good.

What's your favorite thing to cook with pinto beans?

14 April 2015

Winter squash polenta with chipotle pinto beans

Winter squash polenta with chipotle pinto beans

I've been thinking about the combination of squash and beans for a few weeks now. Black beans and sweet potato are a natural match in things like enchiladas and black bean-broccoli stuffed sweet potatoes, so why not try a variation with winter squash?

This is just a basic soft polenta with a big whack of delicious, vibrant winter squash puree added in. I still had some previously roasted CSA squash puree in the freezer, so this was the perfect way to finish it up. Of course, there are still two squash on our counter. Those need to get eaten soon too!

Polenta does take a bit of time to make, but it's such a delicious result that I think it's well worth it. The overall result is smooth and comforting, with a subtle sweetness (not to mention a BRIGHT ORANGENESS) from the squash and a hint of contrasting black pepper. And the combination with spicy beans? Yes. The experiment worked.

Wilted dark greens with garlic would be an excellent addition if you want more vegetables. Cilantro would be a great garnish here too.

Winter squash polenta with chipotle pinto beans: polenta and water mix

Winter squash polenta

3 tbsp butter or olive oil
1/2 medium yellow onion
3 cups veg broth, water, or a mix
1 cup polenta and 1 cup water, combined
~2 cups winter squash puree
salt and pepper to taste

Melt your butter or oil in a 3-quart or bigger pan on medium heat while you dice your onion finely. Add the onion to the pan and cook, stirring occasionally, for about five minutes, or until nice and fragrant and translucent.

Add your water or broth and bring the pan to the boil. I used 2 cups of vegetable stock and 1 of plain water, which worked perfectly.

If you haven't mixed up your raw polenta and water, now is the time to do so. Give it a few good stirs to break up any lumps. Then gradually add your polenta and water mix to the pot, stirring each addition in well.

When all your polenta has been added, it's time to settle in for the long haul. Reduce the heat to low and cook, stirring frequently, for about 25 minutes. Many polenta recipes will have you stir for the entire cooking time, but I don't think this is necessary, especially if you are also cooking some tasty pinto beans at the same time. Just keep an eye on your polenta and stir it frequently.

Your polenta will be cooked when it's thick and is pulling away from the sides of the pan as you cook. Taste it to make sure. Then add your squash puree, season well with salt and pepper to taste (start with 1/2 tsp of each), stir it all up, and cook for another five minutes, or until hot through and tasty.

Chipotle pinto beans

butter or oil
1 yellow onion, chopped
3-4 cloves garlic, minced
cumin, oregano, salt to taste
~2 cups cooked pinto beans
2 chipotle peppers in adobo sauce, finely minced
adobo sauce to taste
green onion to garnish

This is more or less a non-mashed version of basic refried beans. Saute onion and garlic in oil or butter until softened. Season with cumin, oregano, and salt. Add pinto beans and a bit of their broth (if homemade) and cook, stirring, for five or ten minutes, until everything is hot through and the beans are at your preferred degree of dryness. Correct seasonings and take the pan off the heat. Finally, stir in your chipotles, plus a couple spoonfuls of the adobo sauce to taste. (Chop the rest of the can of chipotles in adobo and freeze in an ice cube tray for future applications.)

Serve your beans over a big scoop of polenta and garnish with chopped green onion. Oh man, it's so good.

Fried winter squash polenta squares with fried egg

I spread the leftover polenta evenly into a casserole dish, pressed some parchment paper over the top, and left it to solidify a bit overnight. The next morning, I fried up a couple of squares in a little butter, then topped them with a fried egg. Plain romaine on the side.

This was an excellent plan and I highly recommend that you try it, either with neat squares of polenta or a couple of rough handfuls shaped into patties. Runny egg yolk with crispy polenta is definitely worth a few minutes of effort.

How are you eating the last of your winter storage vegetables?

21 October 2014

Yellow split pea soup with kale and quinoa

Yellow split pea soup with kale and quinoa

We are just barely back from a whirlwind trip to a family wedding on the Florida panhandle. We flew into New Orleans, stayed for a day of beignets, coffee, and wandering around, and then set off for that most traditional of American pastimes: driving for several hours across several states to get as many family members as possible into one place at one time.

The wedding -- on a blindingly white and lovely beach -- was tiny but very happy, with toast after toast in both Spanish and English stretching on into the night at the reception. Yay!

We had a great time.

That said, do you know how much vegetarian food there is in the tourist areas of NOLA and the beach (and also the airport)? Not much. Almost not at all. I ate several platters of fish with fried shrimp garnish, a plateful of veal, and an excellent sausage with caraway, but the vegetables were few and far between, and the beans practically nonexistent, except in dishes that also contained large chunks of ham. There were multiple bags of delicious Michigan apples, however!

So when we got home John and I (especially John -- I like meat, even if my digestive system is not happy with me after I eat this much of it) were ready to get some beans and greens into our mouths as instantly as possible. We dug some split peas out of the freezer, got our hands on a big bunch of kale, and went to town.

The secret to making a delicious yet vegan split pea soup is liquid smoke. Well, liquid smoke and plenty of other herbs and spices. Actually, the use of herbs and spices is possibly the secret of vegan and vegetarian cooking in general. You don't have meat flavoring everything automatically, so spice application is super important.

Yellow split pea soup with kale and quinoa

Yellow split pea soup with kale and quinoa

1 cup yellow split peas (green will work too)
oil of your choice
1 yellow onion
3-4 cloves garlic
1 carrot
1 leek
~4 cups vegetable broth
salt & pepper
marjoram, paprika, smoked paprika, cayenne, red pepper flake
bay leaf
optional splash of dry vermouth or white wine
1 bunch kale
handful of fresh parsley with stems
1 cup quinoa
10-15 drops liquid smoke

Start by covering your split peas in plenty of hot tap water. Leave them to soak and begin softening for 15 minutes or more before you start cooking. This quick soak will help reduce the overall cooking time.

Warm a slug of oil on medium heat in the bottom of a 3-quart pot. Chop your onion and add it to the oil. Cook, stirring occasionally, for about 5 minutes, or until your onion has begun to soften.

Mince your garlic, scrub and chop your carrot, and wash and chop your leek. Add each vegetable to the pot as you finish chopping it.

Season your vegetables with a few shakes of salt, as well as some marjoram, paprika, smoked paprika, cayenne, and red pepper flake to taste. Toss a bay leaf in there too. If you don't have every single one of those spices, you can always rely more heavily on what you do have. I just like to use smaller amounts of a variety of different peppers for a nice depth of flavor.

Stir everything together and continue to cook for 5-10 minutes. When all your vegetables are nicely softened, drain your split peas and add them to the pot, along with your vegetable broth. If you would like to add some vermouth, now is a great time to splash some in.

Bring the pot to a boil, cover, reduce the heat, and simmer for about 45 minutes, or until your split peas are completely cooked and soft.

While you're waiting, wash, destem, and roughly chop your kale. Chop up your fresh parsley as well. Put your quinoa on to cook, so it'll be hot and ready when your soup is done.

When your split peas are cooked, take the pot off the heat, remove the bay leaf, and puree your soup to the texture you desire with an immersion blender. Or leave it chunky if you prefer. It's all good. If your soup is too thick, this is a good time to add some more broth or water to thin it.

Stir your chopped kale and about half of your parsley into the hot soup. Cook for another 2-3 minutes, or until all the greens are well wilted.

For the final seasoning, add your liquid smoke. This stuff is very potent, so be careful and add a little at a time. This is also the time to add pepper and correct any other seasonings.

To serve, add a scoop of hot quinoa to the bottom of a soup bowl. Top with a ladleful of soup and garnish with the extra parsley.

Hooray! Beans (or pulses anyway), greens, and quinoa, together at last.

Needless to say, we both felt miles better after eating this delicious veg-heavy dinner in our own house.

What's the first thing you want to eat when you get back to your own kitchen after a few days (or weeks) of traveling?

17 February 2014

Zürcher geschnetzeltes with chicken

Zürcher geschnetzeltes with chicken

I had never heard of Zürcher geschnetzeltes until last week, when someone mentioned it randomly on ravelry. The translation is just "sliced meat Zurich style." That's not very descriptive, so it's a good thing the reality is much more enticing: a rich and fragrant dish of sliced veal and mushrooms in a white wine and cream sauce. SUPER EXCITING. This clearly needed to happen, if only so I could pretend that it's actually winter here in drought-ridden California.

There was just one catch. Our usual grocery store didn't have any veal--and honestly there isn't a lot of red meat happening at our house anyway. So I decided to make this with chicken.

Yes, chicken, arguably the most boring of all meats! And yet, I like chicken, and I thought it would be excellent in a white wine and cream sauce with mushrooms and sage. What better way to avert the biggest problem with chicken--dryness--than to smother it in sauce? With some attention to size and cooking time, it worked out very well.

I made the mistake of not thinking about what I was going to serve this with until it was entirely finished and ready to go. Evidently the traditional Swiss accompaniment is rösti, which would be pretty amazing. A steaming spoonful of egg noodles or hot mashed potatoes would also work well. But I ate mine all by itself, with a little bread to sop up the copious sauce left on the plate, and was still well content.

Since I'm the only meat-eater in the house, I just made enough for me, but you can double or triple at your leisure.

fresh purple sage leaves

Zürcher geschnetzeltes with chicken
Adapted from traditional Zürcher geschnetzeltes.

1/2 lb chicken, skinned (about 1 chicken breast or 2 thighs)
flour to coat
butter AND olive oil
1/2 yellow onion
2 garlic cloves
10 sage leaves
12-14 large button or brown mushrooms
1/2-2/3 cup of dry white wine (enough to deglaze)
2/3 cup cream
salt, pepper, paprika

Start by slicing a chicken breast (or whatever cut you like--deboned thighs would certainly be easier to keep moist here!) into pieces about 3/4-inch thick. Toss to coat in a couple tablespoons of flour, tapping off any excess.

Heat a wide, heavy-bottomed saute pan on high. Add a pat of butter and a small slug of olive oil. When the butter foams, add your chicken pieces in one layer. Sear quickly for about three to five minutes per side. While you're waiting, cut your onion into thin half-moons and your garlic into slices. Slice your sage leaves into thin strips, reserving a few leaves for garnish.

When your chicken has a beautiful golden-brown crust on both sides, remove to a plate. Don't worry about the meat being fully cooked at this point! You just want a nice sear.

Turn the heat down a touch, add another bit of butter and olive oil to your pan, and throw in your onion, garlic, and sage. Saute for about five minutes, or until the onion has begun to soften.

sauteed onions and mushrooms for Zürcher geschnetzeltes with chicken

Cut your mushrooms into wide slices and add them to the pan with a pinch of salt. Cook, stirring occasionally, for about five minutes. Then add your wine to the pan, stirring to deglaze. Finally, add your pieces of chicken and their juices, as well as some salt, pepper, and paprika.

Mix everything together and cook until your chicken is done, being careful not to overcook. Mine was ready in about five minutes, but the timing is going to depend on exactly how big your pieces are. Cut a thick piece in half to check.

At the last minute, add your cream to the pan. Stir together and cook for another minute, or until warmed through and just beginning to bubble.

Zürcher geschnetzeltes with chicken

Voila! A beautiful dish of tender chicken and mushrooms in a savory cream sauce! Serve over the noodle, potato, or grain of your choice, or just fill up a bowl and eat it by itself.

You clearly want a green vegetable of some type on the side if you can possibly swing it. My first choice would be a big pile of simple steamed spinach with butter and salt. I wouldn't say no to a big spoonful of baby peas, either. And a big crispy salad is always a nice contrast. It's all good--just get something green in your face.

This was rich enough that I couldn't eat it all at once, and thus I can report that it's also excellent eaten cold out of the fridge the next morning. Hooray, leftovers for breakfast!

Zürcher geschnetzeltes with chicken

What thick, hearty stovetop dinners are warming you up this winter?

22 January 2014

Toor dal and spicy sambal cabbage

toor dal

In the interest of cleaning out our food stash while also eating a variety of delightful dinners, I made some toor dal the other day. This fulfilled several criteria at once.

First, we had toor dal already in the freezer. I wanted to get things out of the freezer. Win!

Second, I didn't want to leave the house for any other ingredients. Fortunately, we have a well-stocked spice cabinet and pantry, so that was also a win.

Third, we wanted to eat delicious things. Toor dal is aromatic, full of flavor, and certainly delicious. Another win.

Fourth, we've been wanting to learn to make more Indian food at home. A new dal--generally defined as a lentil or pulse-based soup with spices--definitely qualifies there.

And fifth, I thought it was about time for me to actually try to cook something besides plain dried beans in the pressure cooker. This recipe called for turmeric and ginger in the pressure cooker as well. I tried it out, and lo! Everything worked perfectly.

In conclusion, win win win win win. Yeah!

If you aren't aware, toor dal = dried split yellow pigeon peas. This one combined them with a chonk--a heated oil or ghee with lots of spices--flavored with cumin, mustard seeds, bay leaves, asafetida, dried red chilies, and paprika. That sounds good already, doesn't it? But when you add in some garam amsala and amchoor--dried green mango powder, which serves as an acid punch--you get a really excellent finished product.

I followed Manjula's toor dal recipe, because, as we all know, Manjula's recipes are great. You should go try some of them if you haven't yet. I can't say I bothered clarifying my butter, but otherwise, I followed her basic recipe completely.

toor dal

The dal was really, really amazing: super delicious, fragrant, hot, but not too spicy. I had some yogurt and cilantro out for garnish, but I ended up not using them at all. The dal itself was already too good. That is really saying something.

We had our dal with brown rice (currently hiding under the dal) and some sambal-sauteed cabbage of which I took zero pictures. It was super easy and tasty, though. This method should work for most hardy winter greens, no problem.

Sambal-sauteed cabbage

white cabbage
vegetable or peanut oil
salt
sambal oelek to taste

Warm a slug of oil on medium-high in a saute pan of your choice. While your oil is heating, core half a cabbage and slice it into whatever shape you like best. I made large, rough strips about 1 inch wide and 2 inches across, but you can cut yours however you like.

Add your cabbage to the pan along with a pinch of salt. Saute, stirring frequently, until your cabbage has mostly wilted. This should take maybe five to seven minutes. Toss in a spoonful or two of sambal oelek or the other hot chili paste of your choice and continue to cook for another minute or two, or until the cabbage is done to your liking. Taste, correct seasonings, and you're done. Simple.

Eat your cabbage with dal or top it with a fried egg and some slivered toasted almonds for a full-meal experience. Hooray!

What hearty soups and winter vegetables are you eating lately?

18 January 2014

Twice-baked sweet potatoes with black beans and broccoli

Twice-baked sweet potatoes with black beans and broccoli

More comforting food at its finest!

Winter is definitely the best time for those dishes that require you to run the oven for multiple hours. Twice-baked potatoes are a prime example. First you bake the potatoes whole. Then you hollow them out, stuff them with filling, and bake them again. End result? A toasty warm kitchen and a plateful of soothing starchy goodness. Perfect.

The standard twice-baked potato is generally seen as a side dish, but I make mine into the star of the show. How? By adding not only cheese and vegetables, but protein, generally in the form of beans. This creates an entire little mini-casserole stuffed with every good thing, and perfect for a one-dish meal. Add a salad on the side and you're completely covered.

This time I picked out a couple of beautiful sweet potatoes, added some refried black beans, broccoli, and kale, and topped the finished product with some chunks of herbed goat cheese. This made for an intense & delicious winter dinner combination.

Not the best pictures, but the potatoes in question are still delicious. Let's go.

Twice-baked sweet potatoes with black beans and broccoli

sweet potato
onion or garlic
cooked black beans, refried or roughly mashed
broccoli
kale
salt, pepper, paprika or cayenne
optional cheese

Scrub your sweet potatoes well under running water, pat dry, and stab all over with a fork. Bake at 400F for 45-60 minutes, or until they're cooked through. You can also choose the quick method and microwave them for about 6-7 minutes if you happen to own a microwave. I don't, so the oven method always wins.

Let your potatoes cool enough to work with them. Cut them in half longways and scoop out the cooked sweet potato flesh, leaving behind a thin but intact shell.

Mix the flesh with some chopped onion or garlic, a few big spoonfuls of black beans, some diced broccoli (including the peeled stems--and if you have a random kohlrabi lying around, peel that, cube it up, and throw it in too. Kohlrabi: it's totally a big, round broccoli stem.), and a few leaves of kale. You can definitely go for either all broccoli or all kale, but I had a few odds and ends lying around and I wanted to use them all up at once. That's the beauty of a stuffed potato--practically anything goes.

Season your stuffing mixture with salt, pepper, and paprika or cayenne to taste. If you want cheese, go nuts; if not, no problem. I've mixed in a few handfuls of grated sharp cheddar to excellent effect. This time I decided to rebake my potatoes sans dairy & garnish with cheese at the end.

Twice-baked sweet potatoes with black beans and broccoli

Stuff your potato shells with the filling mixture, dividing it up as evenly as possible. Arrange them on a baking sheet and bake at 375F for about a half hour, or until heated completely through. If you want to, you can throw on a few handfuls of grated cheese and finish them under the broiler; otherwise, you can just call them done when hot.

Serve with salad or soup for a full and hearty lunch. Garnish with anything you think sounds good. I added chunks of goat cheese, which melted nicely as I mashed them in with my fork. Some fresh chopped parsley or a spoonful or two of thick Greek yogurt would be excellent too.

Hooray: potatoes. Don't you feel better?

How are you eating your potatoes lately?

02 December 2013

Thanksgiving in pictures

Hand turkeys for Thanksgiving 2013

Everyone needs some arts and crafts to start off the holiday right. We ate a lot of Paper Doll Parade's maple rosemary roasted nuts while searching through every shade of brown, orange, yellow, and red the Crayola 64 assortment had to offer.

Thanksgiving 2013 roasted chicken

This was the first Thanksgiving at which I've had meat since 2006. I made some salami tidbits (which, true to form, everyone stood around the stove and ate as soon as possible) and Veronica and Simon, who were so kind as to host, brined and roasted a chicken.

Thanksgiving 2013 roasted chicken, vegetables, etc.

The full dinner menu: the aforementioned chicken, roasted potatoes and carrots, mashed sweet potatoes mirepoix, salad, and lots of gravy. I also made apple dumplings for dessert. Needless to say, everyone was VERY FULL.

Thanksgiving 2013

Here's my plate before liberal application of gravy. SO MUCH GRAVY. That was by far the best part of having meat for Thanksgiving. I can totally cook and eat a gigantic vegan celebratory meal with no problem except for the lack of good gravy.

Thanksgiving 2013 leftovers

SO MANY LEFTOVERS. The chicken carcass got tossed immediately into a stockpot for stock. (I also made stock a couple days later from the few bones and skin and etc that came home with me.)

Thanksgiving leftovers bagel with chicken, sweet potato, cream cheese, and greens

Of course you know what leftovers mean. They mean that the next morning you can cut open a bagel, toast it nicely, and layer on all the sweet potato, chicken, and salad greens in the land. Some cream cheese made an appearance as well. So did a big cup of hot black tea with the season's first big whack of eggnog.

Thanksgiving leftovers bagel with chicken, sweet potato, cream cheese, and greens

Definitely the perfect ending to a celebratory weekend.

I hope everyone had a wonderful holiday!

08 April 2013

Baby leek and potato gratin

baby spring leeks

Spring means ramp season across much of the US, and the foodbloggers are starting to sit up and take notice. Ramp chimichurri, ramp pasta, ramp foraging and preserving guides--it's all ramps all the time.

Guess what I have never once seen in California? That's right: ramps.

Instead, when I went to the farmer's market last weekend, guess what I found?

baby spring leeks

That's right: it's the new season's first baby leeks. So tiny! So delightful! They aren't ramps, but they're still beautiful new fragrant alliums barely as thick as my index finger--and at $1.75 a bunch, I'll definitely take them.

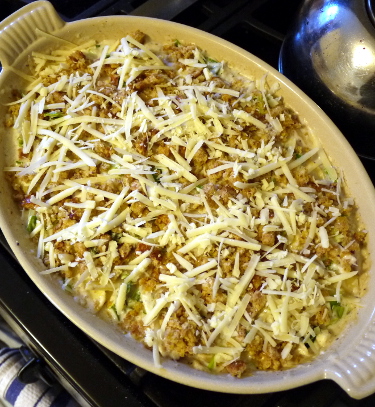
And then I'll smother them in cream sauce and bake them into a fragrant potato gratin. Sure! Why not?

This recipe requires three main components: sauce, vegetables, and breadcrumb crust. If you are working by yourself, you may want to get the vegetables prepped in advance, but you can also cut them up afterward as long as you remember to watch the sauce and stir it occasionally. If you're working with someone else, you can do the veg and sauce at the same time. The breadcrumbs can go last with no problem.

All the leftover leek greens went immediately into a batch of vegetable broth destined for the freezer. Because it's great to make veg broth on the fly and everything, but sometimes you just want to whack a chunk of premade broth into a pot and walk away.

Baby leek and potato gratin

butter
flour
half and half/cream
milk
nutmeg, pepper
gruyere
leeks
potatoes
breadcrumbs
olive oil
dijon mustard

For the sauce, start by melting half a stick of butter over medium heat in a saucepan of your choice. (We used the gratin dish, so as to avoid an extra dirty pot, but I wouldn't recommend it.) Add 4 tablespoons of flour and whisk together, cooking for about three minutes, to make a roux. Add a pint of cream or half and half and continue to cook, whisking frequently, for a good five minutes or so. The sauce will thicken as it cooks. You can add a bit of milk to thin it down if you think it needs it.

Season your thickened sauce with a tiny bit of nutmeg and a copious amount of ground black pepper. Gradually whisk in several large handfuls of grated gruyere cheese. If you want to use another cheese, feel free; just keep in mind that any highly flavored cheeses are going to dominate the finished product.

sauce mornay

Congratulations! You are now the proud owner of a pan of sauce mornay!

Okay. The vegetables mostly require a lot of cleaning and chopping. I used five little leeks and five boiling potatoes. Trim the roots and the ends of the tough greens off your leeks, split them in half, and wash them really well under cold running water. Slice them into inch-long chunks.

Scrub your potatoes well, removing any eyes. You can peel them if you like; I don't bother. Cut them in half, rest each half on its cut side, and slice into the thinnest slices you can manage. If you're prepping potatoes in advance, make sure to put them into a bowl of cold water; otherwise they can oxidize and turn to black mush in an astonishingly short period of time. Then just drain and pat them with a paper towel before assembling the gratin.

baby leek and potato gratin

When your sauce and veg are ready, mix them together and pour them into a gratin dish or casserole of your choice. I also splashed a bit of milk over the top of mine, since the sauce was pretty thick and I wanted to make sure the potatoes had enough liquid to absorb.

Now it's time for the crust. This is easy. Just mix a cup or so of breadcrumbs with a sprinkling of olive oil, a couple spoonfuls of dijon mustard, and a bit of pepper. We usually end up cubing pieces of fresh bread for our crumbs, but whatever you have should work. Mix everything together, making sure you have enough oil to coat the bread. Then spread your breadcrumb mixture over the top of your gratin dish. If you have extra grated cheese, scatter it on last. Otherwise, the breadcrumbs work well by themselves.

baby leek and potato gratin

Now put the whole thing in the oven and bake at 350F for about forty minutes, or until your potatoes are tender to the point of a knife and your breadcrumbs are golden and sizzling.

Hooray! Beautiful, golden, fragrant gratin!

baby leek and potato gratin with green salad

We ate our gratin as dinner, with big mesclun and grape tomato salads. Then I ate the leftovers for breakfast the next day, after a short encrispening in the toaster oven. I didn't put a fried egg on top, but I was tempted. That would be pretty perfect, especially with another big bed of greens.

The tomatoes were also at the farmer's market, incidentally, as were a vast array of heirloom tomato plants. I got two. Soon they will be in my garden. SOON.

Which alliums are popping up at your market? What are you making with them?

22 October 2012

Vegetarian baked beans

homemade vegetarian baked beans

It's raining! Rain in California! Fall is actually here! HOORAY!

This is clearly the best possible time of the year to make a gigantic pan of delicious, hearty, warming goodness. I'm talking about baked beans.

Baked beans are traditionally made with navy beans or similar small white beans, plus onion, bacon, and a molasses-heavy sauce that would probably be excellent on barbecue. (Mental note: make a batch of actual barbecue sauce soon.) But the real essence of baked beans is the bean itself, or maybe the bean plus molasses. So, since our household is half vegetarian, we took out all the meat components and added in some liquid smoke and lemon juice. The result was more than satisfactory.

These take hours upon hours to cook, so they are excellent to make on a grey weekend when all you want to do is putter around the house. Nothing is better than a bubbling pot when it's cold and damp out, right? Soak the beans the night before, boil them in the morning, bake them right after lunch, and you should be all set by dinnertime. Bonus: delicious baked bean fumes delicately wafting through the house all day!

Vegetarian baked beans
Based on Boston Baked Beans

2 cups dry white beans
bay leaf
an onion
3 tbsp molasses
1/2 cup ketchup
1/2 cup brown sugar
2 tsp salt
1 tsp pepper
1 tsp mustard powder
several good shakes of liquid smoke
juice of 1/2 lemon
butter/olive oil

Start the day before you want to eat by sorting and soaking about two cups of dry white beans. Leave them overnight, loosely covered. The next day, change out the water and simmer the beans with a bay leaf until tender. Depending on the age of your beans, this can take up to two hours. When done, drain your beans, reserving the broth. You can also cook your beans in advance and refrigerate them, or substitute canned beans.

When you're ready to make the beans, preheat your oven to 325F/165C.

Break out a dutch oven or other large, deep, oven-safe casserole dish. Chop up a large yellow onion. Fill the dutch oven with alternating layers of beans and onion, ending with beans.

homemade vegetarian baked beans

Next, make the sauce. In a pan, combine the molasses, ketchup, brown sugar, salt, pepper, mustard, liquid smoke, and lemon juice. Smoke seasoning is really potent, so be careful with it! Add a little at a time, and definitely don't drop the bottle.

Bring the pan of sauce to a boil, stir to dissolve any recalcitrant lumps of sugar, and pour it all over the beans. Then add enough of your bean broth to cover the beans entirely. (Freeze the leftover bean broth and use it in soups later.)

Dot the top of your bean dish with chunks of butter or a scattered drizzle of olive oil. Don't skip this--the fat in the oil or butter is going to carry the flavors of the sauce and onion to make the whole dish meld together. It's taking the place of the bacon fat in the original recipe.

Bake your beans, covered, for about two hours. Then take off the lid, check your liquid level, and continue to cook for another hour or two, or until the beans are amazing and delicious. It's done when you think it's done.

Hooray! Baked beans!

We had our baked beans over bowls of rice, but I would definitely be up for a biscuit and gravy or cornbread application. Hearty greens, either steamed or sauteed, would be perfect on the side.

What dishes do you love to make when it's dank and rainy out?

08 October 2012

Barley risotto with chicken sausage, zucchini, and mushrooms

barley risotto

After roasting my chicken the other day, I made chicken broth. This is super easy, if you've never done it. All you do is chuck your chicken trimmings and stripped bones into a stockpot, cover with lots of water, simmer for a couple hours, strain out the solids, put the pot in the fridge overnight, and skim off the solidified fat in the morning. Voila!

Most of the broth went immediately into the freezer for future application. When the freezer was full, I still had a few cups of broth left. Clearly, it was time for risotto.

I make my risottos with barley almost exclusively. It's cheaper, healthier, tastes very similar to standard arborio risotto, and is just as easy to make. Hooray for barley!

This risotto obviously has meat in it, but you can follow the same process with vegetable broth, olive oil, and your choice of vegetable additions, omit the cheese, and end up with an entirely vegan bowl of goodness.

Barley risotto with chicken sausage, zucchini, and mushrooms

onion
olive oil or butter
barley
dry white wine or dry vermouth
broth of your choice
precooked chicken sausage
mushrooms
zucchini
salt, pepper
parsley
parmesan or other grating cheese

Start by dicing an onion and softening it in olive oil at the bottom of a large saucepan.

While the onion is cooking, fill another pan with about three cups of broth and heat it to a gentle simmer. Chicken broth is standard for risotto, but vegetable broth works well too. You can also make the veg broth from scratch--it only takes about fifteen minutes start to finish. No problem.

barley risotto

When your onion is soft and lovely, add about a cup of barley to the pan. Stir it all up and let it toast with the onion and oil for a few minutes. Then pour in a cup of white wine or dry vermouth, stir, increase the heat a bit, and let simmer, stirring occasionally, until the barley has absorbed most of the liquid. I like using vermouth here because then you don't have to deal with an entire bottle of wine. It's cheaper, too. We're practically the only people I know to go through bottles of vermouth on a regular basis.

Now it's time to start the cycle of liquid additions. Get a ladle and add a cup or so of hot broth to your barley. Simmer, stirring occasionally, until the barley has absorbed all the broth. Then add another ladleful of broth and do it again. Repeat this until your barley is cooked through.

barley risotto

In between broth additions, chop up your sausage, mushrooms, and zucchini, in that order. Add the sausage and mushrooms to the pot of barley with your second broth addition, or when the barley is a little over halfway done. Add the zucchini only for the last three or four minutes of cooking, so it stays a bit firm and nice.

When your barley is done cooking--taste it and make sure--take your pan off the heat. Season with a little salt, plenty of freshly ground pepper, and a handful of chopped parsley. If you want cheese, grate up some parmesan or romano and stir it in.

barley risotto

Eat, adding more parsley and cheese to taste. Don't you feel better?

Hooray for warm, cozy fall food!

28 September 2012

Roast chicken; mashed potatoes

roast chicken with rosemary

It's fall. Okay, it's technically fall. That doesn't mean much here in NorCal--hey, we didn't really have a summer either!--so it's no surprise that the weather is still constantly 75F and sunny, 75F and sunny, 75F and sunny.

BORING. I want rain and clouds and wind! I certainly want to start wearing jackets and scarves and inhaling cool, crisp air and eating hot and homey fall foods. Well, I can at least have that last one.

So this week we made roasted chicken with thyme butter and garlic mashed potatoes, for one of the most classic fall dinners ever.

Since I am the only meat-eater in the house, we decided not to roast an entire chicken. Instead, we went to the butcher counter and got a bone-in and skin-on breast. This worked out admirably, especially considering our current lack of freezer space for leftover storage. You can use this same method to roast an entire chicken; just be sure to adjust the roasting time up.

Roast chicken with thyme butter and cherry tomatoes

bone-in skin-on chicken
butter
fresh thyme
salt, pepper
cherry tomatoes

Preheat your oven to 400F.

While the oven is heating, prep your chicken. Wash it, pat it dry with a paper towel, and trim off any unnecessary pieces. John was prepping our chicken, so he chopped off a bit of attached ribcage (too thin; would have burnt) and some extra fat. We saved the trimmings to make stock later, and you should too.

Strip a bunch of fresh thyme leaves off their stems. Use a fork to mix them with a chunk of softened butter. Then use your fingers to butter your chicken both under and over the skin. Really get in there and grease it up. If you want to, you can put a few branches of fresh thyme in the pan or under the skin too. Salt and pepper your chicken on both sides as well.

Roast in a baking dish of your choice, basting occasionally.

We weren't sure how long to roast our chicken because it wasn't an entire bird. So instead of doing the intelligent thing and looking up how many minutes a bird generally cooks per pound, we just stuck it in the oven and kept an eye on it. It took about 45 minutes to cook completely, with golden brown skin and clear juices when tested with a knife.

In the last ten minutes or so of cooking, add as many cherry tomatoes as you like to the roasting pan. Fifteen or twenty per person is a reasonable amount; more is probably better. They'll collapse a bit into the rendered chicken fat and become a delicious acidic mess.

When your chicken is done, take it out of the oven and let it rest for at least a good five to ten minutes before carving. This lets the juices absorb back into the meat, so the finished product isn't dry.

Hooray! Chicken!

Be sure to save the bones for stock-making.

roast chicken with rosemary, mashed potatoes, and cherry tomatoes

Garlic mashed potatoes

boiling potatoes
garlic
olive oil/butter
salt, pepper
milk

Put a big pot of water on to boil while you scrub, peel, and chunk as many potatoes as you want to eat. When the water comes to a boil, add your potatoes. Give it a minute to boil again before you lid the pan, turn down the heat, and simmer. Let cook until the potatoes are cooked through. This took about forty minutes for us.

In the last fifteen minutes or so of potato cooking, warm some olive oil or butter in a small pan. Add a bunch of smashed, peeled garlic cloves. Cook very slowly over the lowest heat, letting the garlic soften and steep in the oil.

When your potatoes are done, drain them well. Add the olive oil and garlic mixture to the potatoes, along with salt and pepper to taste and a dash of milk. Mash everything together to your liking.

To serve, deposit a whack of mashed potatoes on your plate, and a piece of chicken on the side. Cover the potatoes with a couple spoonfuls of roasted tomatoes. Have some salad on the side. Voila!

What classic fall dinners are you eating?

15 December 2011

Cabbage, sausage, onion, apple

Cabbage, sausage, onion, apple recipePeasant food is the best food. Let's make some!

I actually had this mix of onions, apples, precooked chicken sausage, and cabbage quite awhile ago. However, it's totally appropriate to the dank days of winter, so let's talk about it now.

While we cooked the aromatics first, it's also totally possible to start out by cooking the sausage. In that case, I'd just cook to brown and render off some fat; that way you can take out the meat, sauté the vegetables in the rendered fat, and add the browned meat back in near the end. Since we were using chicken sausage, though, we knew there wasn't going to be an overabundance of fat to render off. If you want to use pork sausage, or substitute some bacon/etc. in, I'd definitely start with the meat and cook the veg in the rendered fat.

For those of you who don't eat meat, I'm sure an appropriately spiced seitan sausage culled from your freezer stash would also work well.

Cabbage, sausage, onion, apple

olive oil
onion
apple
precooked sausage/seitan/etc. of your choosing
green cabbage
salt, pepper

Cut your onion in half and slice each half into long strips. Sauté the onion in a slug of oil while you slice the apple into 1/4 inch pieces. When the onion has softened, add the apple and cook together, stirring occasionally, until the apples start to turn golden brown. Cut up your sausage of choice and shred a big chunk of cabbage while you're waiting.

At this point, scrape the apples and onions to one side of the pan. Put a little dab of oil in the free space (if you're using a lean meat or seitan sausage), and add your sausage. Cook until browned, then flip and brown the other side.

When everything is brown and tasty, mix up all the business in the pan, season with salt and pepper, and scrape everything to the side again. Add your shredded cabbage to the various oil and fat left in the pan; sauté with salt and some pepper. I wilted my cabbage for a little over five minutes, so it still had some bite. If you want to go for thoroughly wilted cabbage, be my guest. In hindsight, I wish we'd had a little caraway seed to add. If you have some, you might want to try it.

When the cabbage is done to your liking, adjust the seasonings and serve. I used the cabbage as a bed for the sausage/onion/apple mixture, which worked out well. It would also be fine to mix everything up in the pan and serve it like that.

This business would be great with a bunch of buttered toast or a whack of mashed potatoes. Hell, if you have some leftover potatoes, go ahead and add them to the pan! You might as well absorb every last bit of tasty onion-apple-sausage fat, right?

08 December 2011

It's a gratin!

baked mac and cheeseSo after our sojourn at the cabin with a kitchen stocked in Le Creuset I have to say our desire for enameled cast iron cookware went up pretty far and pretty fast. John and I therefore bought ourselves an early christmas present: a lovely blue gratin dish.

Clearly, we had to christen the pan with a big batch of baked mac & cheese.

We'd normally make the sauce for mac and cheese in a regular saucepan. This time, we made it right in the gratin dish, since cast iron works for both oven and stovetop.

mac and cheese gratinAfter we drained the pasta, we dumped it into the gratin with the sauce, stirred it up, topped it with bread crumbs and grated cheese, and stuck it in the oven. Yay, fewer dishes to wash!

Thirty minutes later, we were blissfully eating plates of mac & cheese with the crispiest crust imaginable. Hooray!

I am well satisfied with our lot in life.

21 March 2011

A fine plate of food: fagioli cake and chard gratin

Like many people, John and I have a set of different staple foods we can throw together at a moment's notice. One of the top contenders is pasta fagioli: a pureed tomato/bean/various vegetable sauce mixed with pasta and dusted with parsley, pepper, and/or grated cheese. It takes very little time (especially with precooked or canned beans), costs next to nothing, provides abundant nutrients, and puts you right to warm, blissful sleep.

Leftover fagioli is especially excellent. When you have leftover fagioli, you can put it in a pan and make it into a huge, lovely, crusty-edged, creamy-middled pasta cake. You then win dinner.

Fagioli cake

Warm up a wide frying pan, preferably nonstick or cast iron. If your leftover sauce and pasta are not mixed, mix them together thoroughly. When the pan is nice and hot, add a slug of olive oil. Swirl it around to coat the surface. Add your fagioli mixture to the hot pan. If you have only a little, you may want to make small individual cakes; I had plenty, so I made one gargantuan cake.

Cook until browned on one side, shaking the pan occasionally to deter sticking. Next, flip your cakes over and brown their other sides. With small cakes, this is easy; with a large cake, you may want to follow my lead and just flip about a quarter of the cake at once. This means the finished product won't be a solid cake, but really, who cares? It will still be browned and crispy and delicious. I suppose you could experiment with the Spanish tortilla-flipping technique, but I have to tell you--I don't think that would work very well. Maybe mixing an egg or some other binding agent in with your fagioli/pasta business would help there.

Once the second side of each fagioli cake is browned, you are done!

Ok. We had fagioli, but we wanted some more vegetables. Fortunately, lots of vegetables are pretty easy to come by at our house. I had a big bunch of chard in the crisper, and this baked spinach recipe from Smitten Kitchen in mind. I'm very happy to report that chard can definitely sub for spinach here; the result was excellent, and tasted nothing like any chard I've made before. New ways to eat vegetables! Hooray!

Even with the chard sub, I adapted Deb's method (initially from Julia Child; reputable!) only the slightest amount. I wanted to use the chard stems, so I diced them finely and cooked them for about five minutes before adding the chopped leaves. I didn't bother shocking the cooked chard, as I didn't care about preserving its color. I used vegetable stock instead of beef (who has beef stock lying around? Not me). I used parmesan instead of gruyere, and finely chopped a somewhat fresh piece of bread instead of using the very dry crumbs required.

So that's what "only the slightest amount" of change looks like at our house.

When I was done cooking, the stovetop looked like this:

It was 9:07. We were starving. I shoveled fagioli and chard gratin onto both our plates, and split a cara cara orange in half for pseudo-dessert.

The result was completely excellent, and we ate it all. I mean that literally. We ate all the fagioli. We ate all the chard. We ate every single edible thing on the stove, and then ate half an orange apiece besides.

It was so good, and we were so full.

22 January 2011

Chicken corn chowder of great excellence

So I finally got enough distance from the meat overload of several months ago to cook with our freezer chicken and its broth. Our refrigerator is actually pretty bare right now, since I cleaned it out and neglected to go shopping afterward. The freezer raid was therefore at least a marginal necessity.

Things we had:
- chicken
- corn
- potatoes (not in freezer)

It was clearly time for some serious chowder.

This is a standard soup, and so it is very easy and fairly fast. And what's cheaper than using the broth you coaxed from the carcass of a roasted chicken and froze months ago?

Chicken corn awesome chowder (or I guess soup as I didn't actually use milk or cream. FINE.)

olive oil/butter
onion
a hot pepper
potatoes
broth (veg Or chicken; what do you have?)
cooked chicken
corn
paprika, mustard powder (or dijon mustard), salt, pepper
garnish: cilantro/parsley, labneh/sour cream/other dairy/etc.

Do what you'd normally do for soup: chop up an onion and hot pepper of your choosing, and soften them in olive oil, butter, or a combination. I believe the pepper I used was of the long red cayenne persuasion, but most hot peppers should work fine. If you have access to some poblanos, by all means roast them, flake off their skins, chop them up, and add them; roasted poblano and chicken LOVE each other.

If you want to add things like garlic, carrots, or celery, go right ahead. It's all good. Let them soften while you scrub and dice some good boiling potatoes.

When things are soft and fragrant, add the potatoes, plus a good few shakes of paprika and a little mustard powder. Herbs in the marjoram/oregano family might be good here too. Toss everything together and cook for a few minutes more, stirring intermittently; this will give the potatoes a chance to absorb some of the excellent onion-pepper oil and to develop a bit of crust.

After about five minutes, add in several cups of broth, a couple handfuls of chopped cooked chicken, and another couple handfuls of frozen corn. I used chicken broth, since I had a big chunk of it in the freezer, but veg broth is also good here; see the big broth FAQ to produce some. I wouldn't use any stronger meat broths, such as beef or lamb, as those would totally overwhelm the finished soup. Other vegetable broths (mushroom, potato, corncob?) should be fine.

Anyway. Salt the soup, bring it to a boil, lower the heat, and simmer, covered, for at least ten or fifteen more minutes. Then take off the lid and check the soup texture; if it's too watery, boil off some liquid; if it's too thick, add some water or some extra broth.

When the soup is your preferred texture, add pepper, taste for seasoning, and serve.

I had my first bowl of this with a lot of chopped cilantro and some sriracha sauce, and it was excellent.

Later, I decided that I wanted a bowl that went along with a more stringent version of the "chowder" title, and contained dairy. I added a bit of milk, but the finished product was just not creamy enough for me. Hmm. Ok, what's in the fridge? Half a block of cream cheese. Great! So I chunked off a slice of cheese, dumped it in the pot of soup, and heated it just enough to melt.

The resulting chowder was so rich that it really needed all the chopped parsley in the house. I think I was full for the entire duration of the day. Oh man. It was awesome.

27 August 2010

Invalid food: soba in broth

So John was sick, and now I am not feeling so great either. Clearly it is time for an abundance of invalid food.

Soba in broth

veg broth (water; vegetables)
soy sauce
rice wine vinegar
mirin (if you have any)
sriracha or other hot chili sauce
soba noodles
green onion
maybe some cilantro, mint, or lemon/lime peel

First, make the broth. I was fortunate enough to have frozen some broth previously, so I just used that. However, making vegetable broth is easy enough even when you don't want to stand up. Just fill a pot with vegetable scraps, cover with water, and let simmer for about 20 minutes. Good vegetables to use: onion, carrot, celery, mushroom, potato, garlic, non-cabbage greens. Use the peels and roots along with everything else--just make sure you wash them first. After the time is up, strain your broth, pressing the veg with the back of a spoon to make sure you get all the flavor out. That is it. You now have a hot pan of exciting, effortless homemade veg broth.

Now is the time to cook your soba noodles. Boil a pot of water, add soba, and cook until done to your taste.

While the noodles are cooking, season your broth sparingly with soy sauce, rice wine vinegar, mirin, and sriracha sauce. Be especially careful with the soy sauce and vinegar, as one is super salty and the other is super pungent. Taste and tweak seasonings until you're happy. Keep warm on a low burner until your noodles are cooked.

Drain the noodles, throw them into your hot spicy broth, add a handful of sliced green onion, and eat it.

John had his massive bowl of soup and soba with some steamed broccoli. I just threw a bunch of florets into the leftover simmering soba water, put on the lid, and let cook for maybe three or four minutes. Voila: lovely broccoli.

We also had sliced nectarine, which you know how to make. 1. Get nectarine. 2. Slice. 3. Eat.

When you're all done with your invalid food, lie pitifully in bed reading books and watching videos on your laptop until you feel better.

16 February 2010

I heart cheesy goo: real mac and cheese

I've been feeling low-level crappy for a couple weeks. My taste buds got kind of screwed up, and not a lot of food seemed even a little appetizing. So one day I went out to the store to get a pint of half and half, a bag of flour, and a chunk of sharp cheddar to make the only dinner that sounded even remotely good.

Real actual macaroni and cheese! Here is my method.

Oh man, how awesome is real mac and cheese? I don't know about you guys, but in our house growing up, boxed mac and cheese mixes were considered pretty much an abomination. Real sauce mornay mac and cheese is my heritage, so fortunately it's what I want when I feel terrible and whiny. Of course, then I have to stand up and cook it, but I can deal with that.

And ok, I still don't feel all that great, but at least in the meantime I got to eat this.

05 February 2010

Oats for dessert

Man, why doesn't everyone eat oats like this? Oats for dessert are almost better than oats for breakfast, in a creamy rice puddingy sort of way. Not that I've, uh, actually ever even had rice pudding. Maybe I should rectify that, since apparently the oats remind me so strongly of said rice pudding.

Oats for dessert
(i.e. oatmeal with yogurt and fruit)

rolled oats
water
optional butter
non-optional salt
optional yogurt
a selection of fruit

Ok. First, make oatmeal with water and oats. I haven't measured anything for oatmeal in such a long time that I have no idea what proportions to use. Just make sure the water covers the oats by about a finger width, add a pinch of salt, and simmer it together, stirring occasionally, until the oats are creamy and delicious. Then if you want you can stir in a pat of butter. Oats!

Put the oats in the bowl and add all kinds of delicious business. I added a lot of plain yogurt, the few remaining blueberries in the house (I have a severe craving for berries, which seems interesting since it's serious winter), and a segmented clementine. You can add fresh/dried fruit, nuts, seeds, honey, maple syrup, jam, cinnamon, or whatever else you want to make the oats into delicious dessert. I would actually recommend against the citrus with yogurt, since the tangy dairy and acid citrus don't play super well together, but practically anything else you can think of would be great.

Eat it with some chamomile tea and get in bed. Better yet, eat it with champagne and get in bed.

23 June 2009

Asparagus risotto

I don't know, you guys. It's been so busy around here for weeks and weeks. In the past month we've had one weekend without either travel or parental houseguests. Summer is busy season at work, too, so no relief on any side. Mostly I am doing things like "warming up leftover takeout palak paneer in the toaster oven."

On the other hand, we also have the awesomeness that is our CSA. They're all about giving us huge bunches of asparagus right now. Asparagus! Hooray! I made practically a week's worth of food out of our first bunch, in the form of exciting risotto. I ate it for dinner, then had the leftovers (with supplements) for three consecutive work lunches. I feel very efficient.

However, the most exciting element wasn't the massive quantity, or the greatness of the asparagus. It was the grain content: equal parts arborio rice and barley. I only had a little actual arborio, so (based on a couple mentions of barley risotto) I decided to experiment. It completely paid off. The result is practically indistinguishable from straight arborio risotto. You know, except for the part where it's cheaper and healthier. WIN.

Asparagus risotto

butter/olive oil
onion
veg broth/water and scraps
arborio rice
barley
dry white wine or vermouth
a bunch of asparagus
salt, pepper
fresh parsley
parmesan/good grating cheese, if you want it

Warm some olive oil in a deep pot; chop up an onion and soften it in the oil. In the meantime, add your onion skin and root, plus any other reasonable stockpile you have lying around, into a second pot, cover with water and a lid, and simmer to make broth. If you have actual broth in the freezer, you can use that too, as long as you get it good and hot first. Hot broth is the key to making a risotto cook in about a half hour, as opposed to NEVER.

When your onion is soft, add maybe 3/4 cup each arborio rice and barley to the pan. Cover with a glassful of dry white wine or vermouth, then cook, stirring, over medium-high heat. After a few minutes, the rice will absorb all the wine. Transfer a cup or so of broth from its pan to the rice pan, making sure not to catch any accidental onion skins, and keep cooking, stirring often. Repeat, adding broth as it gets absorbed, for about twenty minutes, or until your grain is almost completely cooked through.

Trim your asparagus and cut the remaining stems into inch-long pieces. Toss them into the risotto and cook for maybe 3-5 more minutes, or until the asparagus is done.

Salt and pepper the whole business. Stir in a whole bunch of chopped fresh parsley. If you want cheese, grate it and stir it in as well.

Now put it in a bowl, throw any loose bits of parsley lying around over it, and eat it!

RISOTTO.