Showing posts with label nuts. Show all posts
11 August 2014
Spinach salad with lemon cucumber, toasted almonds, and summer cherries
Well, we are still essentially buried under a massive amount of fresh CSA veg at all times.
This means salads. Lots of salads. Salads at dinner, yes; salads at lunch, yes. Salads at breakfast? Also yes.
Breakfast salads are one of my favorite things. This stems from our year and a half living in Brooklyn, during which we tried our best to eat at every restaurant possible, and consequently ended up eating a lot of brunch. I mean, we would have ended up eating lots of brunch anyway, but Brooklyn is one of those towns in which brunch is practically an institution. So we ate lots of brunch at lots of different places, and the main thing those places had in common was salad. Every time we ate brunch anywhere even the smallest step up from the classic diner, we discovered that our orders came with a handful of mesclun and shredded carrot, tossed with vinaigrette and deposited next to the egg of our choice.
And now I don't really want to eat breakfast without some sort of serious vegetable content.
So. Salad for breakfast?
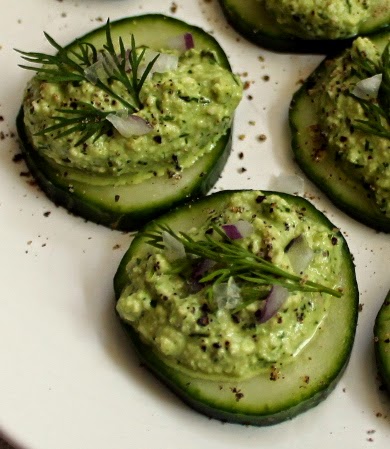
We received both a bag of baby spinach and a few lemon cucumbers in the last CSA box. Clearly, those were the basis for an excellent salad.
Lemon cucumber is not a variety I use much, mostly because it's not the best choice for pickling. But when I'm not making pickles, I find its mild flavor and subtle crunch to be delicious in salads and sandwiches.
The cherries came into play after we found bags of them on sale for $2 per pound. You can't say no to that. And once you have cherries, you have to have a handful of crunchy, rich almonds as well.
Boom. Salad.
Spinach salad with lemon cucumber, toasted almonds, and summer cherries
baby spinach
lemon cucumber
toasted almonds
sweet cherries
olive oil
salt, pepper
lemon juice
Arrange a few handfuls of spinach on each salad plate. Scatter a few drops of olive oil over them.
Trim your lemon cucumber, halve it, and slice it into thin slices. Arrange half a cucumber's worth of slices over each salad.
Roughly chop a handful of almonds and scatter them over each salad.
Pit your cherries, either using a cherry pitter or the paperclip method. Cut them in half. Strew a generous handful of cherry halves over each salad.
Dress your salads with a drizzle of olive oil, a squeeze of lemon juice, and some salt and pepper. Done.
While these salads are excellent alongside a plate of traditional breakfast eggs and toast, they would also clearly be fine additions to the lunch or dinner table. Eat them with a huge sandwich, a seared piece of halibut and a side of green beans, a bowlful of rice and curry. It's all good.
What is your favorite summertime salad?
Labels:
easy,
fast,
fruit,
nuts,
recipes,
salads,
vegan,
vegetables,
vegetarian
14 July 2014
Nocino: Italian black walnut liqueur
Green black walnuts are clustering in the trees and staining the sidewalks in our neighborhood, so I foraged a few nice specimens and brought them home to make a batch of nocino.
What is nocino, you ask? Well. Nocino is an Italian black walnut liqueur flavored with lemon zest and cinnamon. It's traditionally made at the very end of June, since that's when the walnuts are fully formed but still green enough that you can easily chop them up. But for those of you who live in a climate a little less balmy than that of Italy, I'm guessing now is the perfect time to go find some green walnuts and start your own batch.
I still have a huge selection of homemade schnappses and liqueurs hanging around our kitchen cupboards, but I couldn't resist adding at least a tiny batch of authentic nocino. So here's what I'm doing to make one pint jar's worth of nocino this year. The results are going to be small, but so worth it.
Caution: walnuts stain! Be sure to wash your cutting board and knife immediately after chopping your walnuts, or you will have some serious fluorescent green to deal with in the future.
Small batch homemade nocino
5-6 unripe black walnuts, quartered (to fill ~2/3 pint jar)
zest of 1/2 lemon
1-inch piece cinnamon stick
about half a 750 ml bottle of vodka
mason jar with lid
simple syrup to taste
Put your walnuts, lemon zest, and cinnamon stick into your jar. Cover with vodka up to the rim of the jar. Lid the jar, label it, and put it into a dark cupboard to steep.
Agitate the jar every few days for the first week or so of steeping, and once every week or two after that. The walnuts will oxidize and the vodka will turn disturbingly dark within a few days. Don't be alarmed! This is normal! You'll want to take off the lid every once in a while to introduce fresh oxygen and promote the oxidation process. As you continue steeping, the color will mellow to a rich dark walnut brown. So pretty.
Steeping time varies from recipe to recipe. I'd recommend you steep your nocino for at least a month, and up to three months if you can stand the wait. Then, when you're ready to bottle, strain out all the solids through a fine sieve or coffee filter. You may need a second or third straining to remove all the organic material.
Flavor your nocino with a simple syrup made from 2 parts sugar to 1 part water. I'd suggest starting with about a tablespoon of simple syrup per cup of liqueur. Then taste and consider whether you want to add more syrup. Pour your final concoction into the jar or bottle of your choice.
Put your finished nocino in the liquor cupboard to age for at least a few weeks before you drink it. The last time I made black walnut schnapps (a very similar liqueur, just omitting the lemon zest and cinnamon), I aged it for a full year before drinking. That produced an excellent liqueur! But if you are impatient, you are definitely free to taste your nocino and drink it when you think it's sufficiently delicious.
How should you drink nocino? Well, you can certainly have it plain as a totally different and delightful aperitif, but I suggest you experiment with some cocktail recipes, such as Savvy Housekeeping's black walnut manhattan. SO good.
Are you making any interesting infusions this summer?
23 May 2014
Cashew cheese with dill and red onion
So one thing about making egg salad is that afterward you still have 3/4 of a bunch of fresh dill to eat. This is not a huge problem for me, since I love dill, but it does get a little interesting if you're trying to figure out how to eat ALL of it in a short period of time.
I mixed some dill with cottage cheese and pepper and ate it on toast. I...uh, that's actually all I had done by this point. So when I unearthed a container of cashews from the back of the freezer, they seemed like the best idea ever. Cashew cheese with plenty of fresh spring herbs, coming up!
Cashew cheese is one of my favorite spreads ever. It's super versatile and works well with any number of flavors. This time I threw in plenty of dill and some diced red onion for a delightful fresh and herbal nut cheese. So good!
This makes a small batch of about 2/3 cup of cashew cheese, but you can easily double or triple it for a full party tray of Memorial Day tidbits. No problem!
Cashew cheese with dill and red onion
1/2 cup raw cashews soaked in water for 1+ hours & drained
1/2 cup chopped fresh dill, loosely packed
additional chopped fresh parsley if desired
2-3 tbsp chopped red onion
1/8-1/4 cup water
salt, pepper
squeeze of lemon juice
cucumber slices and extra dill & onion to serve
Start by soaking your cashews. Simply cover them with twice their depth of water and let them sit for an hour or more. I actually let mine go for a couple days in the refrigerator, but that is not necessary at all. In fact, if you soak cashews too long, they can start to turn purple! This is evidently their previously dried juice getting rehydrated, so it's not a cause for alarm, but it can be a little disconcerting.
When you're ready to make your cashew cheese, drain your cashews. In a blender or food processor, combine your herbs, onion, 1/8 cup water, salt, pepper, lemon juice, and finally the cashews. It's a good idea to put the heaviest things (in this case the nuts) on top, for a smooth blending experience.
Blend until well combined. If you have a hard time getting everything to combine well, add a bit more water. I ended up using the full 1/4 cup in my standard blender, but if you're using a high-powered blender or food processor, you may not need to do that.
Taste and correct the seasoning, and you're done. Hooray!
Once you have your batch of cheese ready, it's time to use it. I decided to have mine with cucumber.
Top each cucumber slice with a spoonful of cashew cheese. Garnish with an extra frond of dill, some finely chopped red onion, and a grind or two of pepper. Voila! Fill up a few plates, pour a few glasses of sauvignon blanc, and you're totally ready to party.
Since I was eating my cashew cheese by myself, I did not make a gigantic party tray. Instead, I refrigerated my leftovers and later ate them with a lot of pretzel sticks. So, you know, that is a less fancy but similarly delicious alternative.
Hooray!
What delights are you whipping up for the holiday weekend?
Labels:
condiments,
easy,
fast,
nuts,
raw,
recipes,
snacks,
vegan,
vegetarian
26 January 2014
Peanut butter, honey, and banana rice cakes with toasted sesame seeds and crushed almonds
Happy 7th blogiversary to me!
Instead of baking a cake, I had lunch. Seems appropriate.
This is the kind of food I make when I need to eat immediately. A lot of my food fits into that category. It's sort of the theme of the blog, actually. Do you want to eat a plate of something good and interesting, with limited fuss factor? Here you go.
The best thing about these guys is that they're low-effort but high-impact. How basic is a peanut butter and honey sandwich? I ate hundreds of them when I was growing up, both with banana slices and plain. The ingredients are cheap and easily available, and putting them together takes under five minutes. But with a few tweaks to bump up the texture and flavor, you get a far superior end product.
First: rice cakes. They still exist, for one thing, and they're a perfect base for a sandwich filled with peanut butter and honey. You really need a robust crunch to stand up to that soft, sticky, oozing center. Second: just-ripe banana. Fresh fruit with some solid tooth adds a second textural element and a different subtle sweetness. Third: nuts and seeds. These can not only amp up the crunch factor, but add some little pinpoints of heat and aroma, especially if they've just been toasted. The results are crispy, rich, sweet, and savory, and fill you with energy for a surprisingly long time. Yeah!
It's super easy to switch this up to use what you have in the house. Swap out rice cakes for crackers or crisp hot toast, or make a flatbread wrap and crisp the whole thing quickly in the toaster oven. Use sunflower or almond butter in place of the peanut butter. Molasses, agave, or a little swirl of apricot jam (you know, if you're a pb&j person) can work well instead of honey. Apple or pear sliced thinly can sub for the banana, and flaked coconut, chopped dried fruit, or any kind of nut or seed can be a good garnish.
The pantry is your oyster.
Peanut butter, honey, and banana rice cakes with toasted sesame seeds and crushed almonds
rice cakes
peanut butter
honey
banana
sesame seeds
toasted almonds
Start by spreading peanut butter onto a couple of rice cakes. Add a swirl of honey to each.
I like to mix my honey and peanut butter up with the back of a spoon, so I don't get any bites with way too much sugar. It's surprising how much such a simple step improves the taste. Also, it looks pretty.
Slice up a banana and arrange the slices on top of your peanut butter-honey layer.
Now it's time for toppings. I decided to have one rice cake with sesame seeds and one with some finely chopped almonds.
To toast your sesame seeds, place a handful of them in a small dry frying pan. Heat over medium, swirling the pan frequently, for up to five minutes, or until the seeds are just beginning to turn golden brown and smell fragrant and tasty. Be sure to keep an eye on them, since seeds can burn at the drop of a hat. When your sesame seeds are toasted to your liking, remove them from the heat immediately.
Chop a few almonds as finely as you like. Three or four almonds will be plenty for some subtle contrast. My almonds were already roasted, so I didn't need to do anything but chop them up. If you're using raw almonds, you may want to toast them along with your sesame seeds.
Sprinkle your sesame seeds and almond bits over your rice cakes, and you're done.
Eat with the crispy raw fruit or vegetable of your choice. I cut up a fuji apple, sprinkled it with pepper, and had it on the side for even more fruit action.
Happy sandwiching.
What are you making lately for quick yet delicious lunches?
Labels:
cheap,
easy,
fast,
grains,
nuts,
potentially vegan,
recipes,
sandwiches,
snacks,
vegetarian
03 September 2013
What to do with almond pulp
Have you ever made a big batch of nut milk, only to be left wondering what to do with the leftover pulp? Well, wonder no more!
A couple months ago, when I made up a batch of almond milk to drink in cold-brewed coffee, I was left with a substantial pile of pulp. I wasn't sure what to do with it, so I froze it in convenient 1-tbsp cube form for future application. This turned out to be the best possible idea. Now I get to throw delicious almond pulp into various recipes at my leisure!
Most of the time, these guys make an appearance at breakfast. I think my favorite way to use them is in smoothies. They provide great texture and a bit of protein while eliminating the need to use the ever-present frozen banana: a win on all counts.
This time, I broke out a few of the overabundant nectarines in our crisper, and pulled both almond pulp and flaxseed meal out of the freezer. With a whack of plain yogurt, everything combined to make
Nectarine smoothie with frozen almond pulp, yogurt, & flaxseed meal
2-3 nectarines or peaches
3 tbsp frozen almond pulp
1 tbsp flaxseed meal
several large spoonfuls plain yogurt/your choice of vegan sub
Pit your nectarines and chop them roughly. Add to a blender with your cubes of frozen almond pulp, flaxseed meal, and yogurt.
If you want to add anything else, such as more fruit or greens, now is the time. I think a big handful of mint would go exceptionally well with this combination. Or maybe some shredded coconut...
Blend everything together thoroughly, pour into a glass of your choice, and drink with gusto. Hooray, smoothie!
Okay. So what if you want a more substantial breakfast? Almond pulp can definitely make an appearance there too. I mean, I wouldn't try mixing them into scrambled eggs--that is, unless I were already doing some sort of fried rice presentation. Actually, that might be interesting. Mental note: try more obviously savory things with almond pulp. Anyway, since almond pulp goes beautifully with grains, why not throw a couple cubes into a pan of oatmeal?
In this case, your pulp doesn't need to be frozen (although it can be--it'll just defrost in the pan in that case), so it's an excellent breakfast to make and eat along with your fresh almond milk latte.
Almond pulp & flaxseed oatmeal with bananas, yogurt, dried apricots, & sesame seeds
3 big handfuls rolled oats
2-3 tbsp almond pulp
2 tsp flaxseed meal
large pinch salt
water to cover
fruit, yogurt, & seeds to taste
I never measure anything when making oatmeal, so this is all estimated.
Put your rolled oats, almond pulp, and flaxseed meal into a small saucepan. Season with a big pinch or two of salt. Add water to cover by about a finger's width.
Cook over medium-high heat, stirring occasionally, until your oats are done to your taste. You may need to add a bit more water if you prefer a thinner oatmeal. I like mine pretty thick, personally.
Put your finished oatmeal in a bowl and top with your choice of yogurt, fruit, seeds, and nuts. I really like dried apricots and toasted sesame seeds in a bowl of oatmeal, but go ahead and add whatever sounds good to you.
Eat, with almond milk latte optional. Yay, breakfast!
What do you guys do with the pulp left over from making nut milk? I'm thinking I need to branch out into using it in baked goods pretty soon.
12 June 2013
Giant tofu stirfry with mixed vegetables and peanut butter
A little while ago I had a delightful noontime visit from my friend Chrissy, who had driven over the mountain from Santa Cruz to go to multiple interviews in one day. YIKES. Clearly, she needed some relaxing downtime in the form of a delicious lunch she didn't have to think about at all. So I broke out the biggest frying pan I have, turned on the rice cooker, and turned out a huge batch of vegan tofu stir-fry stuffed with shredded cabbage and carrot, nice chunks of broccoli, and sweet red bell pepper. Hooray!
I used peanut oil because it has a high smoke point and I like the flavor it adds to the dish. If you're serving someone with a nut allergy, you can simply switch out the peanut oil for vegetable oil and eliminate the peanut butter. Something like tahini or sunflower seed butter might be a good substitute, depending on the specific allergy. But this is also great with no nut content whatever. No worries.
Giant tofu stirfry with mixed vegetables and peanut
firm tofu
peanut oil/veg oil
soy sauce
sriracha sauce
sesame oil
onion
garlic
fresh ginger
carrot
broccoli
red pepper
cabbage
all the other veg in the house
peanut butter
rice wine vinegar
Start in advance by pressing your tofu. Slice the tofu in half horizontally, keeping both pieces as even as possible, and sandwich them between two cutting boards. Weight the whole business down with a pot full of water or something similarly heavy, and let sit for an hour or so. I like to put a towel under one end of the bottom cutting board and hang the other end over the lip of the sink, so all the liquid drains into the sink itself.
When you're ready to cook, slice your tofu into 1-inch cubes. Brush on both sides with a sprinkling of soy sauce, sriracha, and sesame oil. Heat a frying pan to medium-high, add a few dabs of peanut oil, and rotate to coat. Then slide in all your tofu. Fry, tossing occasionally, until your tofu is golden brown and delightful on all sides.
While your tofu is cooking, slice up all your aromatics and vegetables. You can use practically any veg you have in the house for a stir-fry of this nature. I used everything in the ingredient list; things like bok choy, mushrooms, or green pepper would be great additions as well.
When your tofu is done, tip it out of the pan and set it aside. Add another dab of peanut oil and tip in the onions. Cook until golden, stirring occasionally. Add the garlic and ginger and cook for another few minutes. Then start gradually adding in your main vegetables, starting with those that take longer to cook (broccoli, carrot) and ending with those that don't take so long (cabbage, red pepper). Season the pan with soy sauce and sriracha (and powdered ginger, if you don't have fresh) with your first vegetable addition.
When all of your vegetables are tender, add a big spoonful of peanut butter to the pan, along with a bit more soy sauce and sriracha as needed. You might want to add a little bit of water to help melt the peanut butter as well. Add your cooked tofu and toss together over slightly lowered heat until the peanut butter has melted and coated everything and the tofu is hot through. When everything is ready, take the pan off the heat and stir in a splash of rice wine vinegar.
Serve over rice or your choice of noodle. Udon would clearly be pretty great. I think I'd make a spicy peanut-soy sauce separately instead of pouring small bits of everything right into the pan in that case, though.
We ate our stirfry over long-grain brown rice, and then Chrissy went off, full & happy, to her next appointment. Such a satisfying lunch.
What kind of dishes do you love to serve your friends?
Labels:
cheap,
easy,
fast,
looks a mess; is delicious,
nuts,
recipes,
tofu,
vegan,
vegetables,
vegetarian
28 April 2013
Tilapia with smoked almond crust
Ok, y'all. I am back on the wagon. By "back on the wagon," I mean I am writing things. And yes, I am allowed to use the word "y'all" in good health & good conscience. I lived in North Carolina for a whole year!
I am also glad to hear that my MFA is standing me in good stead even 12 years after the fact. Thanks, guys.
So. Let's talk about nuts.
Every Sunday on my trip through our local farmer's market I make my way to the far back corner. That's where the almonds are.
I'm sure by now I've mentioned the amazing array of almonds at the farmer's market. There have to be at least 30 different spice mixtures. Cinnamon, toffee, sesame, citrus; cheddar, jalapeno, applewood, hickory. They're all out for the sampling, and the sample strategy works, because I regularly come home with a $6 container of fancy luxury almonds when I could totally get some ordinary roasted ones from the supermarket bulk bins. Still. These are better.
My favorite are all smoked. This time I got applewood.
They're delicious on their own, but they're even more delicious with something else.
Let's make some smoked almond-crusted whitefish, okay?
Smoked almonds! Beautiful white fish! Ten minutes of cooking! What's not to love?
Seared tilapia with smoked almond crust
smoked or roasted almonds
flour
salt, pepper
tilapia or other whitefish filet
butter
Finely chop a large handful of almonds per fish filet. You can use a food processor if you want to and have one, but otherwise, a knife will be fine.
On a shallow plate, mix your chopped nuts with a tablespoon of flour and a sprinkling of salt and pepper.
Wash and pat dry your filet of fish. Dip it into the dish of chopped nuts, pressing gently to coat. Turn it over and do the same to the other side.
Sear your fish in a hot frying pan with a pat of butter. The timing will depend on the filet's thickness. Mine took about three minutes per side. When the first side is cooked and the nuts are beginning to turn dark brown, carefully turn it over with a spatula.
Sear the other side until the fish is cooked through. Plate. Melt another pat of butter in the hot pan and pour it over your finished fish, if you like.
Eat your fish with a side salad or some sort of serious green vegetable of your choice. Lemon is not really necessary with nuts, but it can be delicious. It's up to you.
I am ok. How are you guys doing?
19 March 2013
Spicy caramel corn with maple, almond, and sesame
We love popcorn. It's easy, fast, and can take on any spicing combination you throw at it. You can make it any time, on the slightest of provocation, and end up with a gigantic steaming bowl of fresh snacky bitlets. Best of all, it's cheap.
That is, it's cheap if you do it right.
Prepackaged microwave popcorn is not only a ripoff, it is DISGUSTING. Do you want your house to reek as much as the office kitchen does after some misguided person makes a bag of fake-buttery microwave popcorn for a midafternoon snack? No. No, you do not. The solution: plain popcorn.
Plain popcorn is easily available in the grocery store. Most of the time you can find bags right next to the microwave popcorn, but if your store has bulk bins, make sure to check them out too. I tend to buy popcorn in bulk and decant into a jar, so there's no danger of loose popcorn spilling from a ripped bag.
So the other night we had just finished dinner but wanted a little extra something. That something turned out to be this maple-coated caramel corn with lots of crunchy sesame seeds. Hey, popcorn is not only an instant snack--it's an instant dessert too! Perfect.
This caramel corn is easiest to make if you have more than one person in the kitchen, so one person can shake the pan of corn while the other swirls the bubbling caramel. However, it's also totally possible to do it entirely yourself. It just takes a bit of timing.
The proportion of caramel to corn (and to nuts and seeds, for that matter) is up to you. I really like a subtle and minimal coating, and I've written this accordingly, but if you want a super-sugary concoction, you can certainly do that as well. Just make more caramel--or less popcorn.
Spicy caramel corn with maple, almond, and sesame
1/3 cup popcorn
1/4 cup canola oil
1/8 cup sesame seeds
1/2 cup maple syrup
2 tbsp honey
large dash cayenne pepper
1/8 cup roasted salted almonds
optional pat of butter
optional additional salt
Make the popcorn by the method of your choice, following the directions on the package. We do stovetop popcorn, but an air popper or the microwave bag method are good too. Just make sure to use plain unseasoned corn.
While your popcorn is cooking, start your caramel by toasting your sesame seeds. Put a wide frying pan over medium heat and add a layer of sesame seeds. (If you only have raw almonds, you may wish to chop them up and toast them with the seeds.) Toast, shaking occasionally, for about five minutes, or until your seeds turn just slightly golden brown and start smelling delicious. Watch carefully so they don't burn! When done, tip your seeds into a bowl and set them aside.
Put your pan back over the heat. Add your maple syrup and honey and cook, swirling occasionally to mix, until all your sugar is hot and bubbling. Add in a sprinkle of cayenne pepper, a handful or two of chopped almonds, a pat of butter (if you want butter), and your toasted sesame seeds. Swirl the pan to mix everything together, stirring sparingly with something heatproof as needed. Reduce the heat and let the caramel bubble away gently while you finish up making your popcorn.
When both caramel and popcorn are done, put your popcorn in a large bowl. Pour the caramel over it in two or three batches, stirring between each addition. Spread the resulting caramel corn on a sheet of parchment paper or a silicone mat to cool. (If you want to make popcorn balls, incidentally, now is the time--just make sure to butter your hands first.) For an extra sweet-salty crunch, you may want to sprinkle a bit of salt over the hot corn too.
Give your corn a few minutes to solidify before you attack it. We don't even bother putting ours into a serving bowl, but eat it right off the paper. If you want a little more stability, just put the whole thing on a cookie sheet or cutting board. Voila!
What are your favorite emergency snacks--or emergency desserts--or emergency snack-dessert hybrids?
Labels:
cheap,
easy,
fast,
grains,
nuts,
potentially vegan,
recipes,
snacks,
sweets,
vegetarian
15 March 2013
Spring salad with shredded root veg, chickpeas, goat cheese, and almonds
Guys, it's spring. That means SALAD.
I want all the vegetables on the planet. Okay! What if we take some classic spring greens, combine them with some raw shredded veg, and add a few beans, some bits of cheese, and a handful of chopped nuts? Cover a plate and you have a full meal: tender, crispy, crunchy, and chewy all at once. Hooray!
Since we're hovering right at the boundary between winter and spring, I decided to take advantage of the juiciest winter root veg: carrots and beets. Combined with chickpeas, goat cheese, and almonds, they were just about perfect.
Not very many people seem to realize raw beets are even edible, let alone sweet, earthy, and delicious, but they absolutely are. They're a great option for a raw veg when the new spring peas and asparagus are stubbornly hovering just out of reach. I like to use golden beets, so as not to get my entire kitchen covered with magenta juice, but an ordinary beet will work just as well. And since the golden beet was bright yellow, I decided to use some beautiful purple carrot for extra visual punch.
A box grater is all you really need for finely shredded veg, but if you happen to have a spiralizer or mandoline, now is an excellent time to break them out.
We had some really excellent applewood smoked almonds from our farmer's market on this particular occasion. They're pricy, but they're worth it, especially when you use them as a sparing garnish. (I actually crushed some up and used them to coat a piece of flounder before searing a bit ago--and why I didn't take any pictures of that, I don't know. It was AMAZING.) Of course, then there's the issue of just eating them all out of hand, but they're so delicious that I think we can live with that.
This salad can take all kinds of variation. Don't have almonds? Try some toasted cashews or sunflower seeds. Don't have goat cheese? Crumble a chunk of feta or blue cheese, or use mozzarella bocconcini. Want to get rid of a handful of radishes or a kohlrabi bulb? Shred them up and go forth. It's all good.
Spring salad with shredded root veg, chickpeas, goat cheese, and almonds
salad greens
carrot
beet
cooked chickpeas
goat cheese (or your preferred cheese)
smoked almonds (or the nut or seed of your choice)
vinaigrette (we use Thomas Keller's house vinaigrette)
pepper
Wash and dry your greens; arrange them on a plate. Cover your greens with a layer of shredded raw carrots and beets. Add several scattered handfuls of cooked chickpeas and chunks of cheese. Finish with a sprinkling of chopped smoked almonds. Drizzle a vinaigrette over the top of your salad, add a bit of cracked pepper if desired, and eat.
Hooray for salad!
What are you eating on your early spring salads?
Labels:
beans,
cheap,
dairy,
easy,
fast,
nuts,
potentially vegan,
raw,
recipes,
salads,
vegetables,
vegetarian
04 March 2013
Cashew cheese and carrot
Cashew cheese has definitely been on my mind of late. What's not to love about a rich nut puree blended with herbs and vegetables? (Unless you have a cashew allergy, of course.) I decided to take advantage of our giant bush of oregano--the only non-citrus plant that is actually producing right now--and make a batch of cashew cheese with oregano and shallot. Perfect.
At first, I wanted to eat my cashew cheese in rolls, like I did with my raw zucchini rolls this past summer. I decided to use a beautiful yellow carrot instead of the totally out-of-season zucchini. Of course, carrot is quite a bit harder, and I found that my vegetable peeler only wanted to make the thinnest and most breakable of strips. So instead of making rolls, I cut thin slices of carrot and put cashew cheese on top of each. Maybe it's not quite as pretty a presentation (although I honestly find that arguable, with that brilliant yellow carrot color), but it's just as delicious.
I'm having a hard time naming this. Raw carrot and cashew cheese nibblers? Cashew cheese with oregano and shallot atop shaved carrots? Farmer's market yellow heirloom carrot with oregano-shallot cashew cheese and cracked black pepper? Sure, why not?
Farmer's market yellow heirloom carrot with oregano-shallot cashew cheese and cracked black pepper
1 cup cashews, soaked 1 hour or more & drained
leaves from four or five sprigs of fresh oregano
1/4 a large shallot or 1/2 a small one, chopped
1/4 tsp white miso, optional
1/4+ cups water
salt & pepper
a large carrot of your choosing
more fresh oregano and pepper to garnish
First, make the cashew cheese. Combine your cashews, oregano leaves, shallot, miso, water, and a mild sprinkling of salt and pepper in a food processor or blender. Pulse, scraping as needed, until the mixture is thick and well blended, adding a trickle more water if needed. As always, you should use a food processor for this if you have one. I used our blender, which was actually less frustrating than usual. Remove the finished cashew cheese to a container of your choice.
Scrub and peel your carrot. Slice it on the diagonal into oblong disks. Top each piece of carrot with a spoonful of cashew cheese, and garnish with cracked black pepper and an oregano leaf or two. Repeat until you have as many bites of carrot and cashew cheese as you like. Refrigerate any leftover cashew cheese in a sealed container and use it within a week.
These guys would make an amazing plate of hors d'ouvres for a party. Little delicious bites of finger food full of vegetables, nuts, and herbs? They'd certainly give the standard crudites a run for their money.
Hooray! Snacks for all!
Labels:
easy,
farmer's market,
fast,
herbs,
nuts,
raw,
snacks,
vegan,
vegetables,
vegetarian
07 December 2012
Almond poppyseed cookies for all & sundry
December is the height of cookie season at my house. Actually, we tend not to have any cookies at any other time, so I suppose it's the only part of cookie season. Um.
It's cookie season! Let's make some cookies!
Nearly every winter I bake a batch of our now-traditional Swedish farmer cookies. You may have heard of these, since they're one of the few kinds of cookies I ever make. But this year I decided it was time to step it up a notch. So yesterday I not only made a batch of Swedish farmer cookies for our annual cookie exchange, but also a totally new-to-me cookie: almond poppyseed cookies.
This was a great choice for a few different reasons.
1. I have a big bag of poppyseeds hanging out in our spice cabinet, and it's hard to find ways to use more than a tablespoon at a time.
2. There was significant ingredient overlap between the two cookie recipes, so I didn't have to do much prep at all between batches. I also completely used up the almonds, which is good, since my freezer is still just as full as ever.
3. Both recipes are for refrigerator cookies, so it was more than plausible that I'd bake only some of each batch and freeze the rest. Now I have all the cookie dough in the land hanging out in my freezer, waiting for emergency late-night cookie-baking sessions. Hooray!
This recipe comes recommended by my friend Veronica, who is a pretty amazing baker in her own right. The original version is from Penzey's.
Almond Poppyseed Cookies
1 cup softened butter
3/4 cup sugar
1 egg
1 tsp vanilla extract
2 cups flour
1/2 cup finely ground almonds
1/2 cup poppy seeds
1/4 tsp salt
additional sugar for decoration
Cream the butter with the sugar. If you are unfamiliar with the term "cream" as used in this context, it's ok; it just means "beat until light and fluffy". Add your egg and vanilla and beat well.
Mix all the dry ingredients (minus decorating sugar) in a separate bowl. Add the dry ingredients to the wet in several batches, beating well after each addition. Or, if you are me, you can add the almond meal, poppyseeds, and salt to the wet mix first, beat well, and then add the flour in smaller increments. I used a cup and a half of plain all-purpose flour and half a cup of whole wheat, because that's how I roll. I would also like to note that it is not necessarily the best idea to grind your almonds in a coffee grinder if you have other options available. I'm just saying.
The finished dough will be pliable and easy to handle. Gather it into a ball, divide it into equal parts--the original recipe said two parts, but I made four, because I like smaller cookies--and roll each part into a log. If you want to end up with cookies edged in sparkling sugar, roll your dough logs in the sugar of your choice. I rolled two of mine in raw sugar, but found that the large granules were not super interested in sticking to the dough, so I left the other two plain.
Wrap your dough logs in waxed paper, plastic wrap, or tinfoil, and stick them in the refrigerator for at least an hour. You can also freeze a few of the rolls for super easy slice and bake action later, if you prefer. I highly recommend this course of action.
When you're ready to bake, preheat the oven to 325F. Slice your dough into 1/4 inch cookies, arrange on parchment or silicone-lined baking sheets, and bake for about 12 minutes, or until just starting to brown around the edges.
Cool on a rack until you can't possibly wait any longer.
Eat.
These guys are very buttery, not too sweet, and excitingly full of seeds that pop under your teeth. They're also very good with tea, as all shortbready cookies tend to be. Really, is there a cookie on the planet that is bad with tea?
Which cookies are holiday traditions at your house?
25 November 2012
Happy Thanksgiving!
I hope you had one of these:
We had plenty of leftovers. Fortunately, pumpkin pie also makes an excellent breakfast.
The final menu went as follows:
- crackers, pickles, olives, pretzels, and various snacky business
- black bean sweet potato soup
- mashed potatoes with mushroom gravy
- green salad with homemade red wine dijon vinaigrette
- coconut oil & cashew pumpkin pie
We were also supposed to have copious roasted veg--two trays--but managed to burn both of them through not paying attention. That's ok, though--there was certainly plenty of everything else.
A good time was had by all.
I hope everyone in the US is having a great holiday weekend!
30 July 2012
Raw zucchini rolls with cashew cheese and heirloom tomato
Everyone still needs to find new and interesting ways to eat their summer zucchini stash, correct? Well, have I got a deal for you!
How about some raw zucchini rolls filled with cashew cheese and garnished with that queen of summer lovelies, the heirloom tomato?
I found these rolls to be surprisingly filling--and unsurprisingly delicious. Even John, cordial disliker of zucchini, thought they were good. Raw zucchini obviously tastes a bit different from cooked--which makes this an even more refreshing change from the endless squash sautes and pasta sauces and bread and cakes that normally dominate the summer zucchini discussion.
The process is simple. First, make yourself a batch of cashew cheese. Next, cut up your zucchini and tomato. Finally, assemble your rolls.
I've been experimenting with various additions to cashew cheese. I based this variation off Gena's "pizza cheese", switching out the basil for scallion and sweet bell pepper. Result: delightful.
Cashew cheese
1 cup cashews, soaked 1 hr and drained
pinch salt
1/2 tsp white miso
small handful sun-dried tomatoes
large handful chopped scallion greens
small handful chopped sweet pepper of your choice
1/8 cup water
Essentially, you just want to grind everything together into a medium-thick paste. Start by grinding the cashews alone. Then add everything else and continue to grind until everything is pureed together. You can also add a bit more water to thin down your cheese if necessary.
I make my cashew cheese in the blender, because we don't have a food processor. You should use a food processor if you have one, because the blender--being better suited to more liquid pursuits--will make you want to hurl it across the room. (I actually got the tip of the spatula stuck under the blender blade and had to use a second spatula to scrape out the finished cheese before completely disassembling the pitcher in order to get the damn thing out. AWESOME.) I'm just saying.
This recipe will be enough to fill two or three medium zucchinis' worth of rolls. I had plenty left over for later snacking and garnishing.
When you're done making your cashew cheese, it's time to make the rolls themselves.
Raw zucchini rolls with cashew cheese and heirloom tomato
cashew cheese, made as above or by your method of choice
whole raw zucchini
heirloom tomato
To make the zucchini strips, just take a vegetable peeler to a topped & tailed zucchini. Cut a bunch of long thin strips all the way down the length of the zucchini. You'll probably have to discard (or, you know, just eat) the first few strips because they'll be very narrow & irregular. When you start getting to the seed chamber, rotate the zucchini 1/3 of the way around and start cutting more strips. Cut as many strips as you want rolls and save the middle for some other purpose.
The tomato is easy; just core and dice it. (You can also leave out the tomato if you want to eat the finished rolls as finger food--for instance, if you're making a big tray for a party. Tomato is delicious, but it does get messy.)
To make the rolls, deposit a small spoonful of cashew cheese on one end of a zucchini strip. Then just roll it up. I find it easiest to wrap the long tail around the cashew cheese section to form the roll, but do whatever works for you. Repeat until you have a lovely plateful of rolls.
Scatter the tomato over the rolls, sprinkle with pepper, and eat.
Hooray! A cool, refreshing, easy to make, filling, and totally delicious plate of food. You win summer!
Labels:
easy,
fast,
nuts,
raw,
recipes,
vegan,
vegetables,
vegetarian
23 July 2012
More schnapps: cherry, green walnut, strawberry
Sour cherries are hard to find in California, but sweet bings and rainiers have been all over the farmer's market. So I went ahead and grabbed several pounds to bring home for more schnapps-making.
What? Summer isn't just the perfect time for canning--it's the perfect time for immersing fresh, beautiful fruit in alcohol as well. I already made plum schnapps; why not go for several more?
The basic procedure for making schnapps--also known as infused vodka--is as follows. Get your hands on enough top-quality ripe fruit (or herbs, spices, nuts, etc.) to fill 2/3 of your chosen jar. Wash it, cut it up if necessary, put it in the jar, and cover it with vodka. Lid the jar and store it in a dark place, shaking every few days. Steeping time varies. Herbs only need maybe 48 hours of steeping, since they're so potent; fruit can be steeped for anywhere from a week to about six months, depending on your taste. When you're done steeping, filter out your fruit and any sediment. Then put your schnapps back in the cupboard to age to your taste.
For cherry schnapps, I just washed and destemmed a pint or two of dark sweet cherries, pricked them all with a pin, and covered them in vodka. After about a month, I plan to strain out the fruit and filter the resulting schnapps. Voila!
So that's one batch. What's next?
Well, when I was first researching schnapps infusions a couple years ago, I was especially intrigued by walnut schnapps. According to danish-schnapps-recipes.com, this particular schnapps is supposed to be aged at least a year and up to five years before drinking, and to change four colors and release some surface particles of walnut oil over the course of the process. The finished result is supposed to be comparable to cognac. Needless to say, I WANT SOME.
So when I discovered a couple black walnut trees in my neighborhood, I knew I had to experiment.
To make walnut schnapps, acquire and quarter 5 or 6 green, unripe walnuts. Put then in a jar and cover with vodka; put the jar in a dark place. Steep 5 months. Shake occasionally & stir with the lid off once a month to let some oxygen in. The color of the schnapps will change from light green to a dramatic & very dark forest green as it oxidizes. (Mine has just started to do this, and let me tell you, it is seriously weird-looking.) After 5 months, strain & put back in the cupboard to age for a minimum of 7 more months. I can't wait.
Of course, if you want a quicker finished product, there are also strawberries.
Strawberries are one of the most rampant fruits here in CA--you can find them at the farmer's market practically all summer. So last week, when I snagged a half flat for $6 five minutes before the close of market, I knew exactly what to do. I cut up a full pint of the most perfect berries, put them in a quart jar, and covered them with vodka. Then I cut up another half pint, put them in a pint jar, and covered them with tequila. (And then I made a strawberry yogurt cake, and we ate a whole lot of strawberries plain, and we still need to use up about a pint.)
I first heard about strawberry tequila from my friend Veronica, and although I was a little skeptical of a tequila infusion, the aroma of the steeping liquid won me over almost immediately. I only made a pint, because we don't generally have a gigantic handle of tequila in the house, but I'm already regretting it. On the other hand, we do have a cabinetful of different schnappses and infusions marinating already, so I think we'll survive.
Now I just need to have the patience to let everything sit around and get as delicious as possible.
06 June 2012
Sole meunière & green bean almondine
At the grocery store this weekend, the fish case beckoned. It especially beckoned when we realized that sole was on sale for $3.99/lb. Oh, really?
So John made me a feast this Sunday afternoon. Classical French food for brunch! Butter for all!
This type of brunch combination is by far my favorite. Perfectly cooked fish or eggs with an equal or greater amount of beautifully contrasting green vegetables? Yes, please.
Sole meunière
olive oil
sole filet
salt, pepper
flour
butter
shallot
parsley
lemon wedges
Since fish cooks quickly, get all your ingredients ready before you start cooking.
Prep your sole by patting it dry, salting and peppering each side, and coating it in a thin layer of flour, knocking off any excess. Finely chop a shallot and a handful of parsley (or two of each, if you're making green beans as well). Have your butter out and a knife ready to cut it. That's about all the prep you need to do, actually. Simple.
Heat a frying pan of your choice on medium to medium-high. When hot, add a bit of olive oil, swirl it around to coat, and lay in your piece of fish. Let it cook without moving for about three to four minutes, or until golden brown and beginning to curl around the edges. Carefully flip your filet with an adequately large spatula, and cook the other side for another three to four minutes.
Put the finished sole filet on a warmed plate and stick it in a low oven to keep warm. Put your fish pan back on the heat and add a generous pat of butter. As soon as it melts, tip in your shallots and stir to mix. Since your pan will be hot, the butter will begin to turn brown and the shallot will cook almost immediately. Don't let the butter burn! You want a medium hazelnut color, aka beurre noisette. Cook for a scant minute before you pull the pan off the heat. Immediately squeeze in some lemon juice--its cooler temperature will stop the butter's cooking--and mix in the parsley.
Pull your plate of sole out of the oven, pour the sauce over it, and serve with your finished beans and a lemon wedge.
Green bean almondine
green beans
almonds
butter
shallot
parsley
lemon wedge
salt; pepper
Start by trimming and blanching as many green beans as you want to eat. Simply drop your beans into a pot of boiling water and simmer for 3-5 minutes, or until the beans are cooked through but still tender. Shock the finished beans in cold water, drain them, and set them aside.
In the meantime, chop up a handful of almonds. Don't worry too much about making all the pieces uniform; irregular bits are more interesting to eat anyway. Toast the almonds in a little pan over medium heat, watching closely and stirring occasionally. When they begin to get fragrant and turn just barely golden, take them off the heat and set them aside.
If you haven't already done it with the fish prep, finely chop a shallot and cut up a handful of fresh parsley.
Now we're ready for the final stage of cooking. You'll want to start this at just about the same time you put your fish on to cook.
Put a frying pan of your choice on medium heat. We used the pan in which we toasted the almonds. Melt a chunk of butter and slowly sauté the chopped shallot in it. After about two minutes, during which the shallot will start to sweat and turn translucent, add the green beans and almonds, and squeeze the juice of your lemon wedge into the pan. Season lightly with salt and pepper, stir everything together, and let cook, turning the heat down a touch if necessary, for about five minutes.
When your beans (and fish) are done, turn off the heat and stir in the chopped parsley. Correct any seasonings and serve.
Subscribe to:
Comments (Atom)


