Showing posts with label sweets. Show all posts

13 July 2015

Super simple strawberry cake

Super simple strawberry cake

We've been getting 2 pints of strawberries per week from our CSA. This, of course, is pretty fantastic. Strawberries with dinner! Strawberries with breakfast! Strawberries at the slightest provocation!

But there's always that point at which the yet uneaten berries start to wilt a bit. Maybe one pint is gone, and the other is completely untouched (strange, but it does occasionally happen). And then it's Tuesday night and you know that Thursday will bring another two pints.

At this point you have a couple options. You can freeze your berries for smoothies, which is always a good plan. You can mash your berries into the world's smallest batch of jam, to be eaten immediately on toast spread with ricotta or cream cheese and topped with basil and black pepper (which I have not done, but which definitely needs to happen ASAP). Or you can bake with them.

Since the weather was cool enough for us to turn on the oven, we went with option 3. I found a minimal cake recipe that would let the berries take center stage, and I went to work.

This cake is not only really easy and quick to make, but also deceptive, hiding chunks of strawberry beneath its surface. The berries start out on top of the batter and sink down over the course of baking, becoming delightful surprises. So good.

Super simple strawberry cake

Super simple strawberry cake
adapted from Always With Butter.

6 tbsp softened butter
3/4 cup sugar
2 eggs
2 tbsp milk
1 1/2 tsp baking powder
1/4 tsp salt
1 tsp cinnamon
1 1/2 cups flour
1 pint strawberries

I bake pretty much everything by the 1-bowl method, and this was no different.

In a large mixing bowl, cream your butter and sugar until light and fluffy. Add eggs and milk and mix to combine well. Add the baking powder, salt, and cinnamon, and mix to combine again. Add the flour in three half-cup increments, mixing thoroughly after each addition.

Pour the batter into a well-buttered and floured 8-inch cake pan.

Wash and slice your strawberries. Push the berries far down into the surface of the batter, making a pattern or not as you prefer. As you can see, I prefer not to. They'll mostly be covered in the end anyway.

Bake at 350F for 35-40 minutes, or until a cake tester comes out clean. Try not to put your tester directly into a molten berry.

Serve plain, with whipped cream, or with a sprinkling of powdered sugar. Very lovely for breakfast or with a cup of afternoon tea. Or, you know, whenever.

And if you are a fan of peanut butter, this is excellent with a big spoonful spread on top. Peanut butter and jelly cake for all!

What fruit-filled concoctions are you baking this summer?

09 February 2015

Soft pumpkin cookies

Soft pumpkin cookies

It's still winter, and there are still plenty of winter squash from the last few CSA boxes hanging around on our kitchen counter. So last weekend I roasted a pie pumpkin and a butternut squash, mashed up the flesh, and made a big batch of cookies. What better way to eat as much squash as possible?

These cookies are super soft and fluffy, to the point that they almost seem like little bite-sized pieces of pumpkin bread. Of course, they don't bake as long as a pumpkin bread, and they don't need to be cut like a pumpkin bread, and they're generally more cookielike as a rule, but otherwise, the taste and texture is pretty spot-on. So: pumpkin bread in cookie form.

Note that it is 100% possible to make these cookies with no mixer. I just used a big bowl and a wooden spoon, and everything worked out perfectly.

Soft pumpkin cookies

Soft pumpkin cookies
based on Pumpkin chocolate chip cookies

1 1/2 cups sugar
1 3/4 cup pumpkin or winter squash puree
1/2 cup butter, melted
1/2 tsp vanilla
1 egg
1 tbsp cinnamon
3/4 tsp nutmeg
3/4 tsp ginger
3/8 tsp cloves
1 tbsp baking powder
3/4 tsp baking soda
1/2 tsp salt
2 1/2 cups flour

Preheat your oven to 375F. Melt your butter, either in the microwave or in an oven-safe dish in the actual oven.

In a large mixing bowl, combine your sugar, pumpkin, butter, and vanilla. Add the eggs and beat well.

Mix together your spices, baking powder, baking soda, and salt. Add to the wet mixture and stir to combine.

Add the flour gradually, in 1-cup increments, stirring well after each addition. If you would like to add chunks of delightful things to your cookies, you can fold in 1 cup chocolate chips, dried cranberries, or chopped nuts. We prefer totally plain cookies, however.

Use two spoons to drop 1-tbsp pieces of dough 2 inches apart on a cookie sheet lined with parchment or a silicone mat.

Bake for 12-15 minutes, or until set on top (14 min for me). Let cool on cookie sheet for a few minutes before removing to a wire rack to cool completely.

Makes approximately 30 cookies.

Soft pumpkin cookies

Since they're so soft and moist, these guys are a bit more perishable than standard cookies. I recommend eating them within about three or four days. Fortunately they're delicious enough that this won't really pose much of a problem.

If you happen to be in the cream cheese frosting camp -- or even just the spreads-cream-cheese-on-things camp -- these are an excellent candidate. But they're also really good by themselves, with a cup of coffee or tea.

How are you eating your winter squash post-holidays?

24 December 2014

Last-minute chocolate fudge with almonds

Last-minute chocolate fudge with almonds

The refrigerator repairman fixed our fridge! No waiting around for new fridge delivery! At least something has gone right with our house this month.

And now it is time for fudge!

This fudge is an excellent last-minute creation because it's super simple. All you really need to do is melt chocolate and stir things together. Even if you're as stressed out as we are, you can totally do it.

I based this off Faith's Easy Mocha Fudge with Cacao Nibs. The differences are really quite small: I used brewed coffee instead of instant espresso dissolved in hot water, and I switched up the topping from cacao nibs to roasted chopped almonds.

If you want a more almond-filled finished product, you can up the amount of chopped almonds to about 1/3 cup and stir that into the fudge before pouring it into the prepared pan. An excellent plan for almond-lovers.

Last-minute chocolate fudge with almonds

Last-minute chocolate fudge with almonds

1 1/2 cups semisweet chocolate chips
1 1/2 cups milk chocolate chips
1 14-oz can sweetened condensed milk
2 tsp vanilla
4 tsp coffee (or espresso for more intense mocha flavor)
1/8 tsp salt
3 tbsp finely chopped roasted almonds
(OR, for the almond-lovers' version: 1/3 cup chopped roasted almonds)

Start by lining an 8x8 pan with parchment paper.

Melt the chocolate chips and condensed milk together in a double boiler. If you have a microwave, you can also use that.

When everything is melted, turn off the heat and stir in your vanilla, coffee, and salt. If you're making the almond-lovers' version, add your 1/3 cup of almonds, reserving a small amount to top if you so desire. Mix until well combined.

Pour your fudge mixture into your prepared pan. Top with chopped almonds, pressing lightly to make them adhere to the fudge. Be sure to lick all the extra fudge scrapings off the spatula at this point.

Chill until set. This should take 2-3 hours at minimum. Leaving the pan in the refrigerator overnight is a good idea if you have time.

When your fudge is set, remove it from the pan by lifting up the parchment paper. Cut into small squares, using a knife dipped in hot water between cuts.

Now pack your fudge into boxes for last-minute gifts, arrange pieces on a tray for holiday snacking, or just filch pieces out of the (working!) fridge in the dead of night. It's all good.

I hope you all have a merry holiday with plenty of delightful treats!

06 November 2014

Heléne's great chocolate cake

Heléne's great chocolate cake

I've had the recipe for Heléne's great chocolate cake, written out by hand (my hand, to be precise), sleeping away in one of my recipe binders for a very, very long time.

The binders themselves are roughly 18 or 20 years old. They're a remnant of the times when people actually printed things out off the internet instead of saving them to a reading list or cooking app for later search-and-destroy style cooking. (That follows, right? Search for recipe, make recipe, destroy by use of mouth.)

I don't know where I found this recipe, but it's a fair bet that I copied it off some site or other at least ten years ago when I didn't have access to a printer for whatever reason. So I have no idea who Heléne might be -- or at least I didn't until I did a search and discovered an identical recipe, credited to Heléne, a Swedish woman from Los Gatos. The internet comes through again.

Heléne's great chocolate cake

Of course, I had to make a few changes. I used whole wheat flour, because that continues to be how I roll. I also only had 1/4 cup of milk, so I substituted 1/2 cup of plain yogurt thinned with a little water to make up the rest of the dairy. And we don't have any round cake pans, so I used an 8x8 square.

The batter was easy to make and super satisfying to work with -- thick and fluffy and delicious when accidentally dripped onto your fingers and licked off. And the cake? It was pretty perfect.

Here it is, exactly as I first wrote it down.

Heléne's great chocolate cake

Heléne's great chocolate cake

2 eggs
1 1/2 cup sugar
1 1/2 tsp vanilla
1 1/2 tsp baking powder
1/4 tsp salt
4 tbsp cocoa powder
3/4 cup milk
1 stick melted butter (8 tbsp or 1/2 cup)
3/4 cup flour

9 in. round - buttered & floured - 350F

Mix eggs & sugar; whip until fluffy. Add vanilla, baking powder, & salt. Add cocoa gradually while mixing. Add milk & cooled butter. Add flour.

Bake 30-35 min until toothpick almost clean.

Powdered sugar, whipped cream, strawberries.

Heléne's great chocolate cake

Note that it is not possible to test this cake with a knife without making a giant hole. Toothpick recommended. Don't try to cut it until it's cooled, at which point it will pull nicely away from all the sides of the pan of its own volition.

Had I ever even made this cake before? I don't know --- but I'm certainly glad I made it now. The last of the strawberries are over (actually, they're cut up in the freezer, but hey), so I had mine plain, with a big mug of black tea. Very nice.

How is your fall baking coming?

30 September 2014

Coconut oil brownies

Coconut oil brownies

You guys, these may very well be the brownies you've been looking for.

This is a variation on Deb of Smitten Kitchen's best cocoa brownies. Now, I have made these brownies as written, and I did not find them to be to my taste. You'd think a stick of butter would do it! But it didn't.

However, cocoa is generally what I have on hand for making brownies and other chocolate baked items. I can only very rarely be bothered to buy actual baking chocolate, mostly because I already have cocoa lying around. And brownies are by far the best baked chocolate item out there, in my opinion. I actually want them on a semi-regular basis. So I needed a good cocoa-based recipe.

Okay. I also had a jar of coconut oil hanging out in the pantry for several years. Coconut oil is delicious, rich, and available, so I thought I'd see what I could do with it.

I searched for coconut oil brownies and came up with this version on Instructables. I gave it a try, with a few minor variations, and it was good. Hooray!

We made these brownies twice. On the first try, I used whole wheat flour, because that's how I roll, and varied the melting methodology slightly, but kept everything else intact. On the second try, we used whole wheat flour and slightly varied the oil content, using 4 tbsp coconut oil and 6 tbsp vegetable oil. This was necessary because we ran out of coconut oil via copious brownie making. Both versions worked out very well.

What I'm saying is: if you like a dense, chewy brownie that can in no way be called cakey, and you enjoy the taste and texture provided by coconut oil, you will like these brownies. Oh, and you should also like brownies. Yes.

Coconut oil brownies

Coconut oil brownies

5 tbsp coconut oil
5 tbsp vegetable oil
1 1/4 cups sugar
3/4 cup + 2 tbsp unsweetened cocoa powder
1/4 tsp salt
1/2 tsp vanilla
2 eggs
1/2 cup flour of your choice

Preheat your oven to 325F. Lightly grease an 8x8 square baking pan and line it with parchment paper.

Mix your coconut oil and sugar in a small oven-safe bowl. Stick it in the preheating oven for a minute or two to melt together. You can also use the microwave if you own one; we don't. (The original recipe has you melt these with the veg oil, salt, & cocoa; you can do this if you prefer.)

In a large mixing bowl, combine your vegetable oil, salt, and cocoa powder. Add the melted coconut oil & sugar to the bowl and stir well to create a slightly grainy batter. Add the vanilla and mix.

Next, stir in your eggs, one at a time. When your eggs are fully incorporated, add the flour and mix until just combined. You will be left with a thick, shiny batter.

Scrape your batter into your prepared pan and smooth out the top. Bake for 30-35 minutes, or until your brownies have developed a lovely crackly crust and a toothpick test results in a clean, damp pick.

Give your brownies 10 minutes to cool before you cut & eat. Bonus: since you lined the pan with parchment, you'll be able to lift the whole whack of them right out of the pan! This is very helpful, since the resulting brownies are going to be sticky and a bit difficult to cut cleanly, especially if you are too impatient to wait until they're fully cool to cut. But that's ok! The deliciousness factor is well worth it.

Eat with vigor. Also with coffee.

What baked delights are you creating lately?

10 June 2014

Apricot crisp with oat crumble topping

Apricot crisp with oat crumble topping

Someone in our neighborhood had an epic apricot harvest, and this is the result, at least at our house. Hello, fruit!

It's a standard thing around here to get overwhelmed by your burgeoning fruit trees. When that happens, you spend an hour or two picking fruit and put the results in a bag in your front yard with a big FREE sign. Then everyone walking past gets to bring home a bounty of fresh fruit. We do this all the time with our annual pineapple guava deluge. It's great: the glut of fruit gets used instead of rotting away on your back lawn.

This time I came across a big tray of apricots, picked out a bagful, and brought them home for delightful baking escapades. Crumble for all!

A huge variety of other fruit would work well here. Strawberry and rhubarb are excellent and seasonal. Cherries, plums, peaches, nectarines, or a mixture of any of the above would be delicious. In the fall, apples or pears would work beautifully. And you can always add a handful of blackberries, blueberries, or raspberries to punctuate a panful of stone fruit. Delightful.

Apricot crisp with oat crumble topping

Apricot crisp with oat crumble topping

Fruit:
10 apricots, or about 2 cups sliced fruit
1 tbsp sugar
1/4 tsp cinnamon

Crumble:
1/2 cup rolled oats
1/4 cup flour of your choice
2 tbsp sugar
4 tbsp butter/oil

Start by prepping your apricots. Wash them, halve them, remove their pits, trim off any bruises or other issues, and slice them. I ended up cutting each half apricot into five or six pieces, but you can quarter them or even leave the halves as-is if you prefer. It's all good.

Butter an 8x8 inch pan. Tip in your prepared fruit, sprinkle it with sugar and cinnamon, and stir to mix. Flatten your apricots into an even layer.

For the crumble, mix together your oats, flour, and sugar in a bowl. Add the butter, cut into chunks, and rub it into the dry ingredients with your fingertips.

Spread your crumble mixture evenly over your fruit. Dot with additional butter if you feel like it (and have more butter lying around).

Bake at 350F for 45 minutes or until lovely and bubbling around the edges and browned on top.

Apricot crisp with oat crumble topping

This crisp is best eaten hot, right out of the oven. The apricots melt into an intensely flavored jam, while the crumble provides a perfect nutty contrast. You're going to want to have some good seed-specked vanilla ice cream with it, too.

What are you doing with your new summer fruit?

20 March 2014

Other people's recipes

Whole mung beans

Fear not--we have been eating things other than pie occasionally.

First, an amazing mung bean dal! We've had a big bag of whole mung beans hanging out in the freezer for way too long. I knew we needed to do something with them, so I scanned the internet and came up with this Indian style mung dal from Lisa's Kitchen.

Mung bean dal

I added in a chunked Asian eggplant, and the results were PERFECT. They were excellent over a bowl of brown rice, reheated very well, and were stuffed full of flavor and vegetables along with the hearty beans--yes please. I made a double batch and we ate for days before stuffing the last few cups in the freezer for future emergency dinner application.

Needless to say, this will definitely be on the menu again.

Orange poppyseed yogurt cake

Once pi day was over, I needed cake for some reason. Why? I don't know, since I pick pie over cake 100% of the time, but still. So I went through the cupboards and emerged with the ingredients for Cookie & Kate's orange poppyseed yogurt cake, minus the olive oil. I've just never gotten into the olive oil flavor in cakes thing. But the rest of the cake is definitely an excellent plan!

A little grapeseed oil and a whole lot of orange zest later, I was pulling this beautiful loaf out of the oven. So good.

Orange poppyseed yogurt cake

This is exactly what I want out of a cake: a punch of barely-sweet citrus and wheat flavor featuring no frosting whatever. You can eat it for breakfast (with more yogurt on top) and it's no big deal, have a slice or two in the middle of the afternoon with a big mug of tea, or go for the classic dessert option. I did pretty much every single one of the above.

Whose recipes have you been cooking this week?

16 March 2014

Pi day 2014!

OH MAN.

Pi day cafe au lait pie

This year, after being invited but unable to attend for the past couple of years, I finally got to go to my friend Jen's pi day party.

WHY HAVE I NEVER DONE THIS BEFORE.

Pi day party menu 2014

This here is about 1/3 of the actual menu of different pies available. There was a full table of dinner pies--chicken pot pie, lamb shepherd's pie, spanakopita, clearly also some other kinds of pie--and a second full table of dessert pies. Check it out:

Pi day dessert pie table 2014

The whole "phone picture in a dark room" thing worked out about as well as I thought it would. That's ok! You can at least get an idea of the vast, munificent bounty. VAST.

In addition to the listings on the actual menu, there was custard pie with whipped cream, blueberry, key lime, and apple streusel. Actually, the apple streusel may be the vegan apple pie listed. There were so many that I'm not sure.

I hear that the strawberry lemon was the best, but really all of the pies were the best. PIE.

Pi day pi tiles

Also, see these tiles? See the grey ones that are all in lines of different heights? That is in fact a visual representation of the number pi on Jen & Rob's kitchen wall. You know they are taking both math and baked goods very seriously indeed if they had pi grouted into their wall. I'm just saying.

Note the bright purple KitchenAid. YES.

Pi day cherry vanilla lattice pie

I had six kinds of pie and three glasses of red wine and was well satisfied with my lot in life. Chicken pot pie, spanakopita (which was SO GOOD and I really am kicking myself for not taking one for the road when Jen offered; clearly I am going to have to ask for the recipe), custard, cafe au lait (that's the towering one in the first pic), chocolate, and this cherry vanilla lattice-top.

Thank you to Jen & Rob for a lovely party!

What kind of pie did you bake (or, like me, just eat) this pi day?

20 December 2013

Candied white grapefruit peel

candied white grapefruit peels

The other day I was super excited to find a big boxful of white grapefruit marked FREE in one of my neighbors' front yards. Backyard white grapefruit from someone's random tree! Very likely unsprayed, definitely unwaxed, off the tree for under 24 hours, beautiful and fragrant and abundant! I took four (leaving plenty behind for everyone else) and ran home to plot and plan.

white grapefruit windfall

Needless to say, I am totally enamored of white grapefruit. They're a lot more tart than the store standard ruby red, which means that freshly squeezed white grapefruit juice makes some truly superior cocktails. Grapefruit versions of mimosas and lemon drops? YES. So I knew I wanted the juice first and foremost. But I also took one look at the beautiful peels and decided it was time for my first foray into candied citrus.

I looked at the Joy of Cooking only to discover their recipe involved quite a lot of corn syrup. That's clearly not happening at our house. But fortunately, what popped up in my blog reader? The Tart Tart's candied citrus peel recipe!. Linda made some amazing-looking candied peel with no corn syrup in sight--just a plain simple syrup combination of sugar and water. Perfect. I broke out my knife and got to work.

As you might imagine, you don't have to stick with white grapefruit. Ruby reds, various oranges and tangerines, lemons, and limes should all produce different tasty candied peels. Hooray!

white grapefruit peel

Candied white grapefruit peel

Adapted from the Tart Tart's candied citrus peel.

3 white grapefruits
2 cups water
2 cups sugar
additional water to blanch
additional sugar to coat

Start by scrubbing and peeling your grapefruit. I made mine by slicing off the top and bottom of each fruit, putting it down on its flat surface, and cutting several vertical slices of peel as I worked my way around the circumference. Then I cut each peeled fruit in half, squeezed out the juice, and reserved it for later.

While this peeling method worked well, it also produced thick slices of peel with a lot of bitter pith attached. I might try using a standard vegetable peeler for future endeavors, since those catch much less pith.

Cut your peels into narrow strips approximately half an inch wide, or into your choice of shape. Put them into a saucepan and cover them with cold water. Bring the pan to a boil, and then turn off the heat and drain off the hot water. Cover with cold water again and repeat this blanching step. Then repeat it one more time. Your peels should be soft and flexible and a bit squishy to the touch.

Give your peels a few minutes to cool before using a small paring knife or a spoon to cut or scrape off as much white pith as you can. Go to town with this, since pith is bitter and yet you want a reasonably sweet finished peel. Be gentle but thorough, since it can be easy to tear the softened peels. Also? If you are tall, you'll want to stand at a reasonably high counter, since otherwise I guarantee you will end up working at a super uncomfortable angle. Actually, make sure you have a good work surface no matter how tall you are. I just personally have the tall-person-at-a-short-counter experience.

white grapefruit peels in syrup

We're ready to candy our peels! Start by heating an equal amount of sugar and water in your saucepan, swirling gently until the sugar has dissolved. I used 2 cups apiece, but if you're making a larger or smaller batch of peel you'll want to adjust accordingly.

When your sugar has dissolved, add your prepared peels. Bring the whole business to a slow simmer and cook until your peels are translucent and your syrup has thickened slightly. This took me something like an hour and fifteen minutes, but you'll want to start checking after half an hour or so, since the time depends on the thickness of your peels.

candied white grapefruit peels

Spread your finished peels in one layer on a drying rack and let dry for about two hours. You'll probably want to put the rack over a cutting board or something similar to catch any sugary drips.

Finish your candied peels by tossing them to coat in a bowl of granulated sugar. Put them back on the rack (rinsed and dried, if it was totally sticky) to dry out for several more hours or overnight. Voila: a beautiful array of candied grapefruit peels!

And then? You can dip them in melted chocolate, chill them, and give them away to all your friends. Or chop them into little bits and bake them into cookies. Or arrange them in a pattern across the top of a glazed citrusy cake. Or just put a little dish out along with the rest of your holiday sweet spread and let everyone go to town.

candied white grapefruit peels

Keep those holiday treats coming! What are you making with your fresh winter citrus?

15 December 2013

Dried tart cherry rum orange shortbread cookies


Are you ready to descend into the holiday cookie vortex? I mean, the entire foodblogging population seems to be there already, wildly waving quarter sheet pans and spatulas and sporting an amazing array of holiday aprons as they spin through billowing gusts of flour and sugar. Let's go!

First on the agenda: dried tart cherry rum orange shortbread cookies. Super festive!

I have a taste for teeny tiny cookies, and also for homemade slice-and-bakes. So what did I do? I made a simple shortbread dough and mixed it up with fresh orange zest and dried tart cherries soaked in rum. I made the dough into four long, thin rolls, squared them off (just for a change--although round cookies are probably technically superior since they don't have any corners sticking out for accidental burning), let them chill, and cut them into a plethora of little squares. Then I baked them and cooled them and wow! Tender, fruit-filled cookies for all!

I made these for our annual knitters' cookie exchange, which meant I needed a whole lot of cookies to divide up and distribute. One batch of dough made roughly 180 tiny cookies. Perfect! If you make bigger rolls of dough, you will get fewer cookies, but it's still going to be the same amount of overall goodness, so hey.

I actually only had to bake half the dough to get a full complement of cookies for all; the other half is still hanging out in our fridge, waiting for future cookie-baking endeavors (i.e. for us to eat all the other cookies I brought home from said exchange). This brings us to another selling point: you can make up a couple rolls of dough, refrigerate or freeze them, and bake whenever you so desire. Super convenient for those late-night cookie impulses.

Also, the leftover rum that the cherries didn't soak up? HIGHLY recommended. There was only a tiny bit left in my pan, but it was amazing: almost like a cherry-flavored port. I'm definitely going to experiment with infusing a batch of dried tart cherry rum now.


Dried tart cherry rum orange shortbread cookies

Adapted from Everybody Likes Sandwiches' cranberry rum shortbread cookies.

1 cup dried tart cherries
1/2 cup plain old white rum
1 cup softened butter
zest of one orange
1/2 tsp vanilla
1/2 cup powdered sugar
2 cups flour
1/4 tsp salt
1/4 tsp baking powder

Start by finely chopping your cherries. This will be especially important if you want to make tiny cookies; big chunks of cherry tended to encourage crumbling in the finished product. You can avoid that by chopping your cherries now. The smaller your cookies, the tinier your cherry pieces should be for overall physical stability. My cherries were too big. Take note!

Put your cherries and your rum in a small saucepan. Bring the pan to a boil, lid, and turn off the heat. Let the cherries soak up all the rummy goodness for at least half an hour.

To make the dough, cream together your butter, orange zest, vanilla, and powdered sugar. Sift the remaining dry ingredients together in another bowl (I actually did the separate dry mixture this time! A culinary first). Add the dry mix to the wet in batches, beating well with a wooden spoon or the implement of your choice. You may need to get in there and use your hands with the last batch of dry ingredients. Add the drained cherries and mix or knead to distribute them throughout the dough.


Separate your dough into four equal parts. Form each part into a roll, wrap in plastic wrap or foil, and refrigerate for several hours or overnight. At this point you can also chuck a roll or two in the freezer to save for later instant-cookie baking.

To bake, preheat your oven to 375F. Cut a roll or two of your dough into quarter-inch slices and arrange them on parchment-lined cookie sheets. Bake for about ten minutes, checking a bit earlier if you're making particularly tiny cookies. Your cookies are done when they are set and have turned lightly golden around the edges. Let cool on the sheet for about 5 minutes before removing to a rack.

Eat with tea, coffee, or the proverbial nog. Or pack your cookies into bags and send them home with all your friends! It's all good.

What kind of cookies are you baking this holiday season?

25 November 2013

Judy's amazing apple dumplings

Judy's amazing apple dumplings

I can't wait any longer, you guys, even though I haven't made these myself yet. I have to tell you about Judy's amazing apple dumplings.

I am making these for Thanksgiving and they're going to be epic.

Picture this. You get a whole apple, filled with a sweet & chewy-crunchy mixture of chopped raisins and walnuts, wrapped in its own pastry crust, smothered in cinnamon sauce, and baked until golden brown and steaming. And then you get as much pouring cream as you please. Yeah.

I first had one of these guys at Danny and Bethany's birthday party a month ago. (Yes, October is well and truly birthday month for our peer group. It is EVERYONE'S birthday.) Since these are Bethany's usual birthday dessert, her mom Judy whipped up a huge triple batch of apple dumplings for everyone. There was also a half gallon of cream on the table to serve. I'm just saying.

Of course after that I really wanted the recipe, and Judy was kind enough to oblige. Hooray! Apple dumplings for everyone!

Judy theorized that this recipe may have come originally from an old edition of Betty Crocker. Since my own early 70s copy fell by the wayside some time ago, I searched around and turned up this similar but by no means identical apple dumpling recipe. So maybe someone tweaked that version until they made it their own.

The choice of apple is important: you want to use a flavorful cooking apple that will hold its shape well, such as Mutsu, Ida Red, Honeycrisp, or Cortland. I'm going to give Honeycrisps a try and see what happens.

These can be made vegan by switching out butter and cream with the vegan butter & cream subs of your choice. Yes! You too can have an entire apple encased in pastry all to yourself! Full disclosure, however: Judy said the vegan dough she made was softer & thus more difficult to work with, so you might want to build in plenty of chilling time. Then just get some coconut cream for garnish and you should be golden.

I'm planning to make my dumplings (and maybe sauce?) Wednesday, hold them overnight in the fridge, and bake them whenever it seems most appropriate on Thursday. A dessert you can prep in advance for Thanksgiving? Yes. Let's do it.

Judy's amazing apple dumplings
(Barely paraphrased from the recipe card itself.)

Cinnamon sauce:
1 1/4 cup sugar
2 cups water
1/2 tsp cinnamon
1/4 cup butter

Combine sugar, water & cinnamon. Cook 5 minutes & add butter. (Note: after making this, I'm thinking you want to boil hard for 5 minutes to really reduce. This will keep you from ending up with pastry sog on the bottom of each dumpling.)

Apples:
6 apples
2 tbsp chopped raisins
2 tbsp chopped walnuts
1 tbsp honey

Peel & core your apples. Stuff with a mixture of raisins, walnuts, & honey.

Pastry:
2 cups flour
1 tsp salt
2/3 cup shortening (read: butter)
1/3 cup cream

Sift the flour and salt together. Cut in shortening & blend with pastry cutter. Add cream. Mix & shape into ball. Roll out on floured board. Cut into 6 equal squares.

Put a stuffed apple in the center of each piece of pastry. Sprinkle with extra sugar and cinnamon & dot with butter. Fold corners to center & pinch edges together. Put your completed dumplings in a greased baking pan and pour the cinnamon sauce over all. Bake at 375F for 35 minutes, or until pastry is browned and apples are cooked through.

Serve with as much cream as you like.

22 June 2013

Plum pie two ways

backyard cherry plums

Our backyard plums are ripe.

I always have a hard time using up the surplus of fruit our trees produce, mostly because we don't really eat jam on any sort of regular basis. So I end up going two ways: liqueur-making and baking. And since we still have quite a bit of plum schnapps from last year, baking was the clear winner.

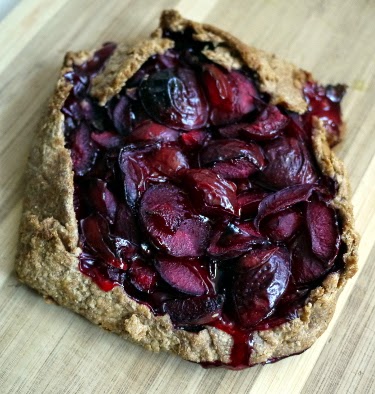
I've baked these plums into a yogurt cake. I've chucked them into smoothies. I've stuck a bunch of them into crumbles and crisps. It was time for something different: PIE.

backyard cherry plums

For someone with "pie" in the title of their foodblog, I certainly don't make it very often. I had a single coconut oil pie crust in the freezer, where it had been languishing since Thanksgiving. That's the last time I made a pie. So I decided to defrost it, roll it out, and fill it with all the fruit I could chop.

Our plums are tiny, juicy, and tart. I knew the usual plum pie recipes would probably be a bit off, since they're developed with supermarket plums in mind. So I broke out my trusty Joy of Cooking, looked up the instructions for sour cherry pie, and tweaked until I came up with this rendition.

I had to cut up about 30 of our little ping-pong-ball plums to achieve sufficient filling. If you're using larger supermarket plums, I'd guess 10 to 15 would be enough for one large pie or two smaller ones.

Make sure to get non-cling plums if you can. Did I mention that ours are super-cling? Yeah.

Instead of making a single pie, I decided to split up my dough and go for two: a rustic hand-formed guy and a neat little 7-inch tart. Double pies! Hooray!

plum pie with coconut oil crust

Plum pie two ways

4.5 cups chopped plums
juice of half a lemon
3/4 cup sugar (or more to taste)
2 tbsp cornstarch (up to 3 if your plums are super-juicy)
1 tbsp water (less for juicier plums)
crust of your choice

If your pie crust is frozen, take it out to defrost in advance. Otherwise, make up a batch of the pie crust of your choice. Since I was using coconut oil pie crust, my pie was vegan. Hooray!

Pit and chop your plums. Put them in a bowl and mix them with your lemon juice, sugar, cornstarch, and water. Let this mixture sit for at least 15 minutes, so the plum juice begins to release and thicken.

While you're waiting, preheat the oven to 425F and roll out your dough to 1/4 inch thickness on the floured surface of your choice. Even though I was making two pies, I rolled out the entire slab of dough at once. Then I pressed it into my tart tin, rolled the pin over to cut off the extra dough, neatened up the tart edges with a few scraps, rerolled the leftovers for my rustic crust, and pricked both crusts all over with a fork. This worked fine, with no particular issue re crust tenderness.

coconut oil whole wheat pie crust

You are also clearly free to just fill up a standard 9-inch pie pan instead of making two pies. Whatever floats your boat.

Put your tart tin and your rustic crust on a rimmed baking sheet before filling. (There will probably be juice leakage. I'm just saying.) Then pile your plum mixture into each crust. Fold up the edges of the rustic crust, overlapping the filling, and press together.

plum tart with coconut oil crust

Bake your pietarts for 25 minutes at 425F. Then reduce the heat to 350F and continue baking for another 25 to 35 minutes. If you're making one larger pie, you'll want to do 30 minutes at 425F and up to 45 minutes at 350F. When lots of thick juice is bubbling up at the top of your pies, they are done.

plum tart with coconut oil crust

I cut the rustic pie in half for immediate dessert purposes. The tart went into the fridge for future eatings. And lo, the next day, I totally ate pie for lunch. And then we ate more for dessert. DAYS UPON DAYS OF PIE.

rustic plum pie with coconut oil crust

We ate our pie totally plain, but ice cream is obviously an excellent addition. It would be a perfect contrast to the tangy acidity of the tart plums.

plum pie with coconut oil crust

What are you making with all the new summer stone fruit?

10 June 2013

Ginger molasses cookie ice cream sandwiches with pineapple coconut ice cream

Ice cream sandwiches with ginger molasses cookies and pineapple coconut ice cream

Yes, I did absolutely make a batch of ginger molasses cookies right at the beginning of summer. Why not? I don't really think of either ingredient as seasonal so much as tropical--totally appropriate for the newly warm weather we've been having. And to really make these cookies appropriate for the glare of the summer sun, I decided to add something cold and melty. That's right: ice cream sandwiches for everyone. Sweet and spicy cookies with rich ice cream? Perfect.

I have to admit I didn't make the ice cream. However! If you want to make your own, feel free. Pineapple coconut was our ice cream of choice, but a vanilla bean, zesty lime, or candied ginger flavor would also pair perfectly with these spicy, chewy cookies.

We still have an overabundance of powdered sugar in the house, so I used a mix of powdered and raw instead of the standard granulated sugar in these cookies. I also used wheat flour, because that's how I roll. This worked out perfectly.

ginger molasses cookies

Ginger molasses cookies

3/4 cup softened butter
1 cup sugar
1 egg
1/4 cup molasses
2 tsp baking soda
1/2 tsp salt
1 tsp cinnamon
1 tsp clove
1 tsp ginger
2 cups flour

Cream the butter with the sugar in a large bowl. Add the egg and molasses and mix well.

It's standard cookie practice to mix the dry ingredients in a different bowl before adding them to the wet in batches. I like to just put everything but flour straight into the wet, mix thoroughly, and then add the flour in three or four additions. It's all good.

Roll your dough into small balls and arrange on cookie sheets. If you want, you can roll each ball in sugar as well, or flatten them with the base of a glass dipped in sugar. Put your cookie sheets in the refrigerator for a few minutes before baking; this will keep the dough from spreading too much.

Bake at 375F for 8 to 10 minutes, or until the tops of the cookies are barely cracked. Err on the side of taking them out early, so they stay chewy and nice when stored. Overcooking equals rock-hard cookies. I'm just saying.

Cool your cookies on wire racks. Try not to eat all of them before they're cool enough to handle the ice cream.

Ice cream sandwiches with ginger molasses cookies and pineapple coconut ice cream

To make ice cream sandwiches, simply spread slightly softened ice cream onto the flat side of one cookie and top with another. We used store-bought pineapple coconut, which matched perfectly with the zing of ginger and the deep dark molasses--almost like a dark rum drink in ice cream sandwich form. Something in the citrus or tropical fruit family would be delicious too.

We made each ice cream sandwich as we ate, but I could definitely see making a whole tray for a weekend party and stashing them in the freezer until the time was right. What could be better at the end of a long, hot afternoon?

What desserts are you concocting this summer?

11 April 2013

Coconut extravaganza!

red lentil curry with avocado

I have a new favorite ingredient and its name is coconut. Coconut oil, coconut milk, actual shreds of sweetened coconut--I want it all. Okay! Let's do it!

My stash of extra virgin coconut oil had been sitting around alone and unloved ever since I used it in my 3-ingredient DIY deodorant. (This has been working just about perfectly for me, incidentally, so if you've been putting off making your own homemade deodorant, go for it!) But now? Now it is no longer alone and unloved. I've started using it as a cooking oil, and is it ever great.

I started out by making Gena's curried lentils, substituting red lentils for the specified yellow, and serving the whole shebang over basmati rice. The coconut oil gives this curry a faint tropical undertone and a richer mouthfeel, making the whole dish much more satisfying.

This was amazing, not to mention practically free. Isn't that a great feeling? I heart practically free food. And it tasted just about perfect, whether with avocado (always a plus) or with a big spoonful of plain yogurt and some sriracha sauce. When you put those two traits together, you know you have a good thing on your hands.

I liked it so much that I made a big pot of very similar red lentil soup with coconut oil and quinoa several days later. That one got the yogurt and sriracha treatment too. So good.

coconut bread

Next, I started drooling over Michelle's beautiful-looking coconut bread. Clearly, I needed to test it out and determine its actual deliciousness level. So I bought a bag of shredded coconut and went to town.

This recipe is based on the original at Smitten Kitchen, but substitutes in coconut milk in place of dairy. I'm thinking this made the loaf a bit heavier overall--but it also made it an especially coconutty delight. COCONUT!

The only change I made was to sub in wheat flour in place of the all-purpose. This is kind of the default at our house, since we almost never have all-purpose flour, but always have whole wheat kicking around. Wheat flour generally gives a slightly more damp and hearty character to baked goods, and that was certainly the case here. I think it worked especially well with all the chewy strands of sweet shredded coconut.

coconut bread with strawberries

Toasted in the toaster oven, cut into cubes, and topped with sliced sugared strawberries, this bread made one of the best desserts ever. Or maybe one of the best breakfasts ever. Either. Both. Yes.

Speaking of strawberries, how about a coconut milk and strawberry smoothie?

I had just about 1/4 cup of coconut milk left after making my coconut bread, so I stuck it in the freezer for a few days. Then, when I scored some windfall white grapefruit, but didn't want to make it into a typical alcoholic beverage--the fact that it was Monday at 11:30 am helped a lot there--I decided it was smoothie time.

coconut milk, strawberry, grapefruit, and yogurt smoothie

White grapefruit, strawberries, frozen coconut milk, and yogurt made a delightfully tart, thick, and filling creation. I also got to avoid the bane of my smoothie existence: frozen bananas. Seriously, frozen bananas are one of the main reasons I don't do smoothies more often (the other reasons are my visceral repulsion as regards the word "smoothie" and my dislike of washing the blender), so discovering the wonders of frozen coconut milk essentially made the heavens open right there.

coconut milk, strawberry, grapefruit, and yogurt smoothie

I put my smoothie in a mason jar. This worked out especially well, because when I discovered I was too full to drink the entire thing, I just put a lid on it and put it in the refrigerator, a la KERF. Then, the next day, I drank it for completely instant and ready-made breakfast. Hooray!

What's next on the coconut agenda? Hmmm...any suggestions?