Showing posts with label beans. Show all posts

02 June 2015

Samosa soup

Samosa soup

We've been eating a lot of pinto beans lately. This is a thing that happens when you buy a 5-lb bag of said pinto beans and cook huge batches of them in your pressure cooker on a regular basis, both of which I absolutely do.

Refried beans are already on the table two or three times a week at our house, whether they're made from pintos or black beans. I also recently made a double batch of Good Good Things' bbq pinto bean burgers (along with a vegetarianized batch of Joy of Cooking bbq sauce to put in them). We now have a lovely stock of 11 burgers stashed away in the freezer for future consumption. But I still had quite a few beans in their broth hanging around waiting to be eaten afterward.

We'd more or less exhausted the classics, so I wanted to make something different. Soup is always good. Why not mix up a basic bean soup with the spices usually used in making samosas?

I looked up a couple of samosa recipes and went to town.

This soup is lovely and warming, with a hint of heat that can be increased as much as you like. The garam masala makes it a bit sweet, especially when eaten plain. Add a handful of crackers (or naan, if you're feeling semi-industrious) and a few salad greens, and you have a complete and very satisfying meal. The leftovers freeze very well.

Serves 4.

Samosa soup

Samosa soup

oil of choice
1 large yellow onion
2 carrots
1-2 stalks celery
1-2 boiling potatoes
1 jalapeno or serrano
2 cups cooked pinto beans (in 2 cups of their broth if homemade, drained if not)
2 cups veg broth (+2 more cups if using canned beans)
1 tsp salt
1 tsp ground coriander seed
1 tsp cumin
1 tsp amchoor powder (or sub lemon juice)
1/2 tsp cayenne pepper or to taste
1 tsp garam masala
immersion blender or other pureeing device
plain yogurt/sub of your choice and cilantro to garnish

Warm a couple slugs of oil over medium heat in a large soup pot while you chop up your onion, carrots, and celery. When the oil is hot, add the chopped vegetables to the pan along with a shake of salt. Cook, stirring occasionally, for about five minutes, or until the onion is beginning to turn translucent.

While you're waiting, chop up your potatoes and chile. Then add them to the pot, stir, and continue to cook for another five minutes.

Next, add your pinto beans and broth to the pot. Add all the spices except garam masala (and lemon juice, if you're using it). Bring the pot to a boil, cover, reduce heat, and simmer for about ten to fifteen minutes, or until your potatoes are entirely cooked through. This may take a bit longer if your potato pieces are on the large side.

Take your pot off the heat and puree your soup using an immersion blender. Taste and correct the seasonings. Then return the soup to the heat and cook it down until it reaches your desired texture.

When you're happy with your soup, turn off the heat and stir in your garam masala (and lemon juice). Serve plain, with chopped cilantro, or top with plain yogurt. Voila!

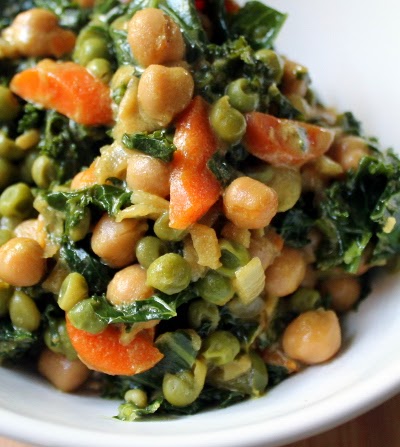
If you want more vegetables, you can saute some peas in olive oil with a little salt and put a big scoop of them over the top of your bowl of finished soup. Or put a handful of spinach or mesclun leaves in the bottom of each bowl before serving. Or have an actual salad on the side! It's all good.

What's your favorite thing to cook with pinto beans?

08 May 2015

Carrot pinto bean chipotle soup

Carrot pinto bean chipotle soup

Because there's no reason to stop eating soup just because it's May.

I am doing nineteen things at once lately, so soup is actually one of the better choices I could make. It's super easy to make, delicious, cheap, and stores well in the freezer for future nights when I don't want to do anything but collapse into bed. Put some soup in a bowl, throw some lettuce on a plate (or into the soup), and you have a full dinner.

This particular soup is lovely and spicy and delightful. I will eat plenty.

Carrot pinto bean chipotle soup

olive oil or butter
1 onion
6 carrots
2 stalks celery
2 cloves garlic
1 boiling potato
2 cups cooked pinto beans
4 cups veg or bean broth
salt, pepper, bay leaf, cumin, oregano
1-2+ chipotles in adobo & sauce
optional garnish: green onion, cilantro, yogurt, etc.

Warm your oil or butter in a large soup pot while you peel (or scrub) and dice your onion, carrots, and celery. Add the vegetables and a pinch of salt to the pot, stir, and cook over medium-high heat for about 5 minutes, or until softened and beginning to brown.

Mince your garlic and dice your potato. Add these to the pot and continue to cook for another minute or two. Then add your beans and broth, season to taste with salt, pepper, cumin, and oregano, throw in a bay leaf, and bring the whole business to a boil. Reduce the heat to simmer, cover, and cook for about 15 minutes, or until all your vegetables are cooked through.

At this point you'll want to pull the pot off the heat, remove the bay leaf, and puree the soup to your desired texture with an immersion blender. I like a completely smooth soup, but it's fine to leave yours a bit chunky if you prefer.

Check out the texture of your soup. If it's too thick, add some water or broth. If it's too thin, put it back on the heat and simmer to reduce to your desired texture.

When you're happy with your soup's texture, taste and correct any seasonings. Then, off the heat, stir in as much finely chopped chipotle pepper in adobo as you desire. The amount can vary quite a bit depending on your spice tolerance, so it's a good idea to start off slowly and taste as you go. We like spice, so I used about 2 tablespoons of chopped chipotle and sauce.

Serve your soup with your choice of garnish. Chopped green onion works exceptionally well here, as does cilantro or fresh oregano. If you happen to be making this at the height of corn season, a handful of kernels fresh off the cob would be an excellent idea. You may also want to have some toasted corn tortillas or chips available for dipping.

What's your favorite thing to eat after a busy day?

14 April 2015

Winter squash polenta with chipotle pinto beans

Winter squash polenta with chipotle pinto beans

I've been thinking about the combination of squash and beans for a few weeks now. Black beans and sweet potato are a natural match in things like enchiladas and black bean-broccoli stuffed sweet potatoes, so why not try a variation with winter squash?

This is just a basic soft polenta with a big whack of delicious, vibrant winter squash puree added in. I still had some previously roasted CSA squash puree in the freezer, so this was the perfect way to finish it up. Of course, there are still two squash on our counter. Those need to get eaten soon too!

Polenta does take a bit of time to make, but it's such a delicious result that I think it's well worth it. The overall result is smooth and comforting, with a subtle sweetness (not to mention a BRIGHT ORANGENESS) from the squash and a hint of contrasting black pepper. And the combination with spicy beans? Yes. The experiment worked.

Wilted dark greens with garlic would be an excellent addition if you want more vegetables. Cilantro would be a great garnish here too.

Winter squash polenta with chipotle pinto beans: polenta and water mix

Winter squash polenta

3 tbsp butter or olive oil
1/2 medium yellow onion
3 cups veg broth, water, or a mix
1 cup polenta and 1 cup water, combined
~2 cups winter squash puree
salt and pepper to taste

Melt your butter or oil in a 3-quart or bigger pan on medium heat while you dice your onion finely. Add the onion to the pan and cook, stirring occasionally, for about five minutes, or until nice and fragrant and translucent.

Add your water or broth and bring the pan to the boil. I used 2 cups of vegetable stock and 1 of plain water, which worked perfectly.

If you haven't mixed up your raw polenta and water, now is the time to do so. Give it a few good stirs to break up any lumps. Then gradually add your polenta and water mix to the pot, stirring each addition in well.

When all your polenta has been added, it's time to settle in for the long haul. Reduce the heat to low and cook, stirring frequently, for about 25 minutes. Many polenta recipes will have you stir for the entire cooking time, but I don't think this is necessary, especially if you are also cooking some tasty pinto beans at the same time. Just keep an eye on your polenta and stir it frequently.

Your polenta will be cooked when it's thick and is pulling away from the sides of the pan as you cook. Taste it to make sure. Then add your squash puree, season well with salt and pepper to taste (start with 1/2 tsp of each), stir it all up, and cook for another five minutes, or until hot through and tasty.

Chipotle pinto beans

butter or oil
1 yellow onion, chopped
3-4 cloves garlic, minced
cumin, oregano, salt to taste
~2 cups cooked pinto beans
2 chipotle peppers in adobo sauce, finely minced
adobo sauce to taste
green onion to garnish

This is more or less a non-mashed version of basic refried beans. Saute onion and garlic in oil or butter until softened. Season with cumin, oregano, and salt. Add pinto beans and a bit of their broth (if homemade) and cook, stirring, for five or ten minutes, until everything is hot through and the beans are at your preferred degree of dryness. Correct seasonings and take the pan off the heat. Finally, stir in your chipotles, plus a couple spoonfuls of the adobo sauce to taste. (Chop the rest of the can of chipotles in adobo and freeze in an ice cube tray for future applications.)

Serve your beans over a big scoop of polenta and garnish with chopped green onion. Oh man, it's so good.

Fried winter squash polenta squares with fried egg

I spread the leftover polenta evenly into a casserole dish, pressed some parchment paper over the top, and left it to solidify a bit overnight. The next morning, I fried up a couple of squares in a little butter, then topped them with a fried egg. Plain romaine on the side.

This was an excellent plan and I highly recommend that you try it, either with neat squares of polenta or a couple of rough handfuls shaped into patties. Runny egg yolk with crispy polenta is definitely worth a few minutes of effort.

How are you eating the last of your winter storage vegetables?

04 February 2015

How to cook beans from scratch & classic refried beans

How to cook beans from scratch & classic refried beans

Beans! They're the perfect food: cheap, delicious, versatile, easy, abundant, suitable for both vegetarian and vegan diets, and healthy. There is literally nothing not to love. So let's talk about how to cook a pan of dried beans from scratch and create a lovely pot of deliciousness.

How to cook beans from scratch

Dried beans should generally be soaked overnight. It's possible to do a quick soak using hot water, but that may require a longer cooking time later. I prefer the overnight soak.

Measure out the amount of beans you plan to cook, keeping in mind that they'll swell to twice their size after soaking and cooking. For this demonstration, I used a 1-lb bag of pinto beans.

Sort your beans before soaking them. Just pour a handful of dry beans onto a plate or other surface and quickly look through them. If you see any chunks of dirt, rocks, or beans that look really past their prime, pick them out and throw them away. Repeat this until you've looked through all the beans. It may seem ridiculous to look through all your beans, but it is 100% possible to find rocks! Get them out of there and avoid cracking a tooth, okay?

How to cook beans from scratch & classic refried beans

Put your sorted beans into a mixing bowl and cover them with twice their depth in tap water. Cover loosely and leave on the counter overnight, or for at least six hours. The beans will absorb the water and get bigger.

When you're ready to cook, pour out the soaking water and replace it with new water, covering your beans by at least an inch. Pour the whole shebang into a large saucepan with a lid. Add a bay leaf (optional, but nice) and bring the pot to a boil.

Reduce the heat, cover, and simmer gently for about 45 minutes to an hour, or until your beans are tender. Your beans are done if their skins split when you blow on them. The taste test is also reliable.

How to cook beans from scratch & classic refried beans

Now you are the proud owner of a pan of lovely cooked beans in their own broth. What will you do with them?

I decided to make classic refried beans with my beans, and to freeze the leftover bean broth for future soup purposes. If you want, you can also freeze your beans in their broth. It works beautifully.

How to cook beans from scratch & classic refried beans

Classic refried beans

olive oil or butter
onion
jalapeño or other hot pepper
salt, red pepper flake or dried chile of choice, cumin, oregano
cooked pinto beans
bean broth or water

In a wide skillet or saute pan, warm your oil or butter on medium heat. (For ultra-classic refried beans, I hear lard is the fat of choice.) Add a diced onion or two and saute until softened. Finely mince your jalapeño and add it to the pan. You can use as many jalapeños as you desire, depending on your spice tolerance.

Season with salt, red pepper flake, cumin, and oregano to taste. You'll want to be a little heavy-handed with all the spices because the beans are otherwise a big bland neutral palette.

How to cook beans from scratch & classic refried beans

When your onions and jalapeños are both softened, add your beans and enough broth or water to make everything a bit sloshy. Reserve a little liquid to add if needed. Cook your beans together with your onions and jalapenos, stirring frequently.

After everything is hot through, start crushing your beans with the back of a large spoon or with a potato masher. Mix and mash until your beans are the texture you desire; add more liquid if necessary. Taste and correct the seasonings, and you are done.

How to cook beans from scratch & classic refried beans

Classic refried beans are good in tacos, burritos, enchiladas, tostadas, or quesadillas, among other things. I used mine to make 16 bean and rice burritos (flour tortillas, beans, rice, salsa, scallion, cheese), which I put in the freezer for future dinner endeavours. The rest got eaten in quesadilla form almost immediately. So good.

What would you make with a big pan of freshly cooked beans?

24 June 2014

Baby artichoke and roasted red pepper salad with chickpeas and mesclun

Baby artichoke and roasted red pepper salad with chickpeas and mesclun

We interrupt plum week (uh, two weeks?) to bring you this important bulletin.

SALAD IS AWESOME.

Maud at Food Feud was talking about advance prep for a week's worth of salads. Yes! LET'S DO IT.

On the menu:
- baby artichokes
- roasted red pepper
- and then a delightful salad! YAY.

I needed to use all the baby artichokes from the CSA box before they went off. This is always a challenge, since artichokes are not noticeably tender or easy to cut when raw. So I broke out our steel, sharpened my knives, and got to work.

cooked baby artichokes

How to cook baby artichokes

baby artichokes
1-2 lemons
water
1 1/2 tbsp salt
1/4 cup apple cider vinegar or lemon juice
1 1/2 tbsp olive oil
1 garlic clove for each 2 baby artichokes

Start by trimming your baby artichokes. This is the hardest part of the whole process. Essentially, you want to chop off the top third of the artichoke, trim the bottom of the stem and peel it thickly, and then cut around and around the edges of your artichoke until all the dark green and purple is removed. You should be left with a little yellow-green nugget of excellence.

Have a big bowl of water ready with the juice of one or two lemons squeezed into it (and the empty peels dropped in too). As you trim each artichoke, drop it into the acidulated water. This will keep your artichokes from oxidizing and turning black.

When all your artichokes are trimmed, bring a pot of water to a boil. Add salt, lemon juice or apple cider vinegar, olive oil, and crushed garlic cloves. Then toss in your artichokes, right side up. Simmer, covered, for about 12 to 15 minutes, or until tender to the point of a knife. Full-size artichokes can go up to 35 minutes.

When your artichokes are done, pull them out of the water and drain them upside down for a few minutes. Then you can halve or quarter them, or leave them whole if they are particularly small. Note that you do not have to remove chokes from baby artichokes, as they are not yet formed. If you're doing this with full-size artichokes, you'll need to get in there with a spoon and scoop out any sharp thistley bits.

Store your artichokes with the lemon husks in a closed container in the fridge. Now you can pull out a handful whenever you want salad!

roasted red pepper strips in olive oil

How to roast bell peppers over the gas flame

bell peppers of your choice
tongs
paper bag or sealable container large enough to hold your peppers

This is easy but requires some attention and care.

If your peppers have stems, cut them off. This is just to keep any dangling bits from catching on fire. The base of the stem can stay on, so the pepper as a whole is intact.

Turn on your gas burner to medium-high. Using your tongs, set the pepper right on the grate over the flame.

The flames will gradually char and roast the pepper. Turn your pepper as it cooks, so all the flesh is evenly blistered and blackened. The creases in the pepper may not want to char; this is okay.

When the majority of your pepper skin is charred, take your pepper off the heat. Put it into a paper bag or other unmeltable container and seal. Leave it there for at least five minutes. Inside the bag, the steam from the hot pepper will loosen the skin.

Repeat this for all the peppers you want to roast.

Remove your roasted peppers from the bag and remove the skins by rubbing them under a stream of cool water. Most of the skin will flake off easily. It's fine to leave any stuck bits of uncharred skin on the flesh.

Tear each pepper in half and remove the stem and seeds. Separate into sections and chop up into any shapes you like.

Voila! Roasted red pepper! I cut mine into strips and stored them in a little olive oil in the refrigerator.

Now that you have a selection of delightful vegetables ready to go at a moment's notice, you can make a salad like this in no time flat.

Baby artichoke and roasted red pepper salad with chickpeas and mesclun

Baby artichoke and roasted red pepper salad with chickpeas and mesclun

mesclun mix
cooked baby artichokes
roasted red pepper
cooked chickpeas (canned or previously cooked & cooled)
olive oil
lemon juice or vinegar
salt, pepper

Arrange your mesclun mix on a plate. Scatter with big handfuls of artichokes, red pepper, and well-drained chickpeas.

Make a simple dressing by drizzling some olive oil over your plate, squeezing a lemon wedge over the top, and seasoning with salt and pepper. Or just use the vinaigrette of your choice.

Eat with vigor! Hooray!

And since you have the rest of the baby artichokes and red pepper strips in the refrigerator, you can have salads like this all week. Or use them for other things! Blend the baby artichokes with some white beans and garlic to make the world's best dip and/or sandwich spread. Toss the roasted pepper into a rice pilaf. Put big handfuls of both artichokes and peppers into a hearty pasta sauce. HAVE IT ALL.

What delights do you like to have on hand for an emergency salad session?

07 May 2014

Couscous salad with chickpeas, golden beets, and zucchini

couscous salad with chickpeas, golden beets, and zucchini

Who wants a quick and delicious lunch salad? You know you want one.

Raw beet has fast become my favorite way to cram as much crunchy, sweet vegetables as possible into a salad. To keep everything in my kitchen from turning fuchsia, I use golden beets. Red or chioggia beets also work well, but their juice will stain. At the very least, red beets will produce a bright pink salad. Be aware!

Of course, beets alone are not a particularly sufficient lunch. To give this salad some real heft, I opened a can of chickpeas. These little guys are the saviors of lunch salads everywhere. And why not bulk it up with the easiest non-grain ever, instant couscous? Perfect.

Not only is this salad tasty, easy, and cheap, it's very easily packable for work lunches or potlucks. The couscous absorbs the dressing, so there's very little risk of an olive oil spill. If I still worked in an office, I absolutely would have packed up a bunch of servings so I could grab one every day as I ran out the door.

I accidentally made enough salad to feed myself for a full week. Oops. On the other hand, now I have lunch just waiting in the fridge constantly. I call that a win.

Makes 6-8 servings.

couscous salad with chickpeas, golden beets, and zucchini

Couscous salad with chickpeas, golden beets, and zucchini

Salad:
1 cup instant couscous
salt, pepper, olive oil
1 cup boiling water
1 medium-large golden beet
1 small zucchini
4 mushrooms
fresh parsley & chives
2 cups cooked chickpeas

Dressing:
lemon juice
dijon mustard
salt, pepper
olive oil

Make your couscous by putting it in a heat-safe bowl, seasoning it with a bit of salt, pepper, and olive oil, and pouring the water over it. Cover with a clean tea towel and let it sit while you prep the rest of your ingredients. It will be done in about five minutes.

The vegetables are super easy: just cut them up into the shapes of your choice. I scrubbed and grated a golden beet and finely chopped a zucchini and a handful of mushrooms. You can add all kinds of other vegetables if you like. Chop up a decent whack of flat-leaf parsley and a handful of chives while you're at it.

When your couscous is finished, fluff it with a fork. Add your vegetables, herbs, and chickpeas and stir together.

Make your dressing by combining the juice of half a lemon, a spoonful of dijon mustard, and a generous grinding of salt and pepper. Whip with a fork to emulsify as you drizzle in about 1/3 to 1/2 cup of olive oil. Taste and adjust seasonings.

Pour your dressing over the salad and mix thoroughly.

couscous salad with chickpeas, golden beets, and zucchini

Check out that beautiful golden glow. I actually might have to rename this "golden glow salad," don't you think? So pretty. So tasty.

Which salads are keeping you happy as the weather heats up?

28 March 2014

Chickpea coconut curry with kale, carrots, and peas

Chickpea coconut milk curry with kale, carrots, and peas

Who wants curry? I, of course, always want curry. Let's have curry!

So I explored the pantry and came up with a can of chickpeas and one of coconut milk. Perfect.

Chickpeas always benefit so much from a long, hot bath in something super-flavorful, which makes them a natural match with coconut milk. Then all you need to do is check out the crisper and see which vegetables to add. I found a bunch of kale, a couple carrots, and, hiding in the back of the freezer, a bag of peas. Chickpea coconut curry, here we come.

Normally when I season a coconut milk curry I go straight for the curry paste. This time, however, we were out, so I went for ultra-simple spicing and just used hot curry powder. Hey, it worked with the coconut milk chicken that has somehow become a huge hit on Pinterest! (Seriously, how? Those pictures are awful.) And it also worked here. Hooray!

Chickpea coconut milk curry with kale, carrots, and peas

Chickpea coconut curry with kale, carrots, and peas

peanut or other oil of choice
1 onion
1-inch knob of ginger
1 jalapeno or other hot pepper
2 small carrots or 1 large
1 can chickpeas
~1.5 cups frozen peas, defrosted
1 bunch kale
1 can coconut milk
salt, curry powder (or your choice of individual spices)
rice or your choice of grain to serve

Start by sauteing a chopped onion in your oil of choice in a wide saute pan. Mince your ginger and jalapeno; scrub and slice your carrots. Add all of these to the softened onion. Give the pan a pinch of salt, stir, and cook over medium for about five minutes, stirring occasionally.

Next, drain and rinse your can of chickpeas and add them to the pan. Shake your coconut milk well before opening it and adding it as well. Season with curry powder, stir everything together, and bring the pan to a gentle simmer. Let cook over medium-low for at least ten minutes, so the coconut milk begins to reduce and the chickpeas have a chance to absorb plenty of flavor.

While you're waiting, prep the rest of your vegetables. Defrost your peas by submerging them in warm water, letting them soak for a few minutes, and then draining them. Wash, destem, and chop your kale leaves.

When the coconut milk has reduced by about half, add all the rest of your vegetables to the pan. Adjust your seasonings and cook for about five more minutes, or until your kale has wilted and become completely tender and your coconut milk has become a thick sauce coating your curry. Taste, add a bit more salt if necessary, and you're ready to serve. Yay!

Chickpea coconut milk curry with kale, carrots, and peas

I had my curry over short grain brown rice, because that's how I roll, but practically any grain you like would be an excellent match here. Garnish is not really necessary with such an array of beautiful vegetables, although a little cilantro wouldn't hurt. But really, all you need to do is get it into a bowl and eat. Super simple.

CURRY. Such an excellent, hearty, and cheap dinner. And did you notice it was vegan as well? It's vegan. Yay!

What quick yet tasty dinners are you conjuring up out of the dark recesses of the pantry?


10 February 2014

Red curry with chickpeas, carrot, and kale

Red curry with chickpeas, carrot, and kale

Coconut milk curries have become one of my favorite things ever to cook. As long as you have the main ingredients--by which I mean coconut milk and curry paste--you can pretty much curry anything in your kitchen. Meat, beans, soy; broccoli, cabbage, squash, mushrooms: nearly any combination of protein and vegetable can make a delicious curry.

Do you have some black-eyed peas and cauliflower sitting around? Curry. How about a package of tofu and a bag of frozen peas? Curry. Dry red lentils and a bunch of spinach? You'll need to add some cooking liquid and make it into a rich soup, but it's still curry.

I usually make red curry for a couple reasons. First, we like spice, which rules out a gentle yellow or masaman curry. Second, the green curry paste at our usual grocery store contains shrimp, which is a problem in a half vegetarian household. I could solve this if I made my own curry paste, but that hasn't happened yet, so. Red curry it is.

On this particular occasion, I broke out a can of chickpeas and pulled some carrots and kale out of the crisper. Twenty minutes later, voila! A rich, satisfying, and spicy vegan dinner.

Red curry with chickpeas, carrot, and kale

Red curry with chickpeas, carrot, and kale

peanut oil/flavorless oil of your choice
1 onion
1-inch chunk ginger
2-3 carrots
1 can/2 cups cooked chickpeas
1 cup coconut milk
1+ bunch kale
2-3 tbsp Thai red curry paste
salt
rice/etc to serve

Start by putting your rice on to cook. If you're making something quicker, like instant couscous or noodles, you can wait until your curry is almost done. Use your judgement.

OKAY. For the actual curry, start by warming a slug of peanut oil in a wide saute pan. Add a chunked onion, stir, and let soften while you peel (use the spoon trick) and finely mince a piece of ginger.

Add your ginger and a pinch of salt to the onions. Stir everything together and continue to cook while you wash, scrub, and cut your carrots into 3/4-inch-thick chunks. When your onions have started to turn translucent, dump in your carrots. Give them about five minutes, stirring occasionally, before you add your drained and rinsed chickpeas.

Shake your coconut milk well before pouring it into the pan. Add your curry paste and stir to combine. The amount here will depend on your spice tolerance. If you like hot and spicy dishes, add more curry paste; if not, add less. It's all good.

Bring everything up to a gentle boil, lid, reduce the heat, and let simmer five minutes. This will give your carrots a chance to cook through and your chickpeas a chance to absorb the spices.

While you're waiting, wash your kale, pull the leaves off the stems, and roughly chop them up. When your carrots are just tender, add your kale to the pan and stir. Put the lid aside and cook for another three or four minutes, or until the kale is completely wilted and the sauce has reduced to your desired thickness. You can always add a touch of water if it gets too thick.

Taste and correct seasonings, and you're done! Serve with rice or your choice of grain device. You can garnish with chopped green onion, cilantro, or basil if you so desire. Cut up a couple oranges and you have a complete dinner.

This served two of us easily, and left plenty of leftovers for lunch the next day besides. Yay, lunch!

What's your favorite kind of curry?

20 September 2013

Sweet potato soup with black beans, corn, and jalapeno

sweet potato corn jalapeno black bean soup

It has actually started to get chilly here in scenic NorCal! You know what that means: SOUP. On the other hand, "chilly" in NorCal really means "highs of under 80F during the day, with lots of sun," so while the fall vegetables are certainly emerging, we still have tomatoes and corn and zucchini and hot chili peppers everywhere. Okay! Let's make a hearty soup full of both late summer and fall produce!

I took some inspiration from Joanne's sweet potato corn & jalapeno bisque and made this soup. The catch is that we needed protein, but that was easy enough to fix with the addition of bean broth and black beans. It also balanced out the serious sweetness of the potato and corn.

So, to sum up: this is an easy, delicious, filling, spicy vegetarian main dish soup with protein and seasonal vegetables. And if you use oil instead of butter, it's vegan! Convenient as hell.

I wanted a big vat of thick, creamy puree studded with bits of barely-cooked corn, so I reserved the corn to add at the end. If you want a more highly textured soup, you can always add the whole black beans to the pot after your puree the potatoes and broth, or you can just hold off on pureeing altogether. It's delicious in every case.

sweet potato corn jalapeno black bean soup
Sweet potato soup with black beans, corn, and jalapeno

butter/oil of your choice
1 onion
3 cloves garlic
2+ hot peppers
cumin, oregano, red pepper flake
salt, pepper
2 big sweet potatoes
3-4 cups veg and/or bean broth
2 cups black beans, refried or whole
2+ ears fresh corn (frozen also ok)
lemon or lime juice to finish
garnishes of your choice: curtido de repollo, sour cream, cilantro, green onion, lime wedges, corn tortillas, avocado...

Start by warming a good slug of oil over medium-high heat in the large soup pot of your choice. Dice up your onion and add it to the pot, stirring to coat with oil. Smash and mince your cloves of garlic and add them as well.

Destem and mince your hot peppers. I used one garden jalapeno and one random red hot pepper from the farmer's market; you can use whatever combination you so desire. I imagine these hot peppers would be a particularly great addition if you roasted them and flaked off the skin beforehand, but I was in the WANT FOOD NOW zone and so didn't bother.

Add your hot peppers to the pot. Season with cumin and oregano to your taste, and add a sprinkle of salt. If you want extra spice, you can add in some red pepper flake as well. I used some hot red hatch chile flake, because that's how we roll, and also because my parents brought us a gigantic bag of it last year, and we're still nowhere near making a dent even though we use it all the time.

Stir everything together and cook, lowering the heat a bit if necessary, to soften. In the meantime, peel and cube your sweet potatoes.

When your vegetables have softened and the onion is golden brown, add your broth to the pot. I used a mix of frozen pinto bean broth and vegetable broth; the bean broth adds protein and the veg broth adds flavor. If you're on the meat boat you can use chicken stock, but it's really not necessary. (Now I'm having a horrible flash of what "the meat boat" might look like. Curse you, personal slang!)

Add your sweet potatoes and black beans to the pot and bring everything to a boil. Cover, lower the heat, and simmer until your potatoes are cooked through. This took about 20 minutes for me, but the time will vary depending on the size of your potato cubes.

Pull your pan off the heat and puree with an immersion blender until the soup reaches your desired texture. Taste and correct the seasonings. You may want to add some more broth or water if the soup is too thick for your tastes.

Put the pan back on the heat and let it simmer gently while you husk your ears of corn and cut the kernels off the cobs. Add the corn to your soup, stir, and continue to simmer for another 5 minutes, or until your corn kernels are hot and delicious. Take the pan off the heat, add any final sprinklings of pepper, and mix the juice of a lime or half a lemon into the pot. Done!

Serve your soup with the garnishes of your choice, preferably of the "fresh and crispy" category. We had ours with big whacks of well-drained curtido de repollo, which provided an excellent crunchy contrast plus some extra acidity. A wedge of extra lime and a stack of corn tortillas charred over the gas flame are also good ideas.

The best part? We had enough soup to feed us for two dinners, plus a few extra servings to stash in the freezer. Hooray!

How are you bridging the gap between summer and fall?

15 August 2013

Chickpea carrot salad with fresh parsley

chickpea carrot parsley salad with herb vinaigrette

It's August! Let's have a salad!

This guy is super simple, delicious, and fast. It's the perfect thing to eat when you can't stand the thought of turning on any appliance in your kitchen. (Okay, refrigerator excepted.)

The key to making a bean or legume-heavy salad appetizing is to add lots of vivid vegetable and herb flavors. Carrot is a perfect contrast to chickpeas: bright, sweet, and crunchy.

I used parsley for my main herb component, and boosted it even more with a super-herby dressing. Chopping a bunch of mixed green herbs and adding them to either the salad itself or a standard vinaigrette would work really well too. Or you can choose to go for a different herb entirely. Dill and carrot are excellent friends; basil would work well too.

The best part? You can make this salad the night before, and the flavors will be even better the next day. Instant lunch for the win!

Chickpea carrot parsley salad

1 can/2 cups cooked chickpeas
3 carrots
1-2 cloves garlic or half a shallot
handful of parsley
lemon juice to taste
salt, pepper
herb vinaigrette or other vinaigrette of your choice

Drain and rinse your chickpeas. Shred your carrots with a box grater. Mince your garlic or shallot and finely chop your parsley leaves.

Add all your ingredients to a large bowl, season with a squeeze of lemon juice and some salt and pepper, and dress with vinaigrette. Toss everything together and taste for seasoning.

If possible, let your salad rest in the refrigerator for several hours before eating.

This salad can go into a split pita with some chopped lettuce for a quick lunch. If you're not a sandwich person, you can transform it into a full meal salad by adding a big scoop to a plate of greens and your choice of chopped veg. It's a simple side for your choice of grilled or barbecued main dishes--juicy lamb would be an especially great combination with chickpea and carrot--and it will travel well to a potluck across town. Perfect!

Which salads are helping you avoid the oven this August?

08 July 2013

Big green salad with chickpeas and herb vinaigrette

big green salad with chickpeas grape tomatoes cucumber mushroom and herb vinaigrette

It looks like we've finally broken through last week's heat wave, and am I ever happy about that. In the meantime, however, the word has been SALAD.

Spicy tuna salad on crisp flatbread with chopped cilantro. Little bites of Erin's cucumber caprese salad. And this salad: the big green.

A green salad is exactly what I want to eat when it's too hot to contemplate anything but lying in the shade with a cool drink, and yet I still need some form of solid food. Of course, while a plate of all veg is delicious and cooling, it's not normally a full meal.

Enter the chickpea.

Chickpeas are by far my favorite way to make a salad into a complete lunch or dinner. They're full of protein, cheap, easily available, healthy, and readily absorb flavors. This time I combined them with with a simple plateful of lettuce, mushrooms, tomatoes, and cucumber, and drizzled the whole shebang with an intensely green vinaigrette made with all kinds of garden herbs. It was perfect.

You can add practically anything you like to this salad. Chickpeas are relatively bland on their own, so they stand up well to intense flavors. I think some finely sliced red onion and kalamata olives would have been perfect additions. Bits of crumbled goat cheese or feta would not go amiss either.

big green salad with chickpeas grape tomatoes cucumber mushroom and herb vinaigrette

Big green salad with chickpeas

butter lettuce
cucumber
mushrooms
grape tomatoes
cooked, drained chickpeas
salt & pepper
herb vinaigrette

Wash your lettuce and spin it dry. Chop the leaves into bite-sized pieces and spread them on a plate of your choosing.

Peel your cucumber, seed it, and slice it into thin half-moons. Slice your mushrooms and halve your tomatoes. Scatter all your vegetables over your lettuce. Top with chickpeas.

Season your plate with salt and pepper and dress with herb vinaigrette.

Eat. Isn't it delightful? A glass of white wine would be an excellent addition.

herb vinaigrette

Herb vinaigrette

6 tbsp olive oil or salad oil of your choice
2 tbsp champagne vinegar
1 big handful apiece of parsley, basil, oregano, and chives
salt & pepper

Wash your herbs, trim the leaves off their stems, and chop roughly. Add to a blender with your vinegar, oil, and salt and pepper to taste. Blend until mixed well. Store excess dressing in a jar in the refrigerator, and use within a week.

Hooray for salads!

What are you eating to beat the heat?

08 May 2013

Zucchini tacos two ways

zucchini and egg tacos

We are back from Michigan! Unfortunately, I accidentally left my camera on in my bag overnight, so I have no pictures to give you. But I do have pictures of things I made before we went to Michigan!

So. TACOS.

Traditional tacos are pretty straightforward: beans or meat, crunchy shredded leaves, and a salsa or garnish of some type. So you get things like fish tacos with cabbage slaw and pickled onions, chicken tacos with shredded lettuce, onion, and cilantro, and straight-up pinto bean tacos with more lettuce and pico de gallo.

Then you start adding more things, and the traditional tacos get blown out of the water.

Don't get me wrong: traditional tacos are amazing and I love them very much. But when the first zucchini start showing up at the farmer's market, I want to eat them every which way, and one way is in the taco of my choice.

Some of you may be saying something along the lines of "UGH! Squash in a taco is an abomination! This is what's wrong with every so-called 'vegetarian burrito' ever made. Why do you torment us so??" Fair point! Most of the time tacos and burritos filled with zucchini (and its awful counterpoint, broccoli, which I flatly do not believe can be saved here) are watery and bland, devoid of protein, and dripping with colorless juice that soaks the tortilla through before you're even halfway through. These tacos are different.

By pan-frying the zucchini with onion and herbs, you not only burn off the offensive juices, but also flavor the resulting vegetable mass beautifully. Adding scrambled egg or refried black beans takes care of the protein problem. And cooking the tortillas over open flame provide an extra element of crispness to fight against the sog factor.

zucchini and egg tacos

I made two different kinds of zucchini tacos: one for breakfast and one for lunch. Both start out in very much the same way.

Saute chopped onion and/or garlic in a frying pan with a little olive oil or butter. While it's softening, toast as many corn tortillas as you want tacos on both sides over the gas flame. You can do this in a frying pan if you have an electric stove, but the gas burner char is really amazing. Put your finished tortillas aside, covered with a clean kitchen towel to keep them warm.

Chop up your zucchini and add it to the pan. Salt, pepper, cumin, oregano. Cook over medium to medium-high heat, stirring or tossing frequently. It should take five minutes or so before your zucchini has released all its liquid and begins to turn golden around the edges. This is what you want.

For breakfast tacos: scramble a couple of eggs, either with your finished zucchini or by themselves. Add in a bit of chopped cilantro or green onion if you want. Layer your tortillas with the finished eggs, the zucchini mixture, and a scattering of the cheese of your choice. I used parmesan because we had some lying around.

Hooray! Tacos!

zucchini avocado and black bean tacos

For lunch or dinner tacos: Warm up some black or refried beans in a separate pan, or shove all the zucchini and onion to one side of your frying pan and just warm them in the empty spot.

Layer your tortillas with the hot beans, zucchini, and some sliced avocado. Scatter cilantro over the tops.

Hooray! Double tacos!

What have you been stuffing into tortillas lately?

22 April 2013

Weekend tacos

On Saturday I went to the park to read a book and discovered a young woman sitting in the grass straight-up sobbing for a good ten minutes.

Afterward I walked up the street, passing two guys in their 50s playing basketball in a driveway. The ball got away from them, and one guy went after it, while the second made small talk with me. "Hi! How are you? Nice weather." I agreed that it was very nice weather. Then, as I continued to walk away, he said, "Don't get yourself killed." I immediately & without batting an eye agreed that I would try not to.

It turned out that he was actually talking to his friend, who had chased the basketball into the street, but still. That's what the week was like. I am more than willing and happy to accept wishes that I not die from a random person on the street.

I don't have a whole lot to say about food today. I transplanted the tomatoes a few days ago: Boxcar Willie and Caspian Pink. I stood around drinking Modelo and weeding and watering for a good chunk of the weekend. The jasmine is still in bloom. Overripe oranges keep falling off the tree, and I find them on the ground, smashed, half-eaten, and filled with ants.

Last night we made tacos. Onion, carrot, jalapeno, black bean; long-grain brown rice; chopped lettuce and grape tomato; corn tortillas charred over the flame; hot sauce. I put cream cheese on mine, because that was the cheese we had in the house. Later, for a midnight snack (ok, a 9:30 snack), I charred one more tortilla, filled it with leftover beans and cheese, folded it in half, and set it to toast over the gas. It was warm and tasty and comforting, and I ate it and played some puzzle games and went to bed.

25 March 2013

GIANT BURRITO

giant burrito with refried black beans, brown rice, avocado, cheddar, cilantro

There comes a time in every girl's life when she just wants to eat the most gigantic burrito possible.

Actually, for "a time" substitute "all the time."

Yeah. This weekend we happened on the largest tortillas I've ever seen--12 inches in diameter. What better excuse could we possibly have for making gigantic burritos?

I sauteed some garlic, jalapeno, red and green pepper, and frozen corn in olive oil, seasoned the pan with cumin, oregano, ground New Mexican hot chile, and onion powder (there being no actual onion in the house), and mixed that with a couple cans of refried black beans. You could clearly use your own black or pinto beans instead. I made short-grain brown rice in the rice cooker and warmed up the tortillas in a foil packet in the oven. They were too big to fit in the toaster oven. Yeah.

Assembly: beans, rice, thinly sliced cheddar, hot sauce, avocado, and some mixed lettuce from the farmer's market. I had cilantro in mine too. We forgot to cut up the green onion, but oh well. Note the random piece of purple lettuce peeking out of the end.

giant burrito with refried black beans, brown rice, avocado, cheddar, cilantro

The result? One huge burrito for each of us, and three additional similarly huge burritos for the freezer. I left the avocado and lettuce out of the frozen versions, since those obviously would not do so well in the cold. But I can't say I'll mind smashing up a batch of guacamole or pouring a bunch of tomatillo salsa over a hot emergency burrito in the future.

MOST SATISFYING DINNER EVER.

15 March 2013

Spring salad with shredded root veg, chickpeas, goat cheese, and almonds

Spring salad with greens, shredded root veg, chickpeas, goat cheese, and almonds

Guys, it's spring. That means SALAD.

I want all the vegetables on the planet. Okay! What if we take some classic spring greens, combine them with some raw shredded veg, and add a few beans, some bits of cheese, and a handful of chopped nuts? Cover a plate and you have a full meal: tender, crispy, crunchy, and chewy all at once. Hooray!

Since we're hovering right at the boundary between winter and spring, I decided to take advantage of the juiciest winter root veg: carrots and beets. Combined with chickpeas, goat cheese, and almonds, they were just about perfect.

shredding a golden beet

Not very many people seem to realize raw beets are even edible, let alone sweet, earthy, and delicious, but they absolutely are. They're a great option for a raw veg when the new spring peas and asparagus are stubbornly hovering just out of reach. I like to use golden beets, so as not to get my entire kitchen covered with magenta juice, but an ordinary beet will work just as well. And since the golden beet was bright yellow, I decided to use some beautiful purple carrot for extra visual punch.

A box grater is all you really need for finely shredded veg, but if you happen to have a spiralizer or mandoline, now is an excellent time to break them out.

raw shredded golden beet and rainbow carrot

We had some really excellent applewood smoked almonds from our farmer's market on this particular occasion. They're pricy, but they're worth it, especially when you use them as a sparing garnish. (I actually crushed some up and used them to coat a piece of flounder before searing a bit ago--and why I didn't take any pictures of that, I don't know. It was AMAZING.) Of course, then there's the issue of just eating them all out of hand, but they're so delicious that I think we can live with that.

This salad can take all kinds of variation. Don't have almonds? Try some toasted cashews or sunflower seeds. Don't have goat cheese? Crumble a chunk of feta or blue cheese, or use mozzarella bocconcini. Want to get rid of a handful of radishes or a kohlrabi bulb? Shred them up and go forth. It's all good.

Spring salad with greens, shredded root veg, chickpeas, goat cheese, and almonds

Spring salad with shredded root veg, chickpeas, goat cheese, and almonds

salad greens
carrot
beet
cooked chickpeas
goat cheese (or your preferred cheese)
smoked almonds (or the nut or seed of your choice)
vinaigrette (we use Thomas Keller's house vinaigrette)
pepper

Wash and dry your greens; arrange them on a plate. Cover your greens with a layer of shredded raw carrots and beets. Add several scattered handfuls of cooked chickpeas and chunks of cheese. Finish with a sprinkling of chopped smoked almonds. Drizzle a vinaigrette over the top of your salad, add a bit of cracked pepper if desired, and eat.

Hooray for salad!

What are you eating on your early spring salads?

22 February 2013

Black bean cauliflower soup

black bean cauliflower soup

It's been a crazy week. I've been working setup for Stitches West, a gigantic yarn convention, and am going to at least one yarn-related party this weekend before working teardown Sunday night. That means many hours of physical labor. Personally, I'm used to sitting in front of a desk or videocamera for the majority of my workday, so this is a huge and exhausting (although fun) change. It does mean I'm getting the best sleep I've had in ages, though.

Thank you all for your camera recs! I did a good bit of additional research, especially since I decided a smaller and more portable form factor was important to me. So I decided to take a step back from the ubiquitous Canon and go for the Panasonic Lumix GF3. Hey, why not learn to use a different camera interface while I have the opportunity? And a small DSLR with pancake lens seems to offer the best of both worlds.

So here's the situation. I have the camera in hand, but I haven't been in the kitchen since Tuesday, and all I want to do is lie on the couch and eat delivery pizza.

It's a good thing I'm the type of person to stash homemade soup in the freezer.

black bean cauliflower soup

I make this same kind of simple pureed veg and bean soup over and over, as you may have noticed. It freezes beautifully and defrosts to an unchanged texture. By keeping the main base free of dairy, you can not only avoid any separation or crystallization in the freezer, but also feed vegans. Hooray!

Black bean cauliflower soup

olive oil
onion/garlic
celery
carrot
cauliflower
dry vermouth
cooked black beans
bean/veg broth
salt, pepper, thyme, sage, red pepper flake, bay leaf, etc.
typical garnish of cilantro, yogurt, and sriracha

If you're starting from dried beans, sort them, soak them overnight, and boil them in a fresh change of water for about an hour, or until tender. This will give you both beans and black bean broth. I was starting from previously cooked beans in their broth, which I had frozen into a 2-cup block. Yes, the freezer is my prep kitchen.

If you're using canned beans and thus need veg broth, start a pot of that first.

Okay. Chop up an onion and a couple cloves of garlic. Saute in some olive oil in a reasonably sized soup pot. While the onion is softening, scrub and chop a carrot and dice a stick or two of celery. Throw them into the pot, add a bit of salt, stir, and let cook on medium for about five minutes, or until tender.

While this is happening, tackle the cauliflower. Cut off any dark bits and chop the rest of the head (or as much cauliflower as you want) into florets. Add them to the pot, season with the herbs and spices of your choice--I used thyme, sage, red pepper flake, a bay leaf, and maybe some marjoram too--and cook for another five to eight minutes, stirring occasionally. You want the cauliflower to soften and also to pick up a bit of browning. Deglaze with vermouth when the pan gets too dry.

Next, add your black beans and broth. Since mine were frozen, I just threw the blocks into the pan and let them melt. I used about four cups of beans in broth, so that's roughly 2 cups apiece.

Bring everything to a boil, reduce the heat, and simmer for a good ten minutes. Puree off the heat with an immersion blender. Cook down to your preferred texture, correct any seasonings, and you are good to go.

Eat with the garnish of your choice and some delicious pita or toast. I obviously really like yogurt, sriracha, and cilantro as soup garnish, but I think a squeeze of lemon and a scattering of parsley would also be delicious. Also: cashew cream. I'm just saying. I may be needing some cashew cream in the next few days.

Put the ungarnished leftovers in the freezer for the next time you come home with absolutely no desire to spend any time over the stove. Hooray!

What foods do you store for emergency dinners?

18 February 2013

Chickpea tomato couscous

chickpea tomato couscous

Well, my camera has suddenly started writing invisible junk data to its memory card. It still takes pictures, but it won't store them. So I'm pretty happy that I've had a backlog of pictures hanging out waiting to be edited, aren't you?

It was a good run, ridiculous little Canon point-and-shoot. Hey, over five years' worth of service in the kitchen is pretty great, considering all the sauce and steam and oil in the mix, right? I'm thinking I will take a small step up instead of leaping into the land of complex equipment I don't really know how to use. If any of you guys have recommendations for mid-range cameras that work well for food photography, let me know!

Anyway. Lunchtime!

Instant couscous is one of my favorite options for a super-fast meal. It costs just about nothing from the bulk bins. It's not perishable, so you can keep a container in your desk at work and whip it out whenever you have a food emergency. It's surprisingly filling, and can be a meal in itself if necessary. It's exceptionally easy to make--all you really need is boiling water and a little salt and pepper. And, of course, it makes a perfect backdrop for nearly any mix of vegetables, beans, and sauce. This time I had chickpeas, tomato sauce, and some carrot and red pepper. Voila! Lunch.

chickpea tomato couscous

Chickpea tomato couscous

couscous
garlic
olive oil
carrot
red bell pepper
cooked chickpeas
dry vermouth
tomato sauce
salt, pepper, red pepper flake, marjoram, oregano
parsley and green onion to garnish

Start out by making your couscous. Simply put as much couscous as you want to eat into a bowl, keeping in mind that it will expand by about half when cooked. Boil some water in your teapot and pour it over the couscous to cover by a finger's width. Add some salt, pepper, and a little drizzle of olive oil, cover the bowl with a clean tea towel, and set it aside. It will steam while you cook all the vegetables.

Warm a glug of olive oil in a saute pan. Add as much minced garlic as you like. I like plenty, so I used three or four cloves for my lone lunch serving. Let the garlic soften over medium heat while you scrub and grate a carrot and slice up a chunk of bell pepper.

Add the carrot, bell pepper, and a bit of salt, and cook your vegetables together, stirring occasionally, for about five minutes. When the vegetables are tender, add your chickpeas and season with pepper, red pepper flake, marjoram, and oregano. I used half a can of chickpeas, since I was only feeding myself, but you can easily up the amounts if needed. Stir everything together and cook for another three or four minutes. When the pan gets dry, deglaze with dry vermouth or some water.

Add your tomato sauce to the pan, stir, and bring to a simmer. Give everything a few minutes to cook before you taste and adjust the seasonings. Chickpeas can take a lot of flavor, so be prepared to add a bit more of everything. Continue to cook until the sauce has reduced to your desired thickness.

By this time your couscous should be finished steaming. Uncover the bowl and fluff with a fork. Top your couscous with a big spoonful of chickpeas and tomato. Garnish with chopped parsley and green onion.

chickpea tomato couscous

Now eat it!

Since I used oregano and marjoram as my main herbs, this turned out slightly Italianate. The red pepper, carrot, and tomato made the overall profile a bit sweet, while the red pepper flake punched everything up with spice. It would be really easy to switch out the herbs and turn this into a spicy tomato curry, to mix up the vegetables with some celery or mushrooms, or to exchange the chickpeas for white beans and puree into fagioli-type sauce. It's totally up to you. I think that's my favorite thing about knowing how to cook--the ability to improvise lets you use your available ingredients to cater precisely to your tastes. It's so satisfying.

What's your favorite melange to serve over a bowl of delicious grains?

22 October 2012

Vegetarian baked beans

homemade vegetarian baked beans

It's raining! Rain in California! Fall is actually here! HOORAY!

This is clearly the best possible time of the year to make a gigantic pan of delicious, hearty, warming goodness. I'm talking about baked beans.

Baked beans are traditionally made with navy beans or similar small white beans, plus onion, bacon, and a molasses-heavy sauce that would probably be excellent on barbecue. (Mental note: make a batch of actual barbecue sauce soon.) But the real essence of baked beans is the bean itself, or maybe the bean plus molasses. So, since our household is half vegetarian, we took out all the meat components and added in some liquid smoke and lemon juice. The result was more than satisfactory.

These take hours upon hours to cook, so they are excellent to make on a grey weekend when all you want to do is putter around the house. Nothing is better than a bubbling pot when it's cold and damp out, right? Soak the beans the night before, boil them in the morning, bake them right after lunch, and you should be all set by dinnertime. Bonus: delicious baked bean fumes delicately wafting through the house all day!

Vegetarian baked beans
Based on Boston Baked Beans

2 cups dry white beans
bay leaf
an onion
3 tbsp molasses
1/2 cup ketchup
1/2 cup brown sugar
2 tsp salt
1 tsp pepper
1 tsp mustard powder
several good shakes of liquid smoke
juice of 1/2 lemon
butter/olive oil

Start the day before you want to eat by sorting and soaking about two cups of dry white beans. Leave them overnight, loosely covered. The next day, change out the water and simmer the beans with a bay leaf until tender. Depending on the age of your beans, this can take up to two hours. When done, drain your beans, reserving the broth. You can also cook your beans in advance and refrigerate them, or substitute canned beans.

When you're ready to make the beans, preheat your oven to 325F/165C.

Break out a dutch oven or other large, deep, oven-safe casserole dish. Chop up a large yellow onion. Fill the dutch oven with alternating layers of beans and onion, ending with beans.

homemade vegetarian baked beans

Next, make the sauce. In a pan, combine the molasses, ketchup, brown sugar, salt, pepper, mustard, liquid smoke, and lemon juice. Smoke seasoning is really potent, so be careful with it! Add a little at a time, and definitely don't drop the bottle.

Bring the pan of sauce to a boil, stir to dissolve any recalcitrant lumps of sugar, and pour it all over the beans. Then add enough of your bean broth to cover the beans entirely. (Freeze the leftover bean broth and use it in soups later.)

Dot the top of your bean dish with chunks of butter or a scattered drizzle of olive oil. Don't skip this--the fat in the oil or butter is going to carry the flavors of the sauce and onion to make the whole dish meld together. It's taking the place of the bacon fat in the original recipe.

Bake your beans, covered, for about two hours. Then take off the lid, check your liquid level, and continue to cook for another hour or two, or until the beans are amazing and delicious. It's done when you think it's done.

Hooray! Baked beans!

We had our baked beans over bowls of rice, but I would definitely be up for a biscuit and gravy or cornbread application. Hearty greens, either steamed or sauteed, would be perfect on the side.

What dishes do you love to make when it's dank and rainy out?

13 July 2012

Soupe au pistou at Eating Appalachia


Today, gentle reader, I have the honor of sharing my recipe for soupe au pistou in a guest post over at Jes's beautiful blog, Eating Appalachia.

Do you have zucchini, tomatoes, basil, or green beans bursting out of your kitchen? This is the perfect way to use them. Hop on over!

08 June 2012

Massive freezer burrito stash!

bean and cheese burritos

Ideally, we'd make and eat a delicious, healthy, quick, easy, and mood-targeted dinner every single night. However, sometimes you just need to eat but don't have the time/energy/desire to make the effort to cook. Why else does the frozen entree industry exist?

So. To circumvent the impulse to buy packages of frozen burritos--one of our favorite ridiculous convenience foods--I decided to make my own.

The first step was making a gigantic batch of refried beans. I soaked a whole bunch of pinto beans overnight, drained and rinsed them, and boiled them until tender with a couple of bay leaves and twice their depth of water in my biggest pot. This gave me not just a whole lot of perfectly soft and tender pinto beans, but also five--count them, five--containers of pinto bean broth to pop in the freezer for future soup enrichment. That's ten cups of broth! Hooray!

To make the refried beans, I warmed some olive oil in a big pot and added an onion, a handful of garlic cloves, half a serrano, a whole jalapeño, and a couple of chipotle peppers in adobo sauce, all of which were chopped. I seasoned everything with cumin, oregano, salt, and more chipotle in the form of powder. When all the vegetables were softened and super-fragrant, I added ALL THE BEANS IN THE WORLD and their remaining broth. I mixed it all together and let it cook for maybe fifteen or twenty minutes, to give the beans a chance to absorb some more flavor. To get the beans to ultimate smoothness, I took the pot off the heat, let it cool slightly, and pureed with an immersion blender.

bean and cheese burritos

Voila! A massive pan of refried beans!

To set up my burrito-making station, I cooked some brown rice in the rice cooker. I cut up some green onions. I sliced up some cheese. I found a bottle of hot sauce. I took the beans and tortillas out of the fridge to warm up enough to use. Then it was just a matter of starting the assembly line.

Lay out tortillas. Add beans, rice, onions, cheese, and a little dribble of hot sauce. Fold. Repeat.

bean and cheese burritos

I ended up with a massive batch of eighteen bean, cheese, and rice burritos. Hooray!

To freeze, lay your finished burritos on a cookie sheet, seam side down (so they won't unroll). Stick the entire sheet in the freezer for maybe half a day, or until everything is frozen. Then remove the pan, stick your brozen burritos in a resealable bag or other container, and stick them back in the freezer. You could also wrap them each in foil if you're planning to take them to work for lunch. This process ensures that your burritos won't freeze together, so you can actually get out one at a time without having to defrost the entire bag.

bean and cheese burritos

To heat frozen burritos, we bake them in the oven or toaster oven at 350F/175C for twenty minutes, or until hot through and beginning to brown. You can use the microwave if you have one. Since microwave power can vary, I'd start with one minute and heat for longer as needed.

These are obviously pretty standard burritos, but the method would work for practically any filling you want to try. I'd shy away from more liquid ingredients--raw chopped tomatoes come to mind--but otherwise, the sky's the limit. I think a black bean, sweet potato, corn, and kale burrito may be next on the list, or maybe a black bean, rice, garlic-seared summer squash, cotija, and cilantro burrito. I may even test out freezing a refried bean and sour cream burrito, for an ultimate sleepytime feast on nights when I want to do nothing whatsoever.

Success!